[https://docs.fortinet.com/document/fortigate/6.2.16/cookbook/632796/ospf-with-ipsec-vpn-for-network-redundancy](https://docs.fortinet.com/document/fortigate/6.2.16/cookbook/632796/ospf-with-ipsec-vpn-for-network-redundancy)
### 前言 上一篇分享了 [Fortigate IPSEC + iBGP](https://mdfk.goddamn.idv.tw/books/fortigate/page/fortigate-ipsec-ibgp) 的動態路由,但畢竟一般企業中鮮少使用BGP,大多反而是使用OSPF,OSPF不但能自動交換路由,同時也能 Fail Over 與 Load Balance,此篇實作帶大家一起來看看 Fortigate IPSEC + OSPF + SDWAN 有沒有搞頭。 ### 環境說明 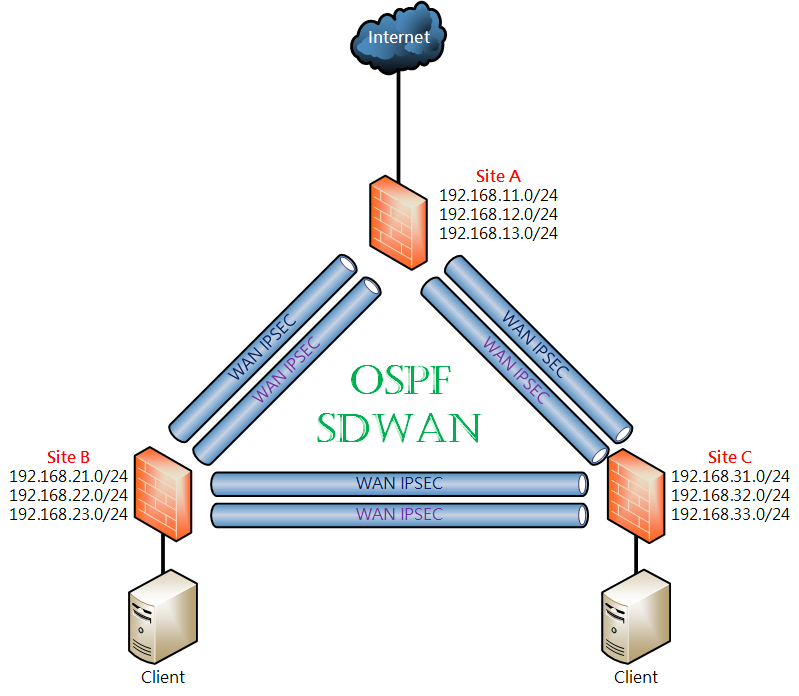 **設計概念:** 三個Site透過 IPSEC+OSPF+SDWAN 來達成多線路OSPF動態路由,任一條線路故障時可透過其他線路接續連線,並透過SDWAN來監測線路品質狀況,同時由於資訊安全控管的原則希望能統一由同一個Gateway進出。 **Firmware Ver. :** Fortigate-VM 7.0.15| **WAN IP** | **LAN Subnets** | **WAN1 IPSEC IP** | **WAN2 IPSEC IP** | |
| **SiteA** | WAN1 10.1.1.1 WAN2 10.1.2.1 Port4 (to Internet) | 192.168.11.254/24 192.168.12.254/24 192.168.13.254/24 | **A1toB1** 172.17.1.1 **A1toC1** 172.17.1.6 | **A2toB2** 172.17.2.1 **A2toC2** 172.17.2.6 |
| **SiteB** | WAN1 10.1.1.2 WAN2 10.1.2.2 | 192.168.21.254/24 192.168.22.254/24 192.168.23.254/24 | **B1toA1** 172.17.1.2 **B1toC1** 172.17.1.3 | **B2toA2** 172.17.2.2 **B2toC2** 172.17.2.3 |
| **SiteC** | WAN1 10.1.1.3 WAN2 10.1.2.3 | 192.168.31.254/24 192.168.32.254/24 192.168.33.254/24 | **C1toB1** 172.17.1.4 **C1toA1** 172.17.1.5 | **C2toB2** 172.17.2.4 **C2toA2** 172.17.2.5 |