# Linux
# Let's Encrypt 免費SSL憑證
# 安裝設定Let's Encrypt (Apache2)
**系統環境 :**
OS: Debian GNU/Linux 12 (bookworm) x86\_64
Host: PRO ADL-U Cubi 5 (MS-B0A8) 1.0
Kernel: 6.8.4-3-pve
Uptime: 5 hours, 52 mins
Packages: 556 (dpkg)
Shell: bash 5.2.15
Terminal: /dev/pts/3
CPU: 12th Gen Intel i7-1255U (4) @ 4.700GHz
Memory: 241MiB / 4096MiB
Apache2
**1. 請先設定好DNS對應,使外部DNS可連線到該站台,並安裝必要元件**
```
apt-get update
apt-get install certbot python3-certbot-apache -y
```
**2. 顯示Certbot參數**
```
certbot -h
```
\- - - - - - - - - - - - - - - - - - - - - - - - - - - - - - - - - - - - - - - -
certbot \[SUBCOMMAND\] \[options\] \[-d DOMAIN\] \[-d DOMAIN\] ...
Certbot can obtain and install HTTPS/TLS/SSL certificates. By default,
it will attempt to use a webserver both for obtaining and installing the
certificate. The most common SUBCOMMANDS and flags are:
obtain, install, and renew certificates:
(default) run Obtain & install a certificate in your current webserver
certonly Obtain or renew a certificate, but do not install it
renew Renew all previously obtained certificates that are near
expiry
enhance Add security enhancements to your existing configuration
-d DOMAINS Comma-separated list of domains to obtain a certificate for
\--apache Use the Apache plugin for authentication & installation
\--standalone Run a standalone webserver for authentication
(the certbot nginx plugin is not installed)
\--webroot Place files in a server's webroot folder for authentication
\--manual Obtain certificates interactively, or using shell script
hooks
-n Run non-interactively
\--test-cert Obtain a test certificate from a staging server
\--dry-run Test "renew" or "certonly" without saving any certificates
to disk
manage certificates:
certificates Display information about certificates you have from Certbot
revoke Revoke a certificate (supply --cert-name or --cert-path)
delete Delete a certificate (supply --cert-name)
manage your account:
register Create an ACME account
unregister Deactivate an ACME account
update\_account Update an ACME account
show\_account Display account details
\--agree-tos Agree to the ACME server's Subscriber Agreement
-m EMAIL Email address for important account notifications
More detailed help:
-h, --help \[TOPIC\] print this message, or detailed help on a topic;
the available TOPICS are:
all, automation, commands, paths, security, testing, or any of the
subcommands or plugins (certonly, renew, install, register, nginx,
apache, standalone, webroot, etc.)
-h all print a detailed help page including all topics
\--version print the version number
\- - - - - - - - - - - - - - - - - - - - - - - - - - - - - - - - - - - - - - - -
**3. 申請憑證**
```
certbot certonly --apache -w /var/www/xxxxxx/ -d xx.aa.bb.cc --email xxx@aa.bb.cc
```
**4. 確認憑證**
申請完成之後,應該會在 /etc/letsencrypt/live/xx.aa.bb.cc 中找到憑證入如下
lrwxrwxrwx 1 root root 43 Jun 7 22:53 cert.pem -> ../../archive/xx.aa.bb.cc/cert1.pem
lrwxrwxrwx 1 root root 44 Jun 7 22:53 chain.pem -> ../../archive/xx.aa.bb.cc/chain1.pem
lrwxrwxrwx 1 root root 48 Jun 7 22:53 fullchain.pem -> ../../archive/xx.aa.bb.cc/fullchain1.pem
lrwxrwxrwx 1 root root 46 Jun 7 22:53 privkey.pem -> ../../archive/xx.aa.bb.cc/privkey1.pem
**5. Apache2 conf放上憑證**
```
vim /etc/apache2/sites-availible/xxxxxx.conf
```
<VirtualHost \*:443>
SSLEngine on
ServerAdmin webmaster@localhost
DocumentRoot /var/www/xxxxxx
** SSLCertificateFile /etc/letsencrypt/live/xx.aa.bb.cc/cert.pem**
** SSLCertificateKeyFile /etc/letsencrypt/live/xx.aa.bb.cc/privkey.pem**
** SSLCertificateChainFile /etc/letsencrypt/live/xx.aa.bb.cc/chain.pem**
</VirtualHost>
存檔之後 Restart Apache Service
```
systemctl restart apache2
```
**6. 檢查SSL設定是否正確**
[](https://mdfk.goddamn.idv.tw/uploads/images/gallery/2024-06/STuQ2oD3yp.png)
**7. 確認 certbot.timer 執行正常、Certificates renew正常**
```
systemctl status certbot.timer
```
\* certbot.timer - Run certbot twice daily
Loaded: loaded (/lib/systemd/system/certbot.timer; **enabled**; preset: **enabled**)
Active: **active** (waiting) since Fri 2024-06-07 17:37:05 CST; 6h ago
Trigger: Sat 2024-06-08 08:04:10 CST; 8h left
Triggers: \* certbot.service
Jun 07 17:37:05 systemd\[1\]: Started certbot.timer - Run certbot twice daily.
```
certbot renew --dry-run
```
Saving debug log to /var/log/letsencrypt/letsencrypt.log
\- - - - - - - - - - - - - - - - - - - - - - - - - - - - - - - - - - - - - - - -
Processing /etc/letsencrypt/renewal/xx.aa.bb.cc.conf
\- - - - - - - - - - - - - - - - - - - - - - - - - - - - - - - - - - - - - - - -
Simulating renewal of an existing certificate for xx.aa.bb.cc
\- - - - - - - - - - - - - - - - - - - - - - - - - - - - - - - - - - - - - - - -
Congratulations, all simulated renewals succeeded:
/etc/letsencrypt/live/mdfk.goddamn.idv.tw/fullchain.pem (**success**)
\- - - - - - - - - - - - - - - - - - - - - - - - - - - - - - - - - - - - - - - -
# Alibuda
# Linux Software Raid - MDADM開機磁碟
## 前言
為了資料的安全Raid一直是必要的手段,高階伺服器使用Raid Card固然方便效能也較好,但價格也相對來說較高,隨著時代的進步,Linux上的Software Raid安裝也越來越便利,在預算有限又想要有Raid功能的話可以嘗試看看Software Raid,由於是使用CPU+OS來做Raid,效能上有一定程度的影響是必然的,但如果你都能接受使用Synology/QNAP這種NAS設備,那你應該也會能夠接受Software Raid,畢竟原理是一樣的。
## 安裝步驟
#### 一、安裝媒體準備
為了方便截圖,我使用最新版的Fedora 40來Demo,CentOS / Rocky / Oracle 等Redhat Like的OS安裝方式應該也一樣,Ubuntu / Debian 系我改天如果有空再來做(看心情 囧)。
至 [https://fedoraproject.org/workstation/download](https://fedoraproject.org/workstation/download) 下載安裝Fedora Media Writer來製作USB安裝媒體,以下就不贅述了。

#### 二、使用USB安裝媒體開機安裝OS
以下Demo是基於UEFI+GPT的環境,Legacy Bios上會有部分不同操作會稍微複雜一點,在這裡我就先不展示了。(一樣看哪天有心情再說 囧)
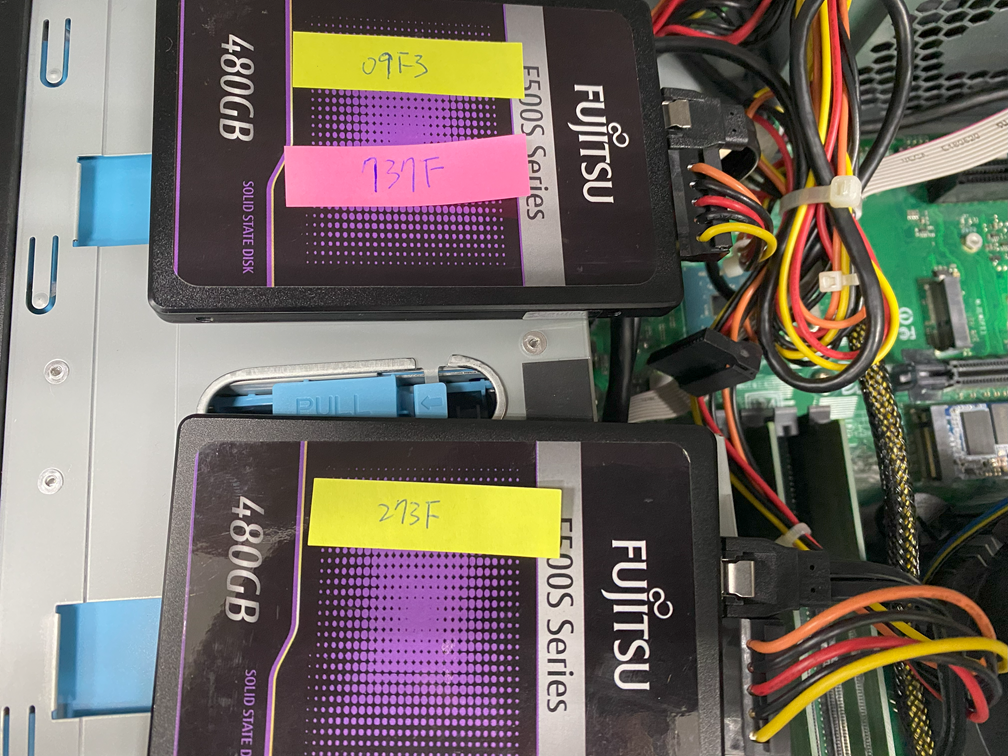
首先找兩顆HDD,先把資料清空後接上(這張圖以後還會用到,先記得有這件事),使用上面做好的USB開機 。
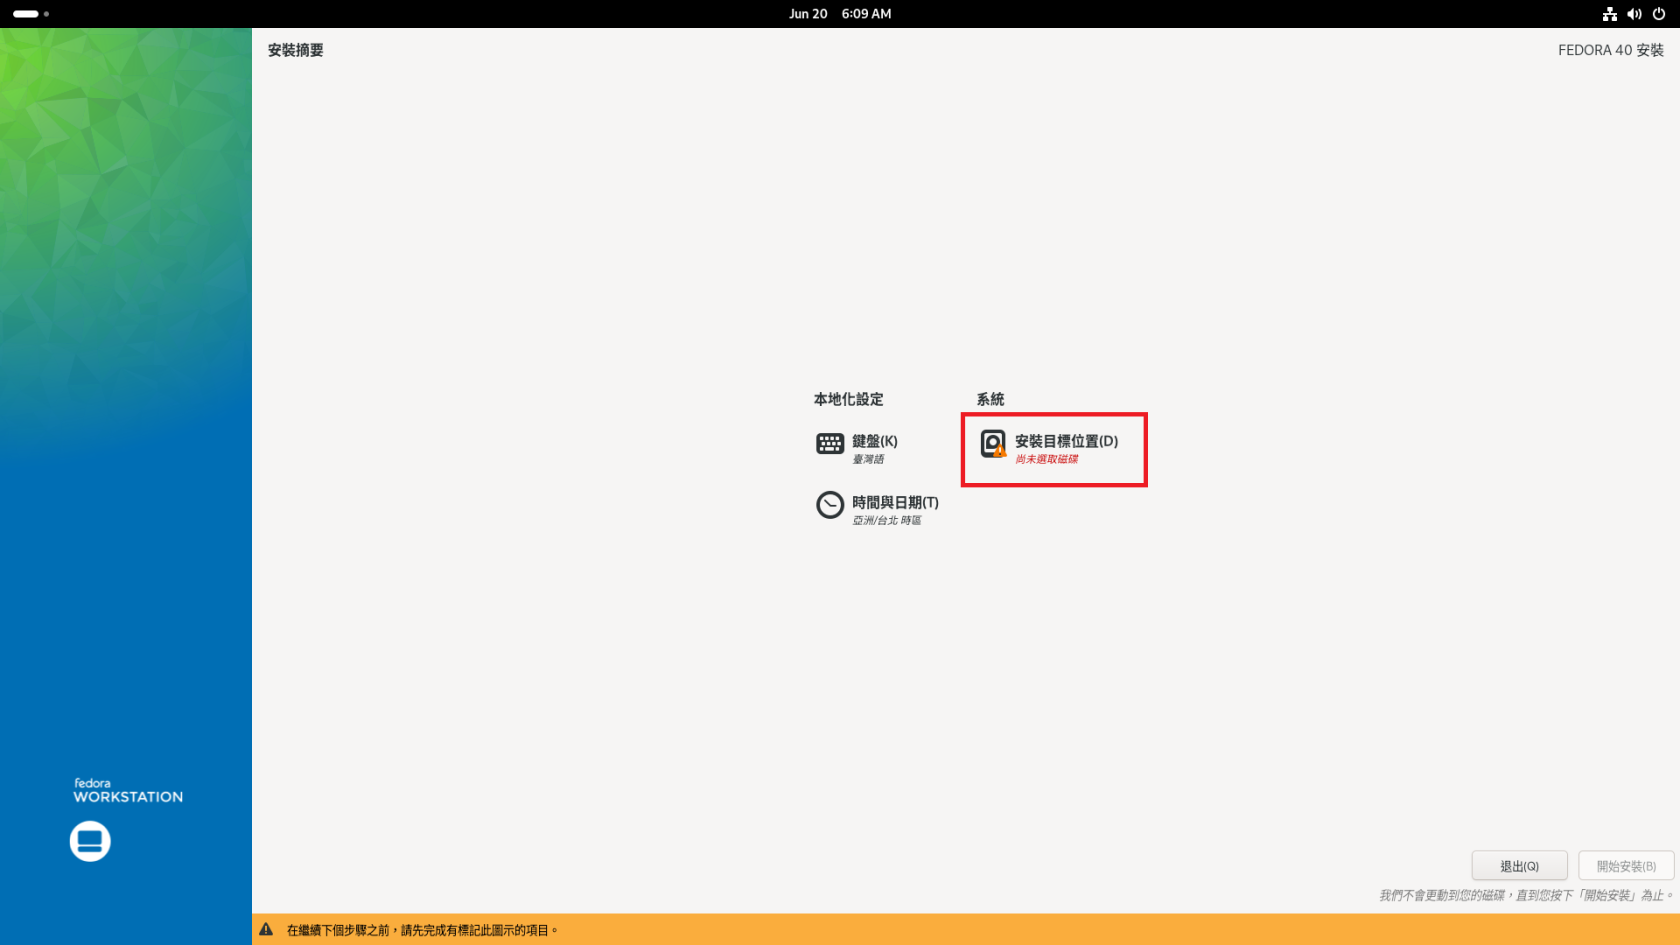
選擇要安裝的位置。
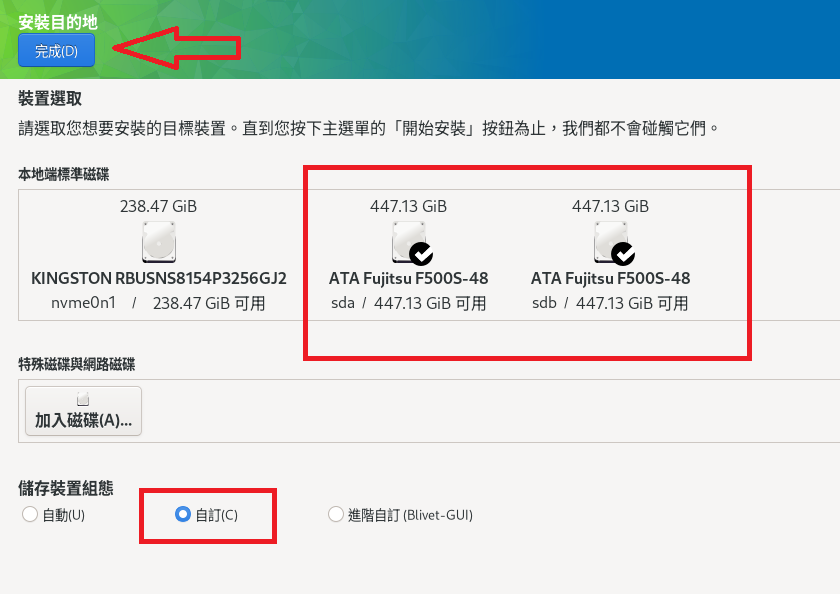
點選剛剛接上的兩顆HDD,自訂組態選完成。
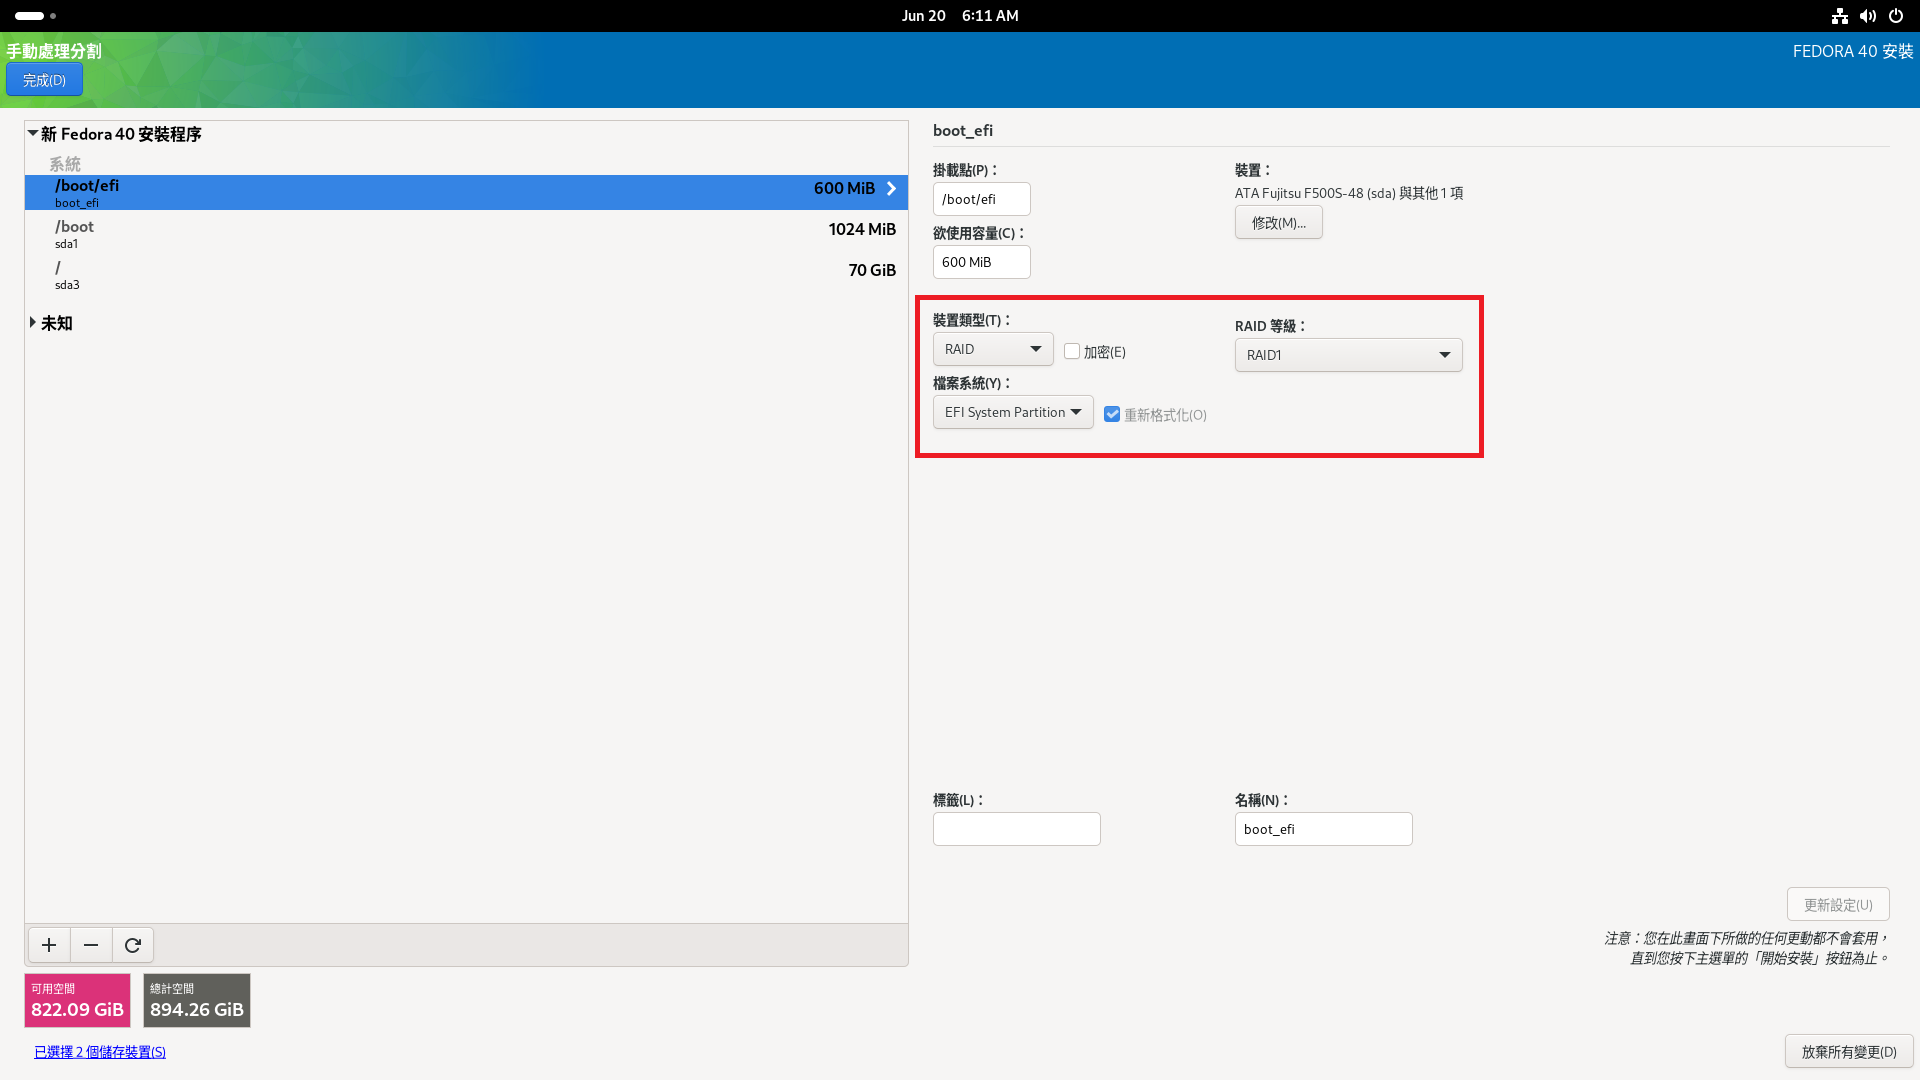
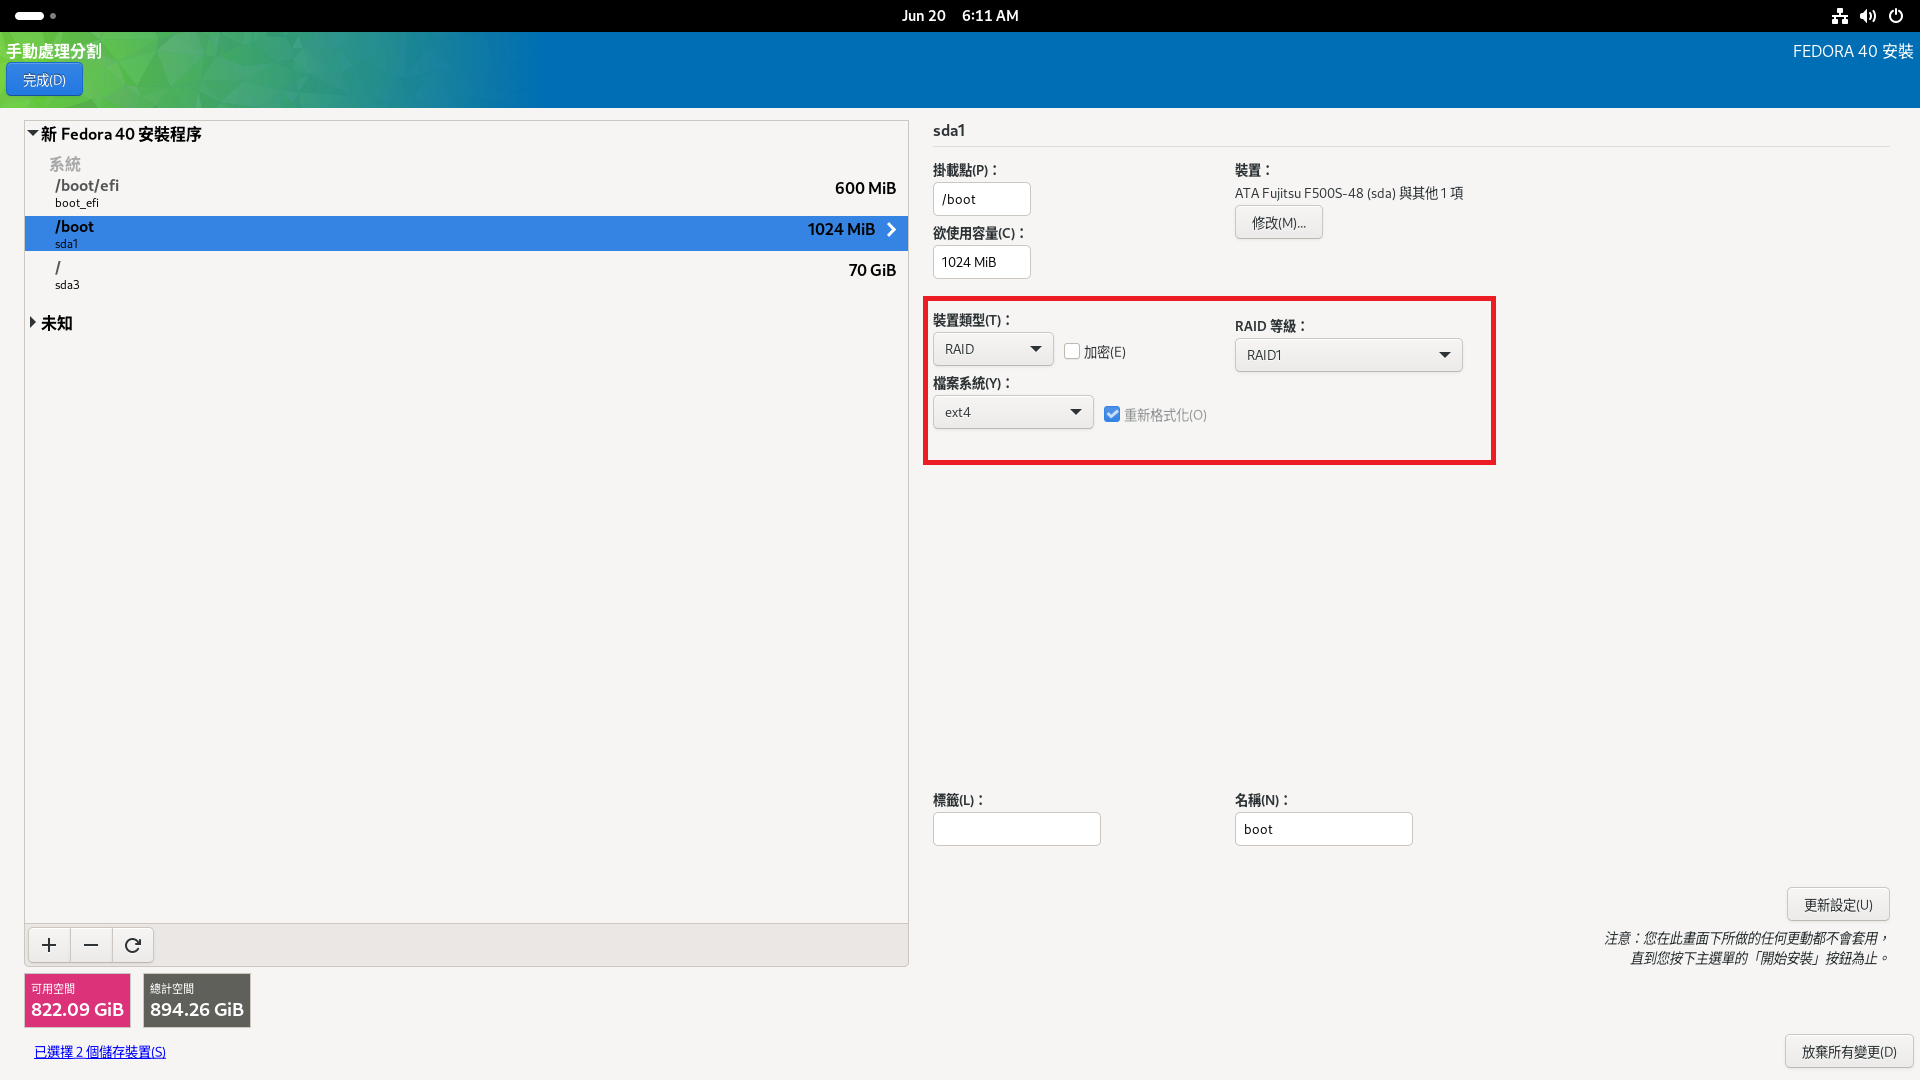
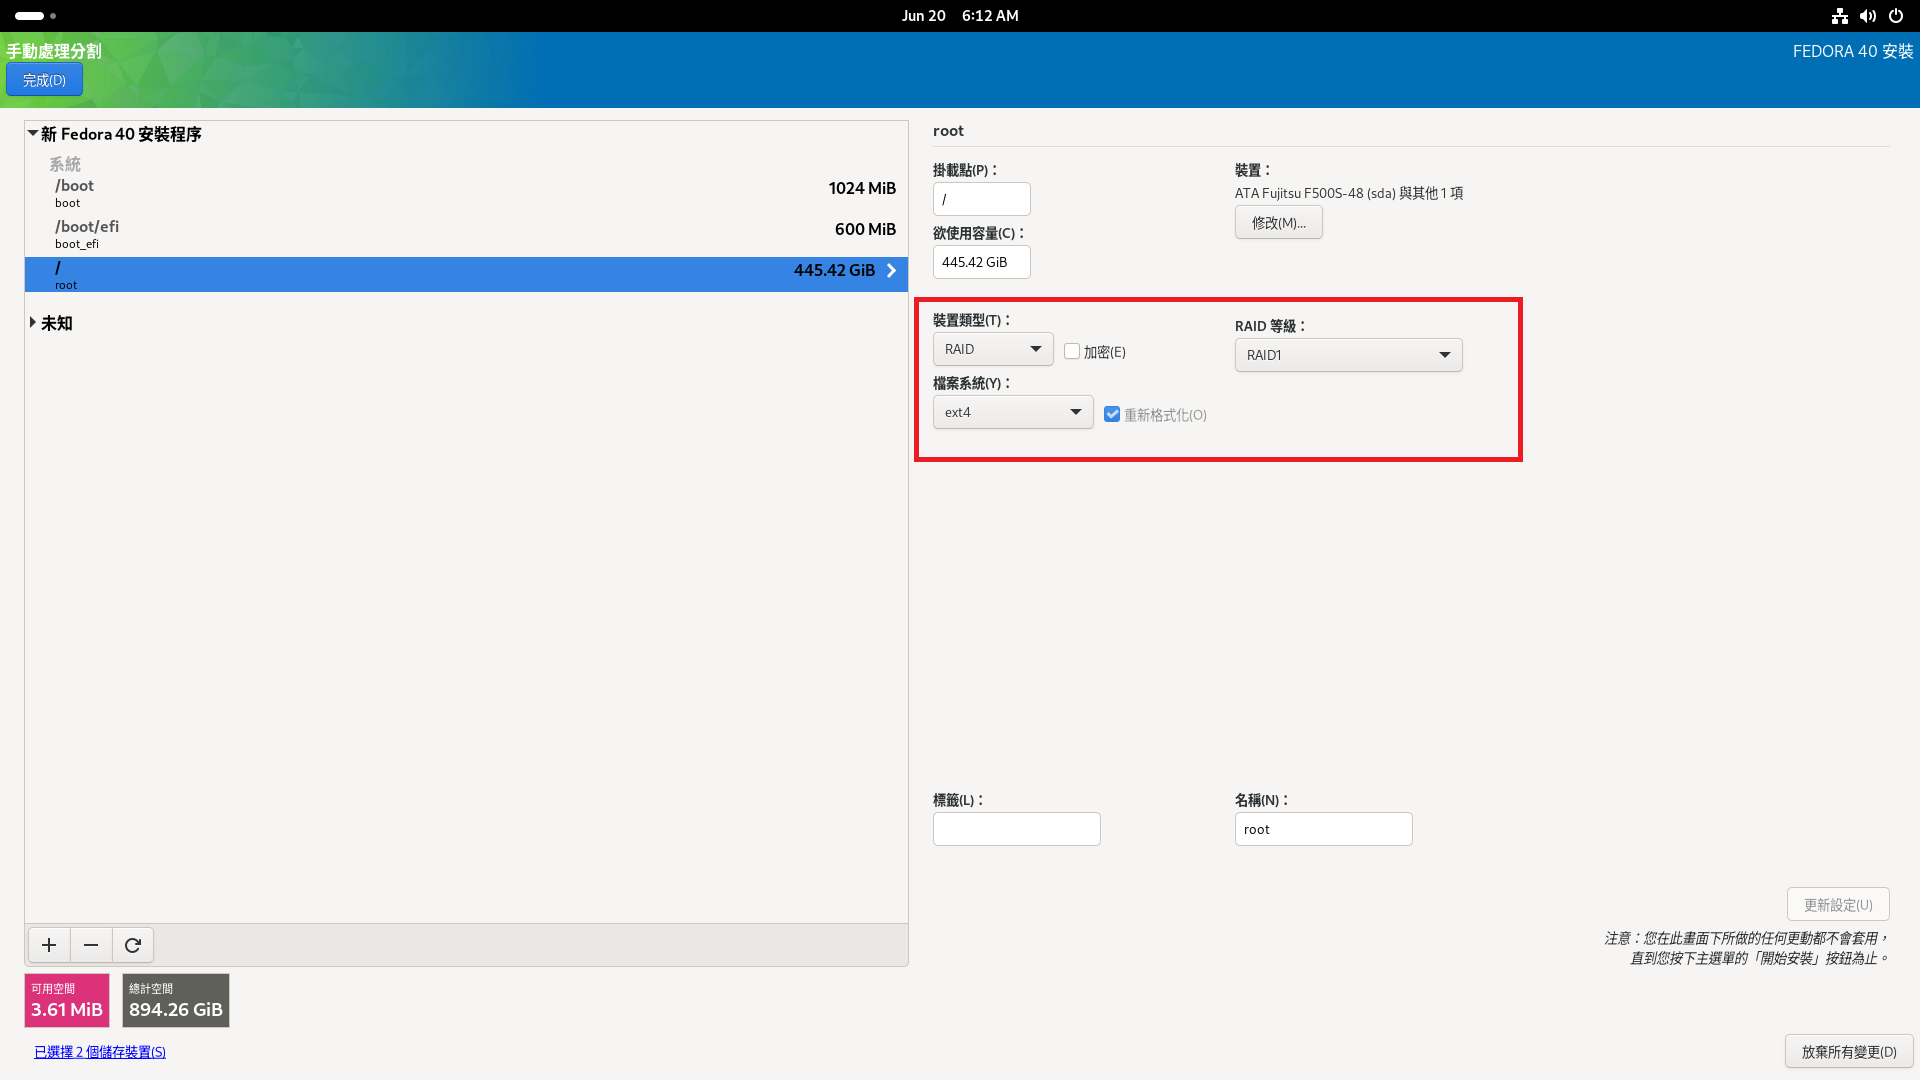
修改每個Partition的裝置類型,全都改為RAID,改完之後點"完成"下一步
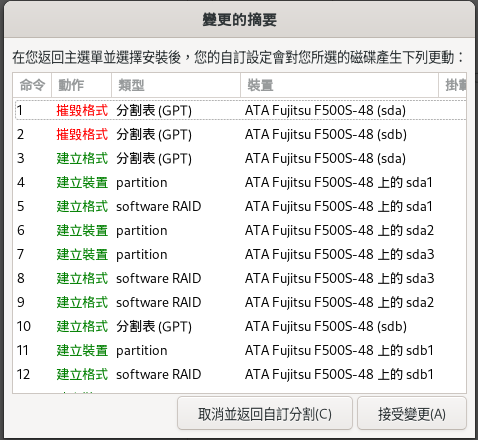
確認變更
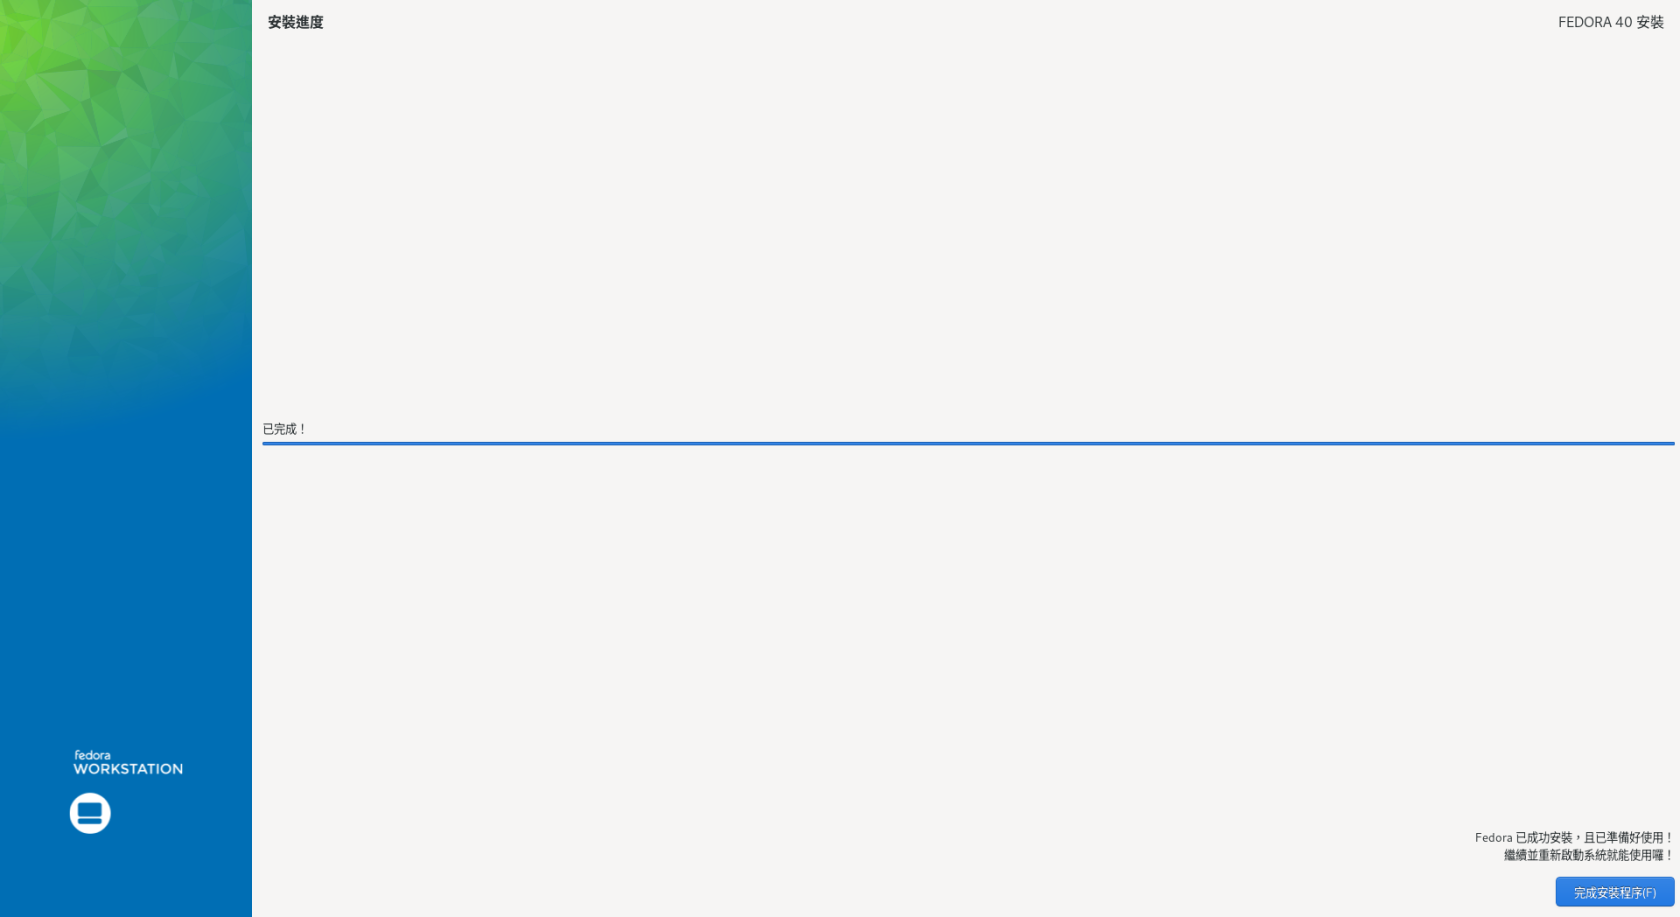
開始安裝,就完成了 << 全文完 >> (開玩笑的)
此時如果先不要重新啟動,在Terminal中就可以看到Mirror正在進行中,不過不用管他直接重開機即可

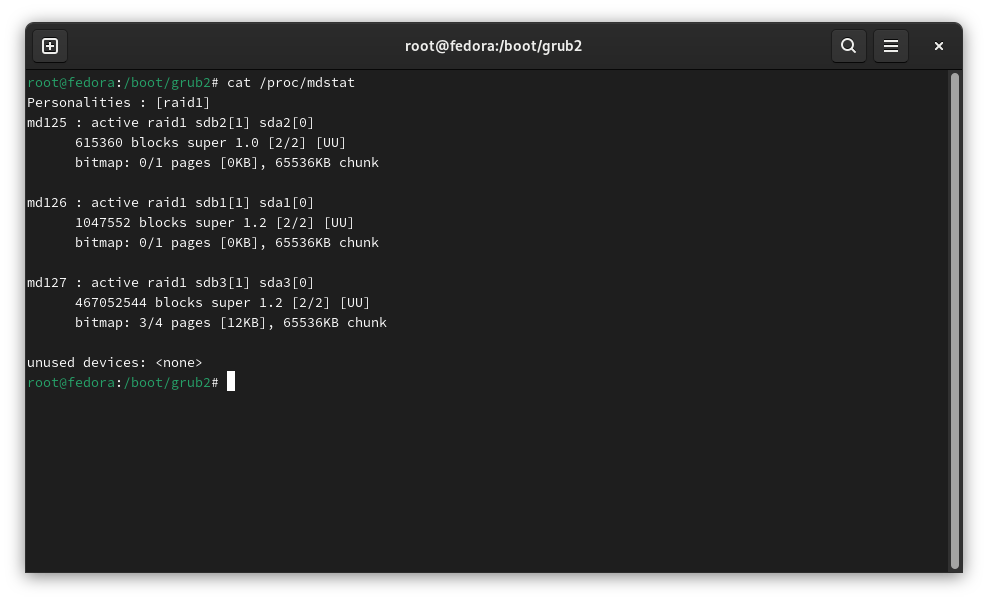
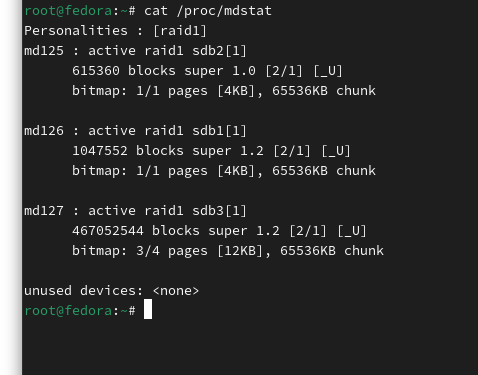
## 確認Raid狀態
安裝完成後,開機進入OS (請記得把USB拔掉......) ,來看一下我的Demo環境狀態
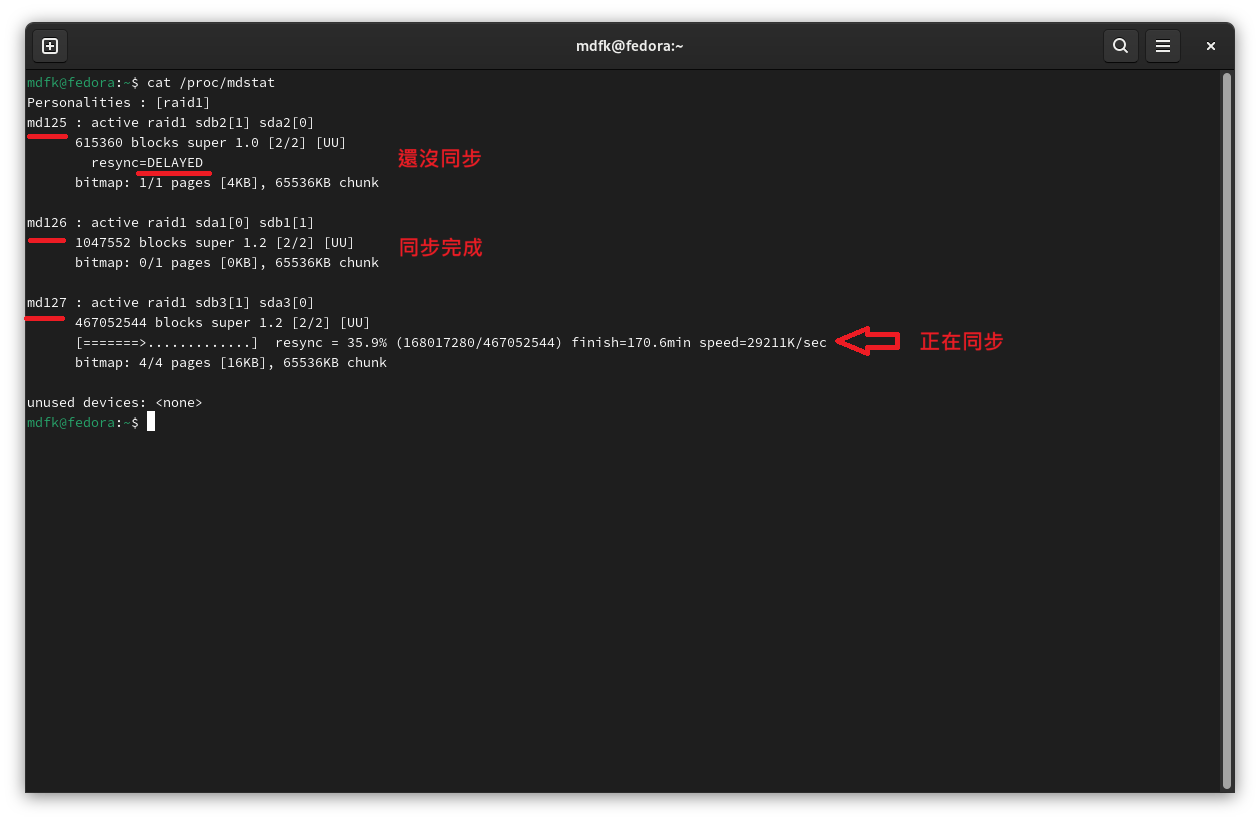
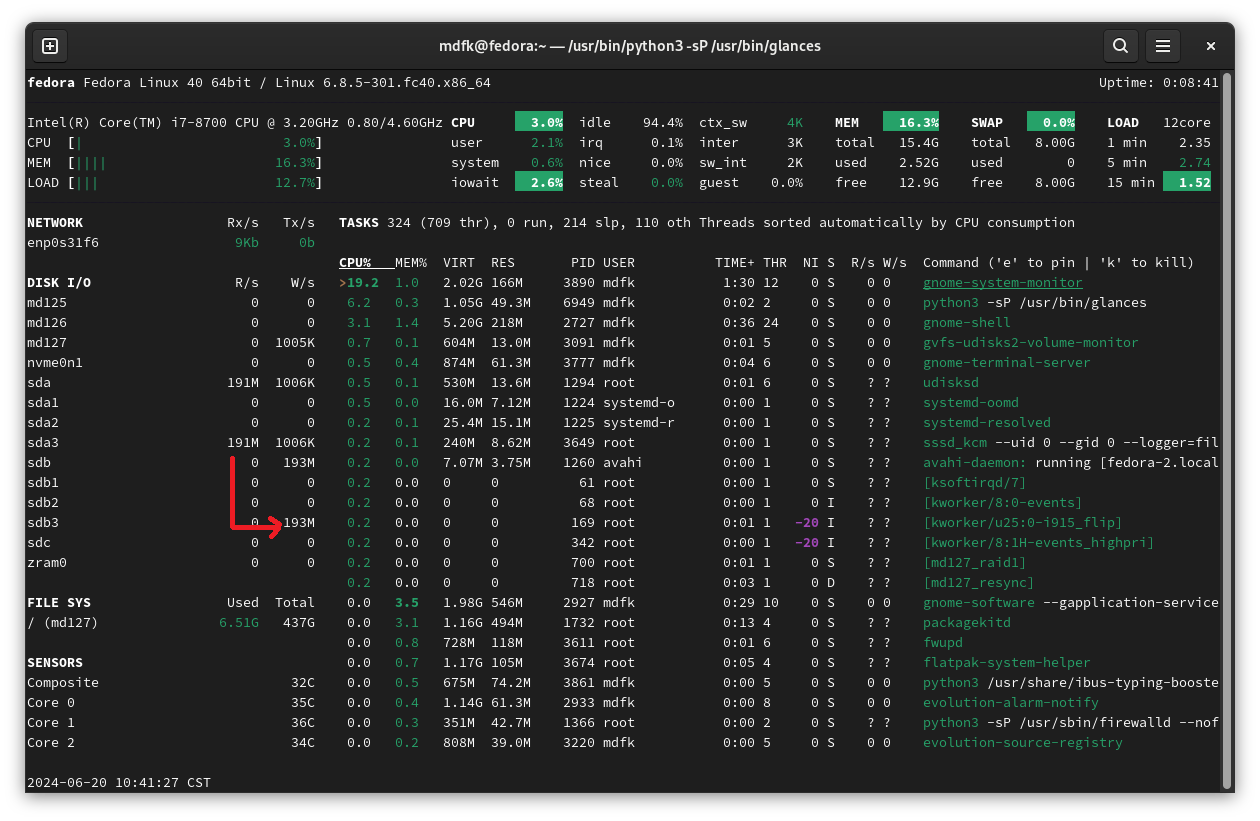
透過下面指令來確認Raid狀態,以下圖來說可知道md126已同步完成,md127正在同步、md125尚未開始同步
```
cat /proc/mdstat
```
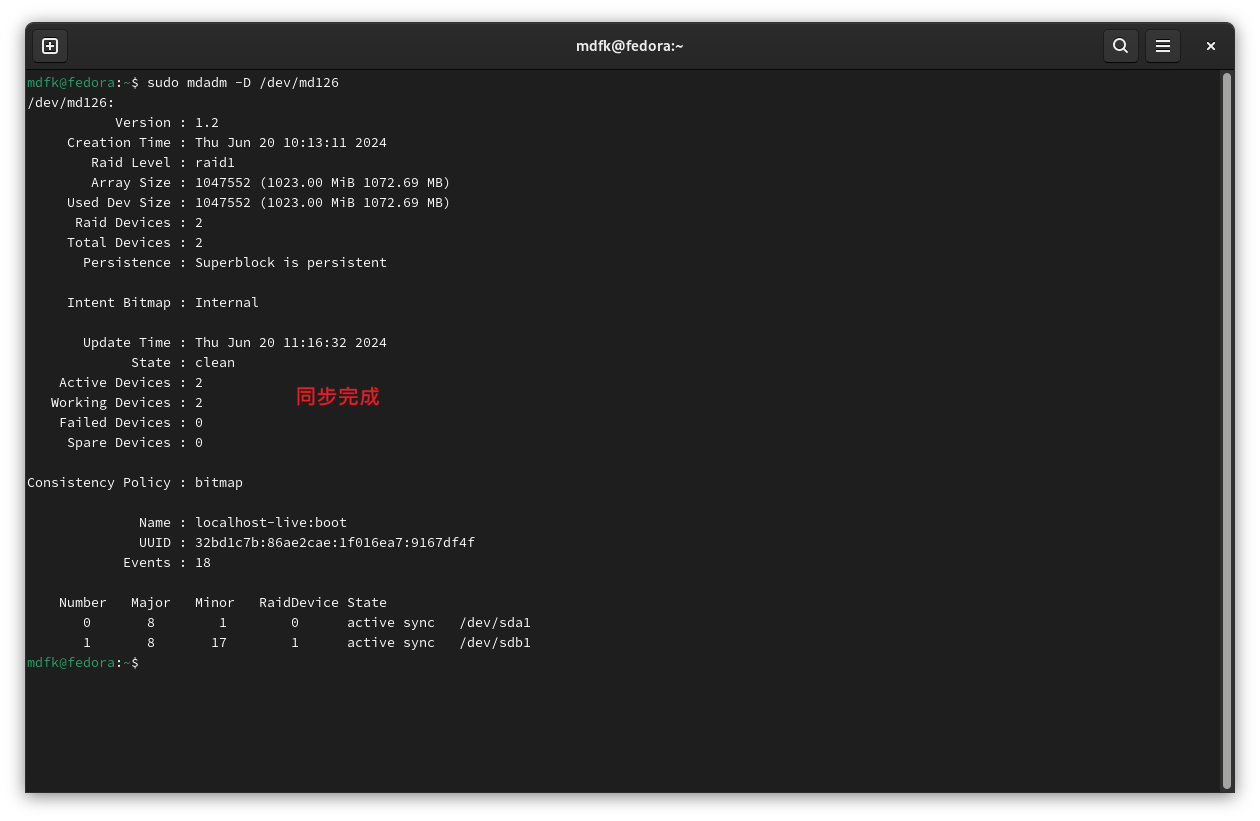
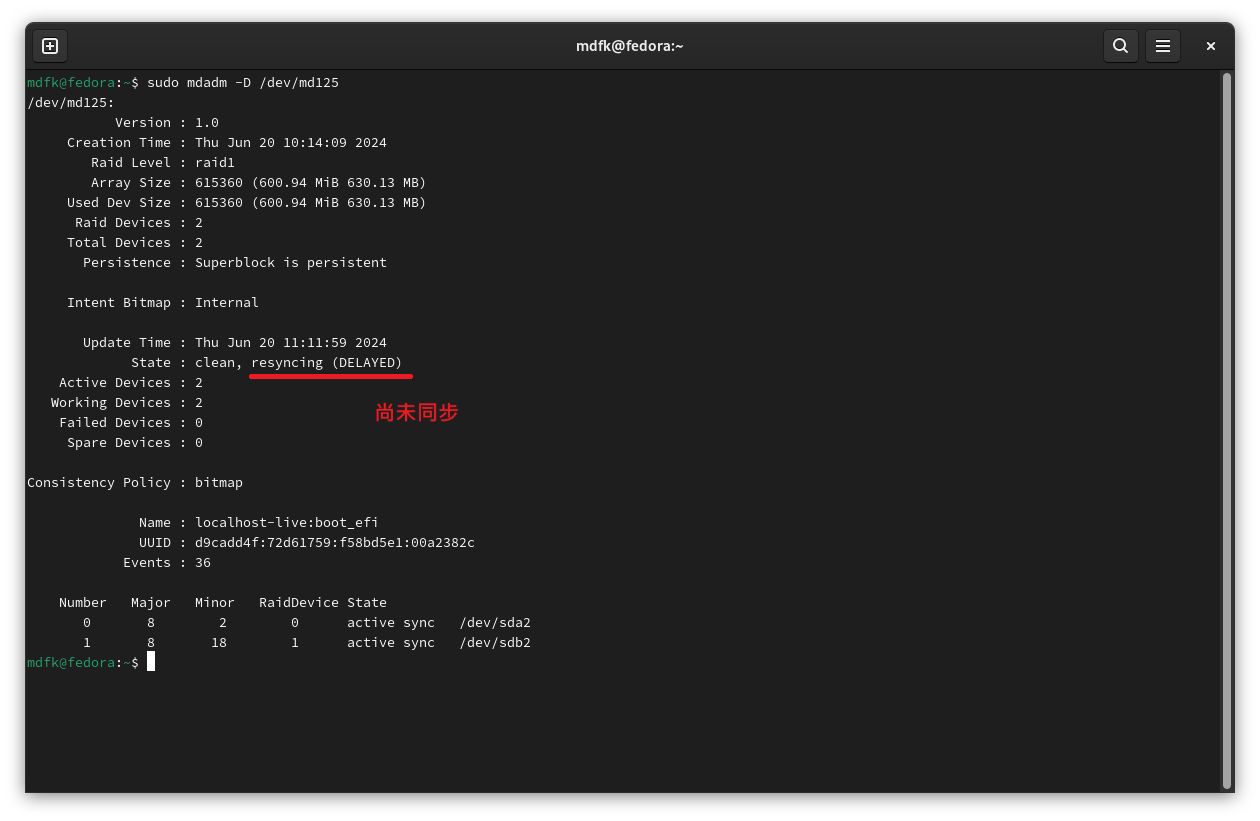
透過以下指令可確認各md的狀態
```
mdadm -D /dev/mdxxx
```

透過glances也可確認到抄寫的狀態
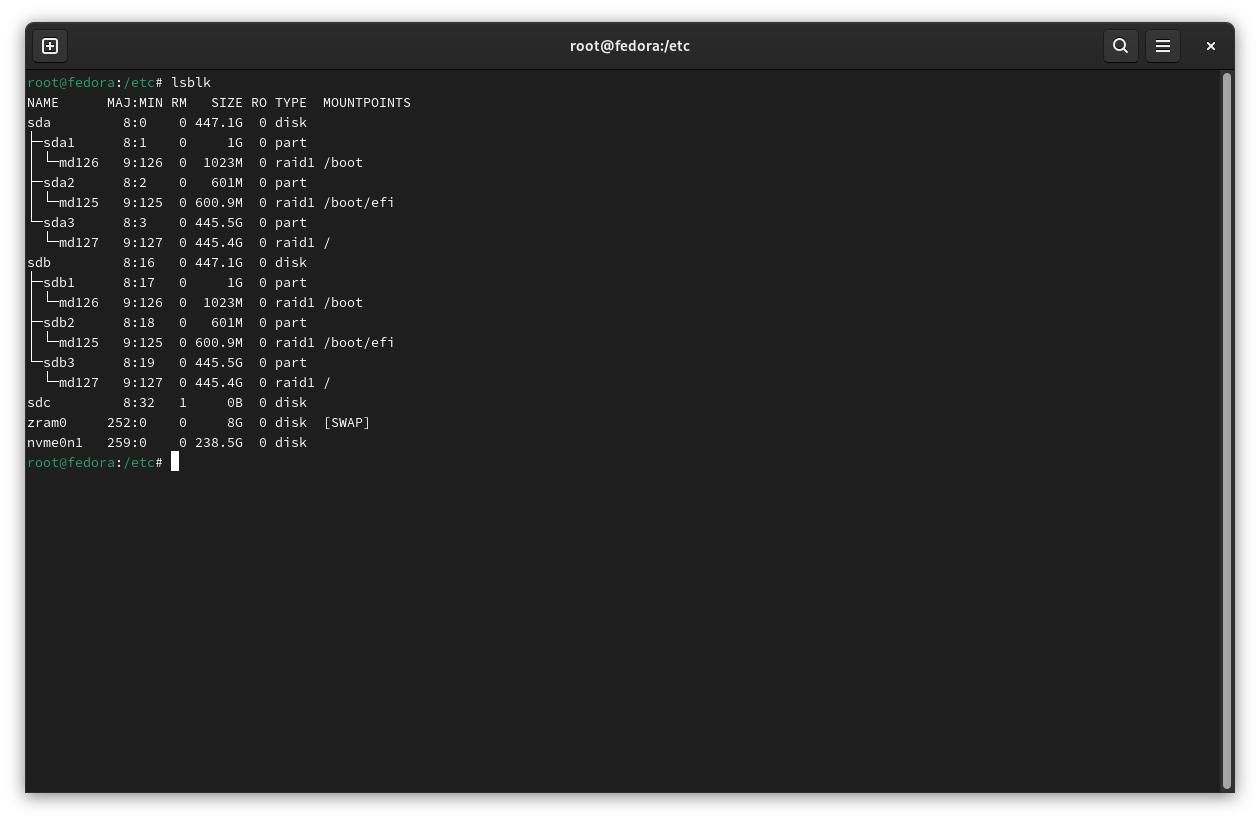
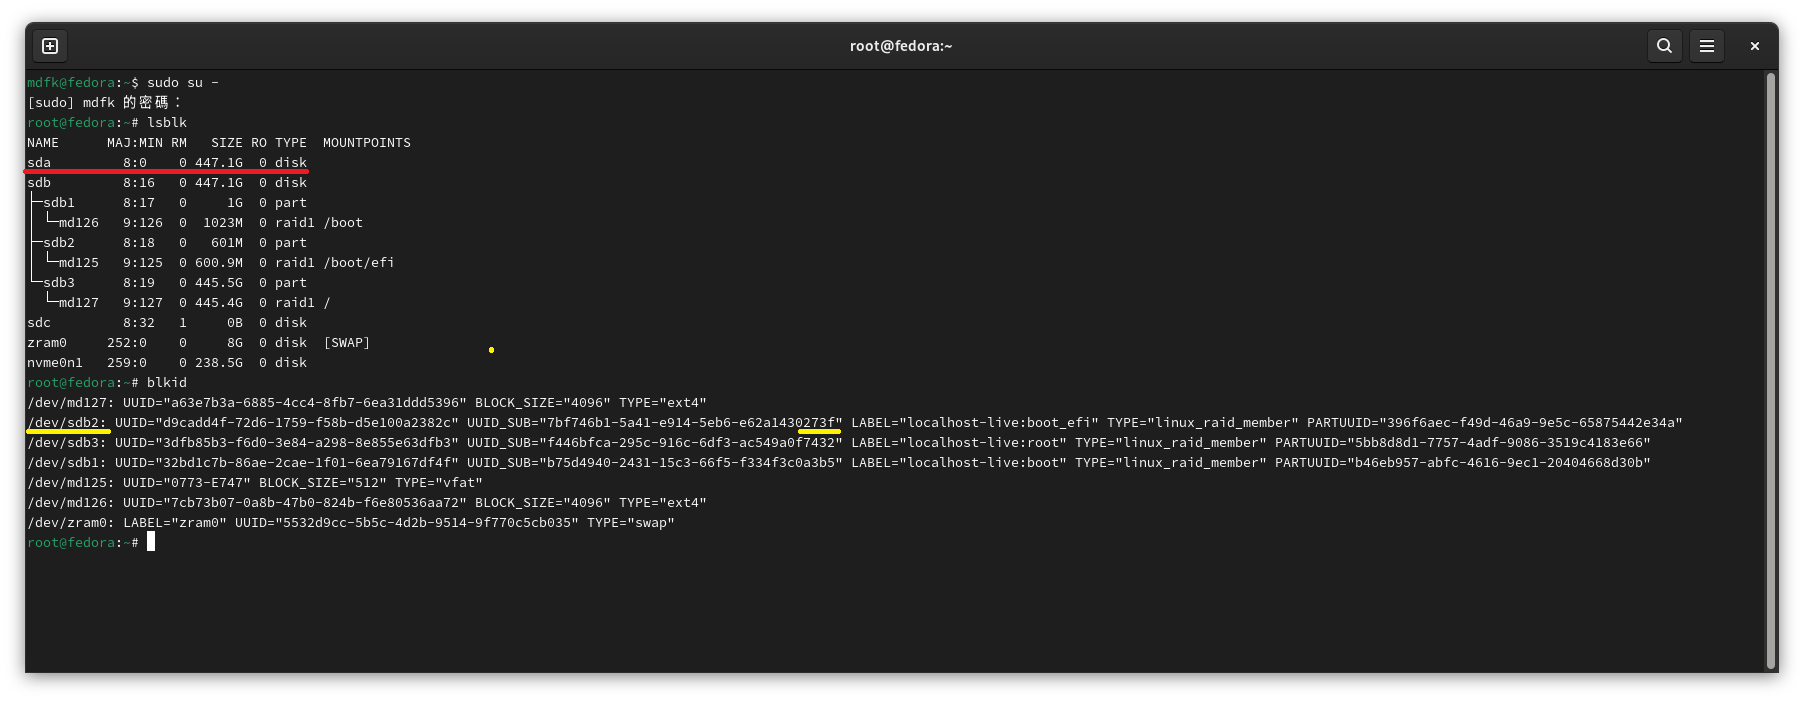
LSBLK狀態
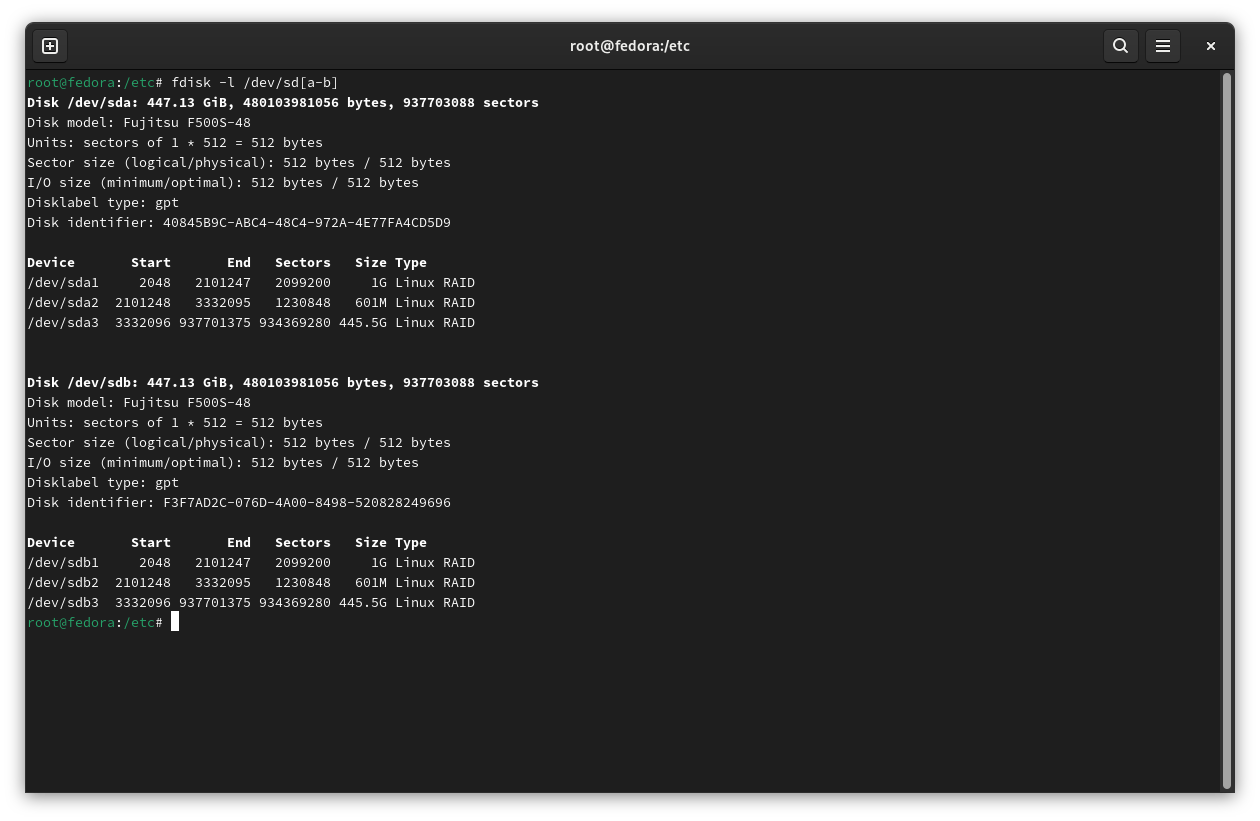
FDISK狀態
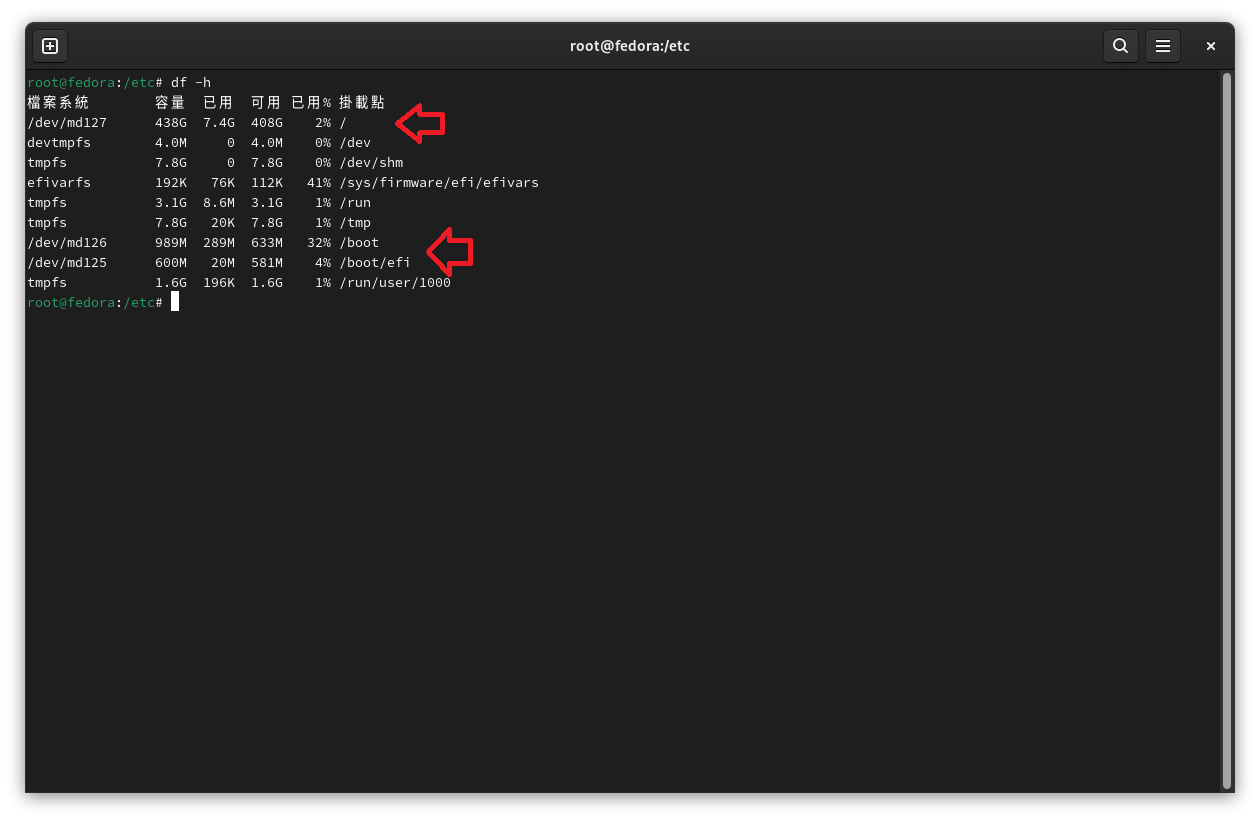
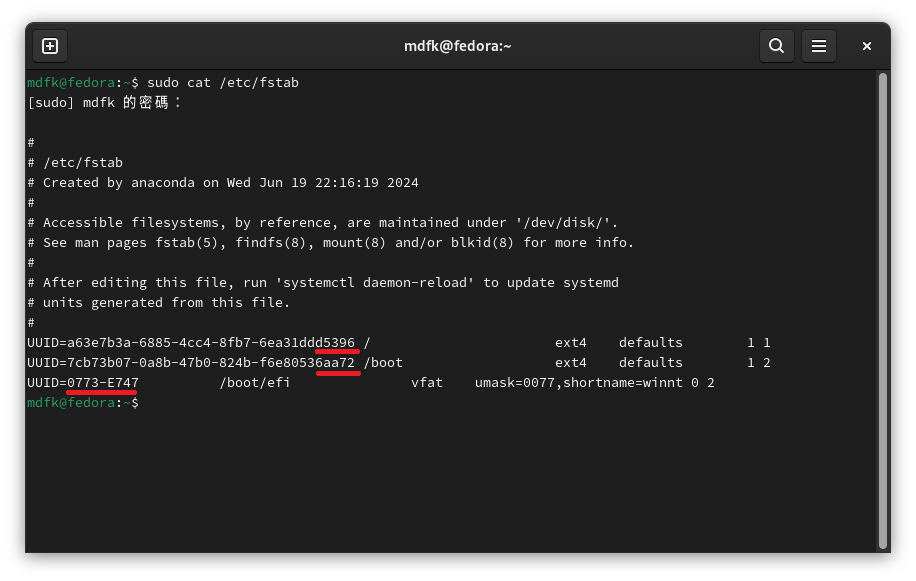
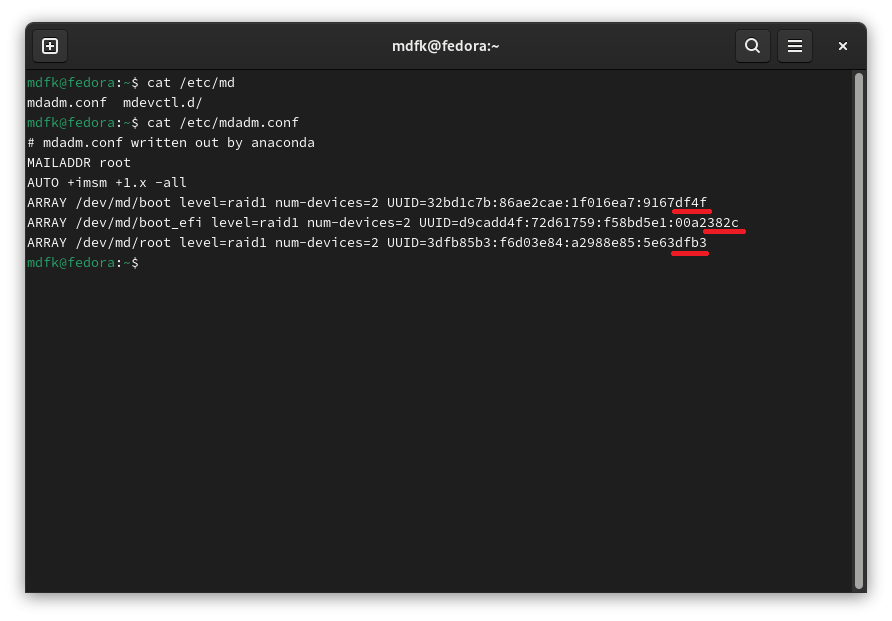
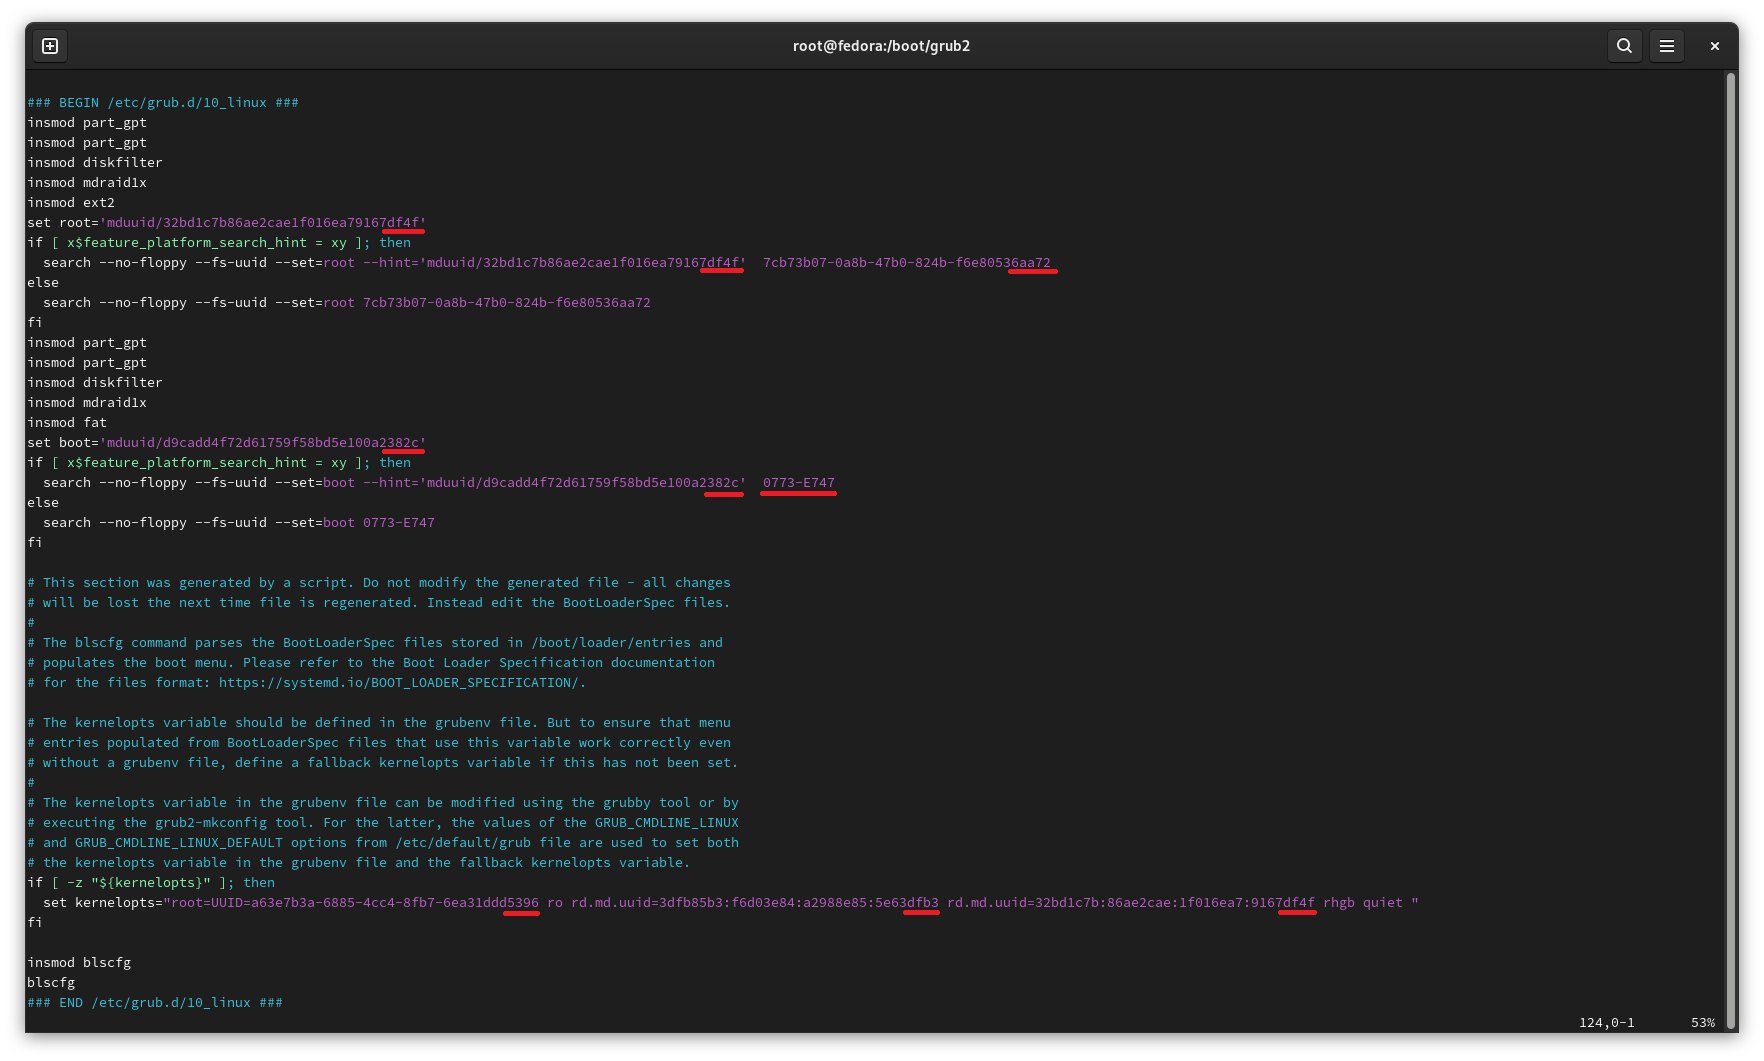
DF、FSTAB、mdadm.conf、BLKID 、grub.cfg 相關資訊
[](https://mdfk.goddamn.idv.tw/uploads/images/gallery/2024-06/gcJimage.png)
[](https://mdfk.goddamn.idv.tw/uploads/images/gallery/2024-06/UTyimage.png)
觀察上BLKID與grub.cfg就可以知道,sda1、sdb1的UUID都是df4f,sda2、sdb2的UUID都是382c,sda3、sdb3的UUID都是dfb3,但sda、sdb的UUID\_SUB不同(如黃線),記得上面那張實體硬碟圖嗎 ? 我在上面依照 sda2 (09f3)、sdb2 (273f)標註了UUID\_SUB,讀者可以對照上面那張圖來確認一下。
好了,我們確認完這些事之後,再次確認一下 mdstat,等待同步完成後我們就可以進行後續的測試了
## 讀寫測試
同步好之後,我們來做一下讀寫測試
讀取測試,由下圖可見兩顆磁碟會同時讀取
[](https://mdfk.goddamn.idv.tw/uploads/images/gallery/2024-06/84oimage.png)
寫入測試,由下圖明顯可以看到資料寫入時 sda與sdb同時寫入
[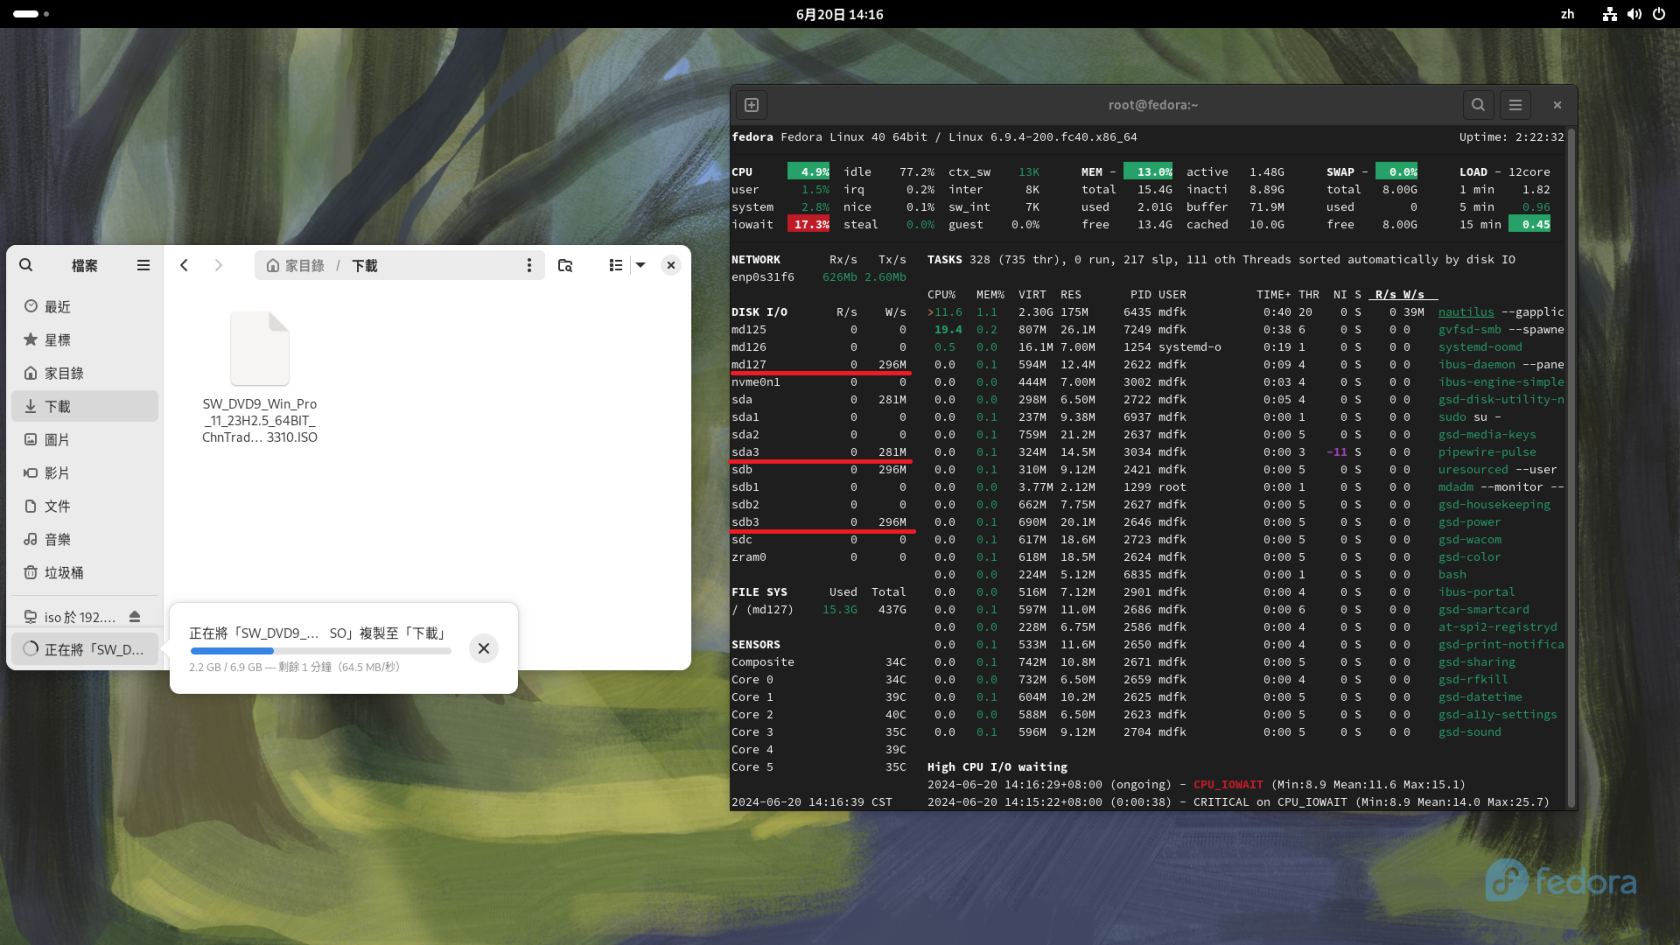](https://mdfk.goddamn.idv.tw/uploads/images/gallery/2024-06/ccFimage.png)
## 手動移除磁碟測試
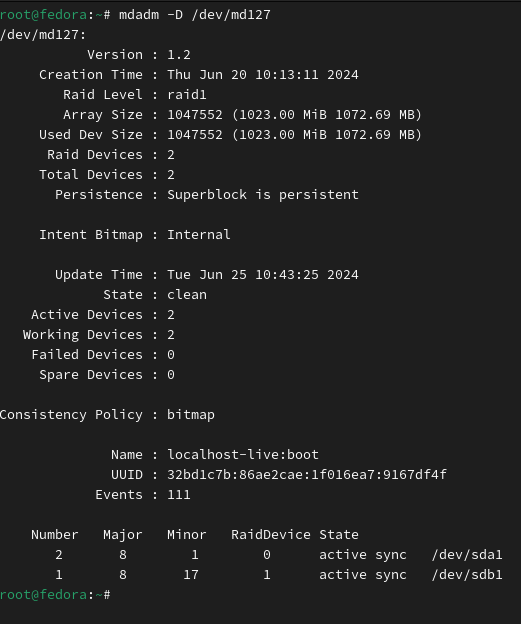
來看看如何手動將磁碟退出與加入Raid,首先先看一下Raid狀態
```
mdadm -D /dev/md127
```
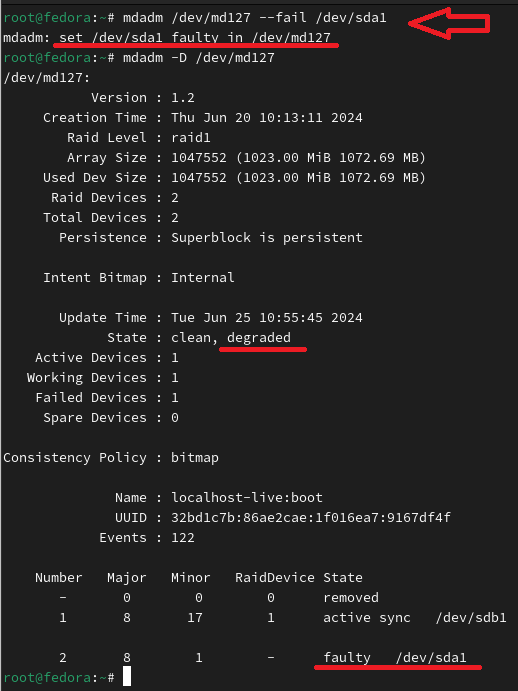
手動將/dev/sda1變成故障狀態
```
mdadm /dev/md127 --fail /dev/sda1
```
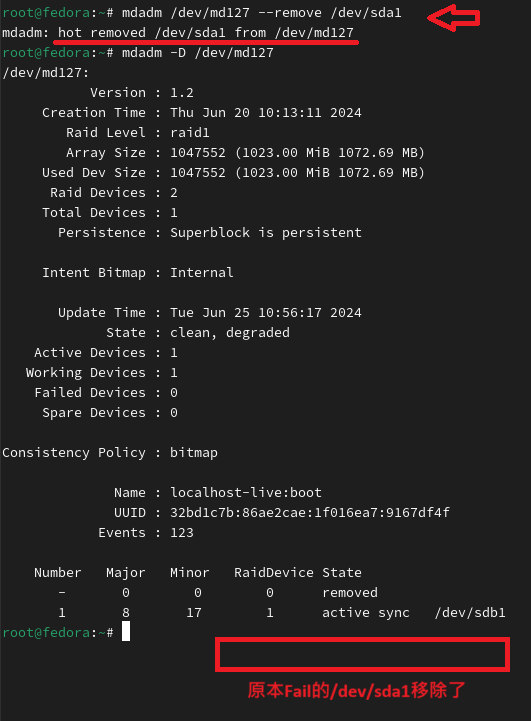
手動將/dev/sda1退出Raid
```
mdadm /dev/md127 --remove /dev/sda1
```
再將/dev/sda1加回/dev/md127
```
mdadm /dev/md127 --add /dev/md127
```
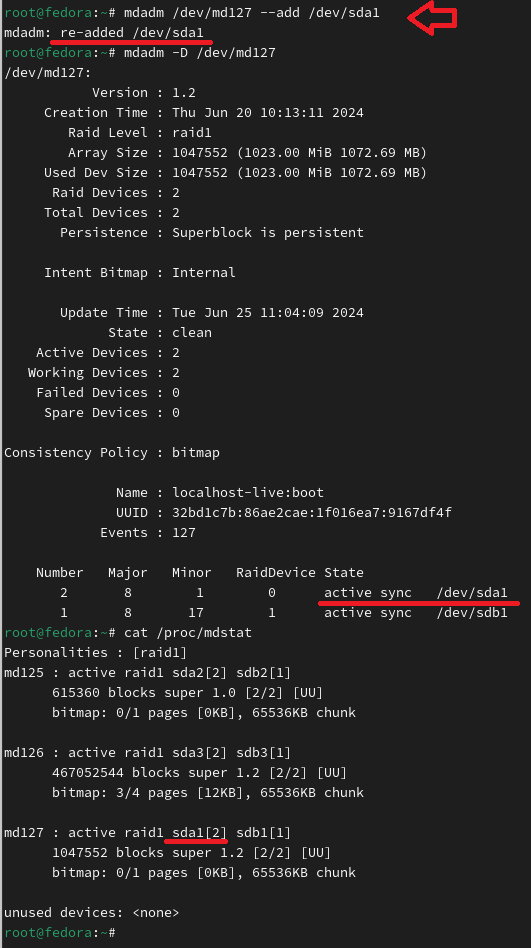
由於磁碟不大只有1G,很快就同步完了
## Fail Over測試
由於我的demo環境沒有熱插拔,所以我關機後將 sda (09f3) 拔掉後開機,開機後可以看到原本的sdb (273f)現在變成了sda
[](https://mdfk.goddamn.idv.tw/uploads/images/gallery/2024-06/diLimage.png)
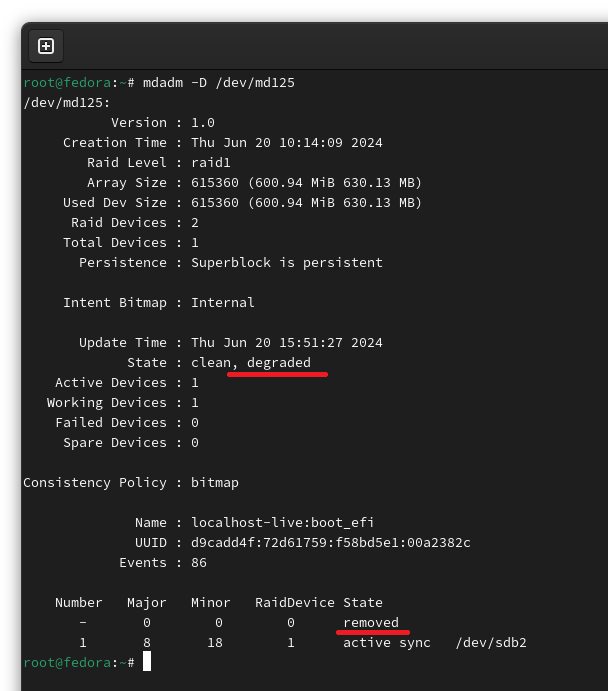
我把原本sda (09f3)這顆HDD清除乾淨後,再關機後插上後開機,可以發現依然可以正常開機沒有問題,但原本的sda(273f)又變成sdb了
[](https://mdfk.goddamn.idv.tw/uploads/images/gallery/2024-06/PEZimage.png)
mdadm顯示另一顆HDD為Removed
## Raid Rebuid
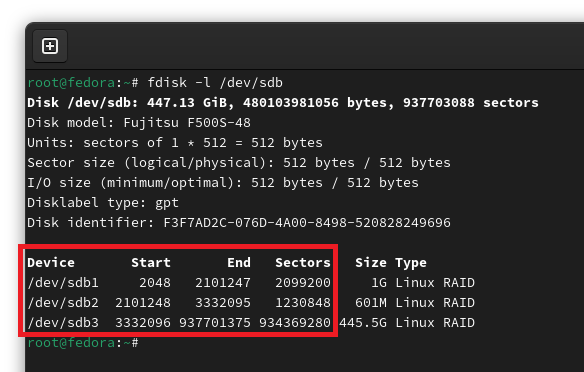
首先先確認sdb (273f)的fdisk分割,我們要將sda建成一模一樣的狀態
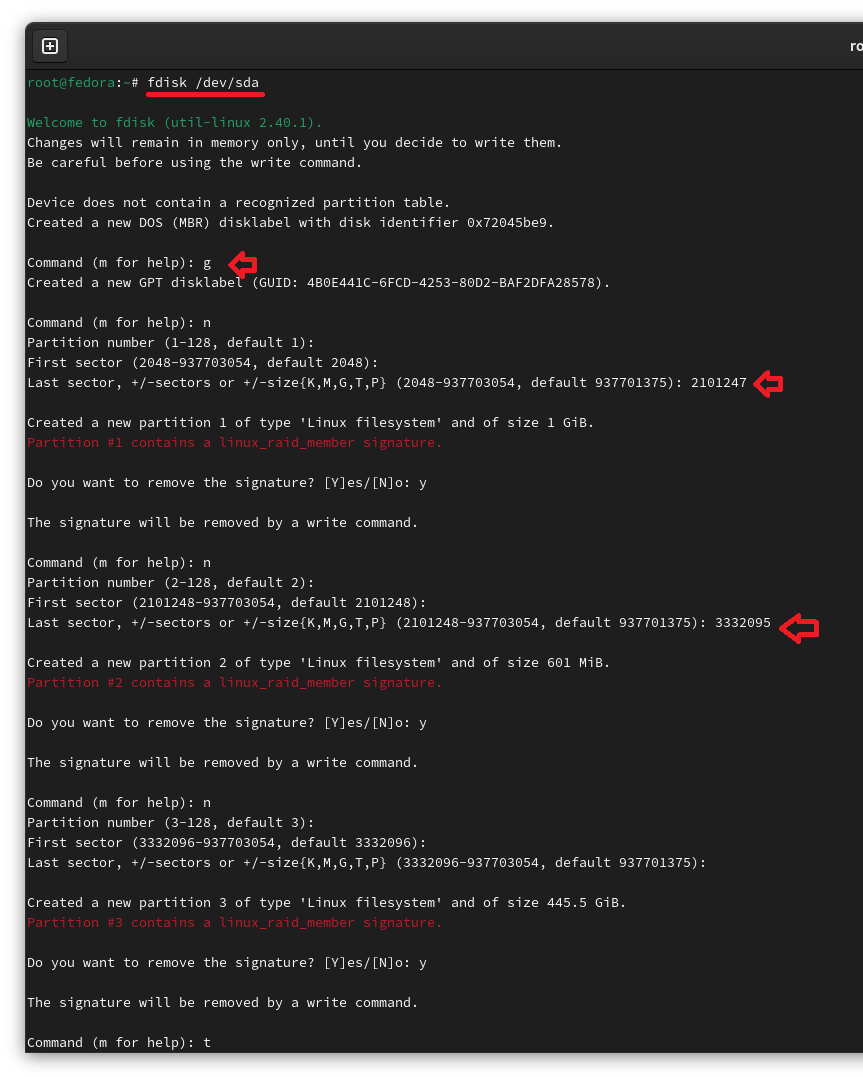
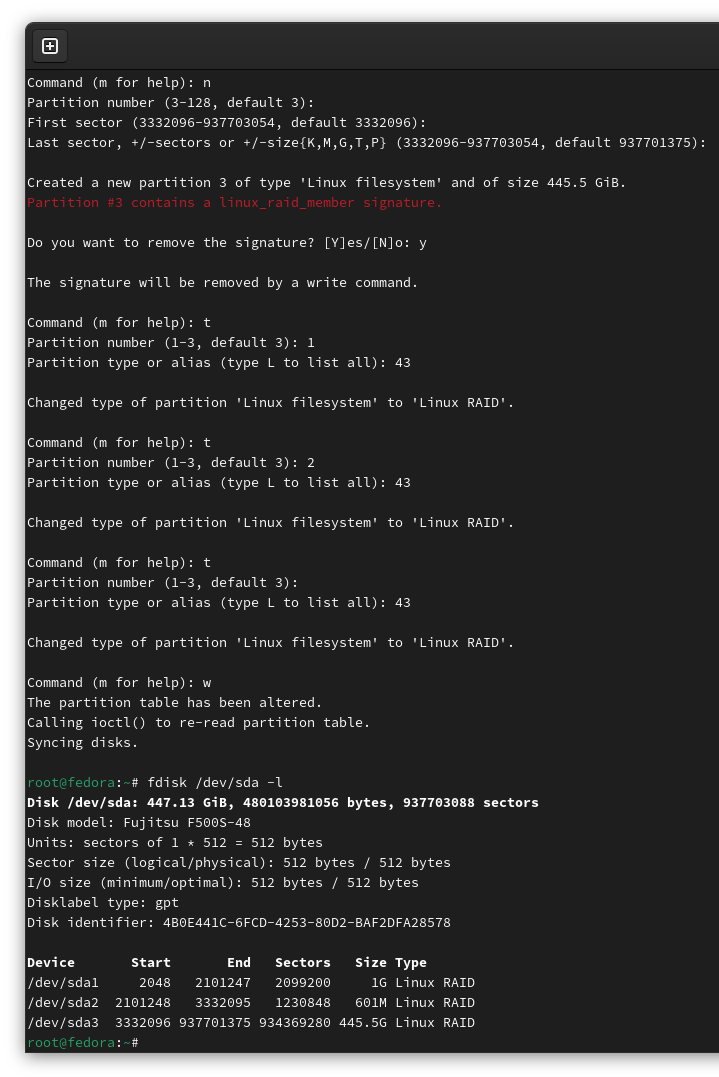
使用fdisk建立分割,並變更磁碟類別
將磁碟重新加入Raid,即會自動Rebuild
```
partprobe
mdadm /dev/md125 --add /dev/sda2
mdadm /dev/md126 --add /dev/sda1
mdadm /dev/md127 --add /dev/sda3
```
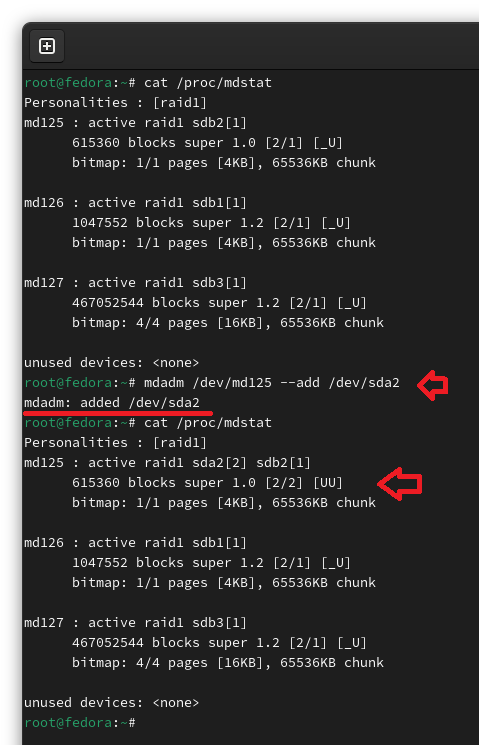
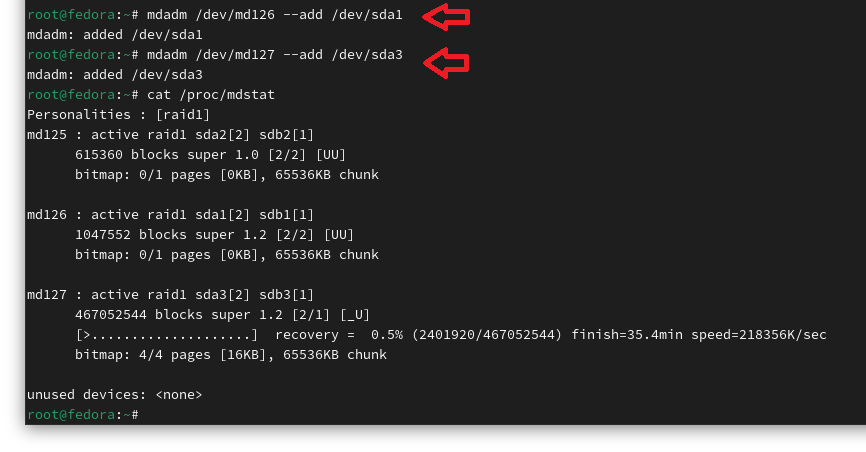
Raid Rebuid中...... 請稍後......
透過glances可以觀察到寫入狀況如下
[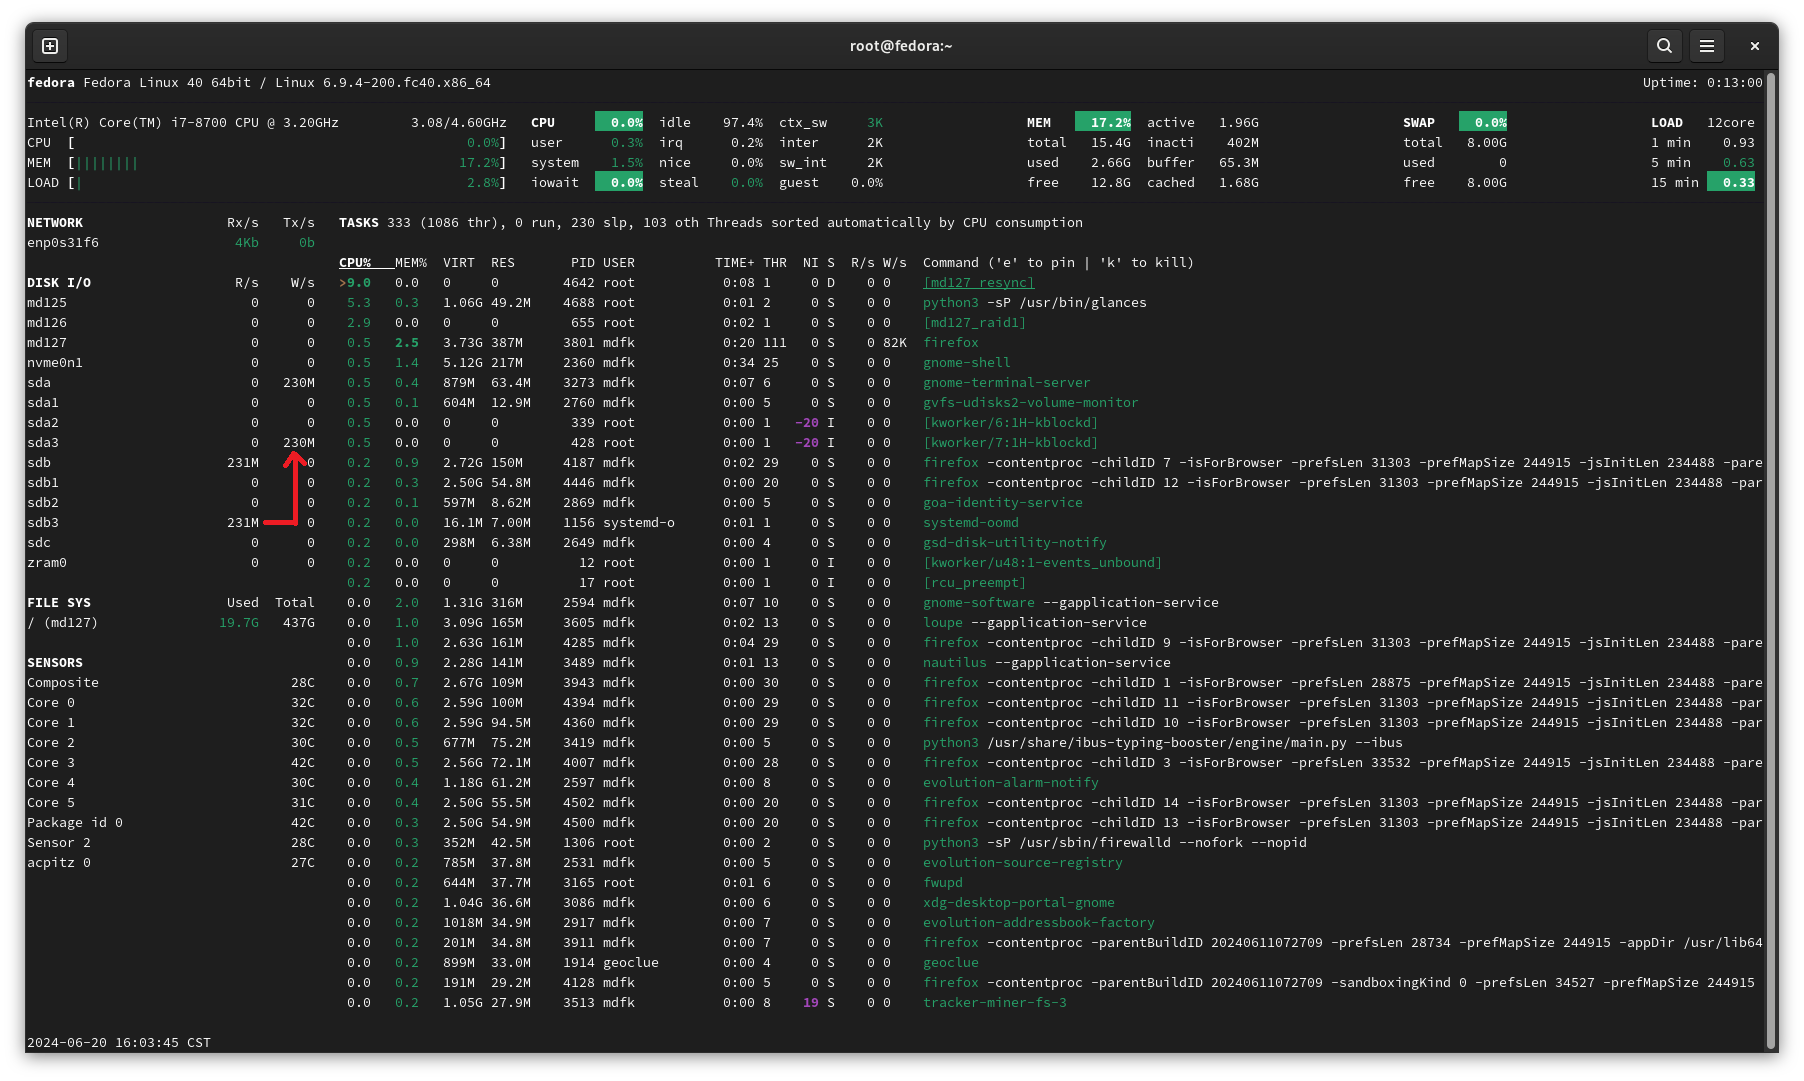](https://mdfk.goddamn.idv.tw/uploads/images/gallery/2024-06/o1ximage.png)
等到Raid Rebuid完成後,關機拔掉sdb (273f),來確認一下Rebuild完成的Disk是否可以正常運作,同時透過blkid確認到磁碟UUID\_SUB由原本的sda (09f3)變成sda (737f)了,但uuid還是382c沒有問題 (參照實體硬碟圖)
[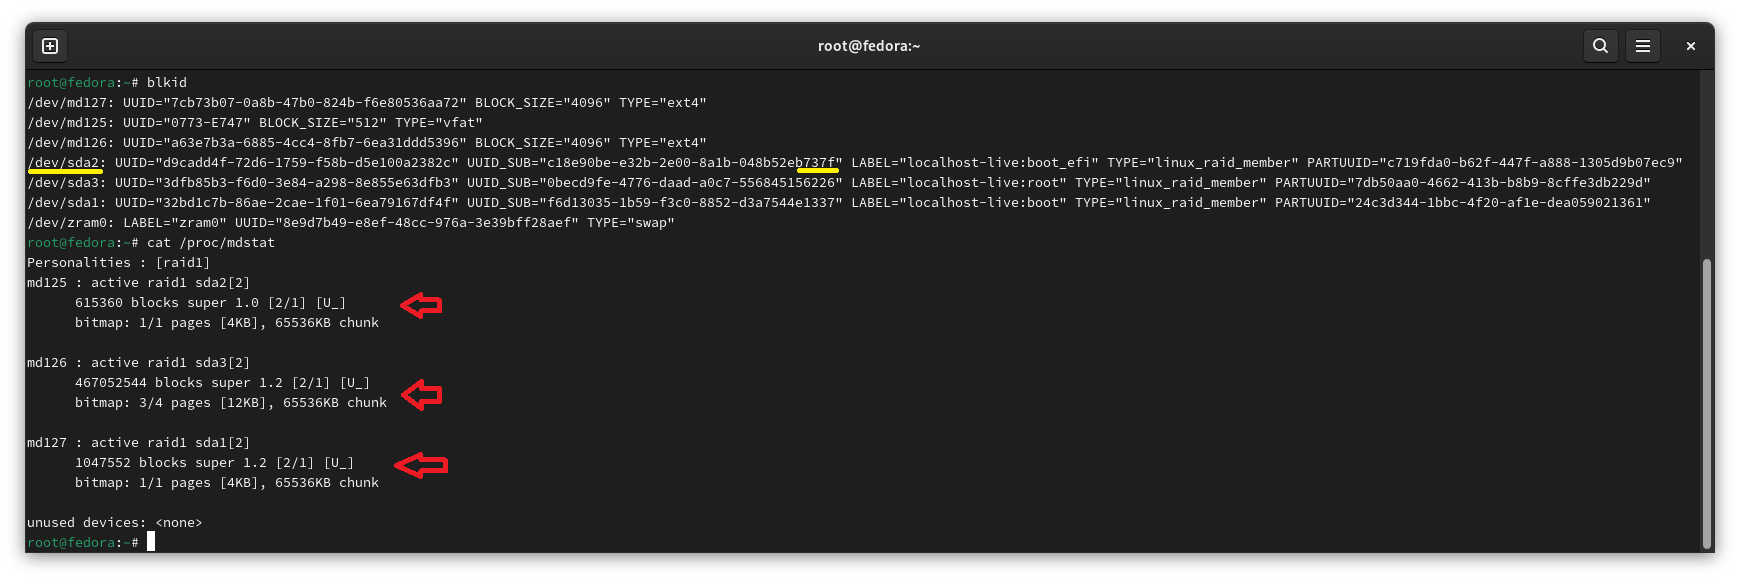](https://mdfk.goddamn.idv.tw/uploads/images/gallery/2024-06/P6Yimage.png)
反過來,關機將sda (737f)拔掉,插上sdb (273f),依樣正常開機沒有問題
[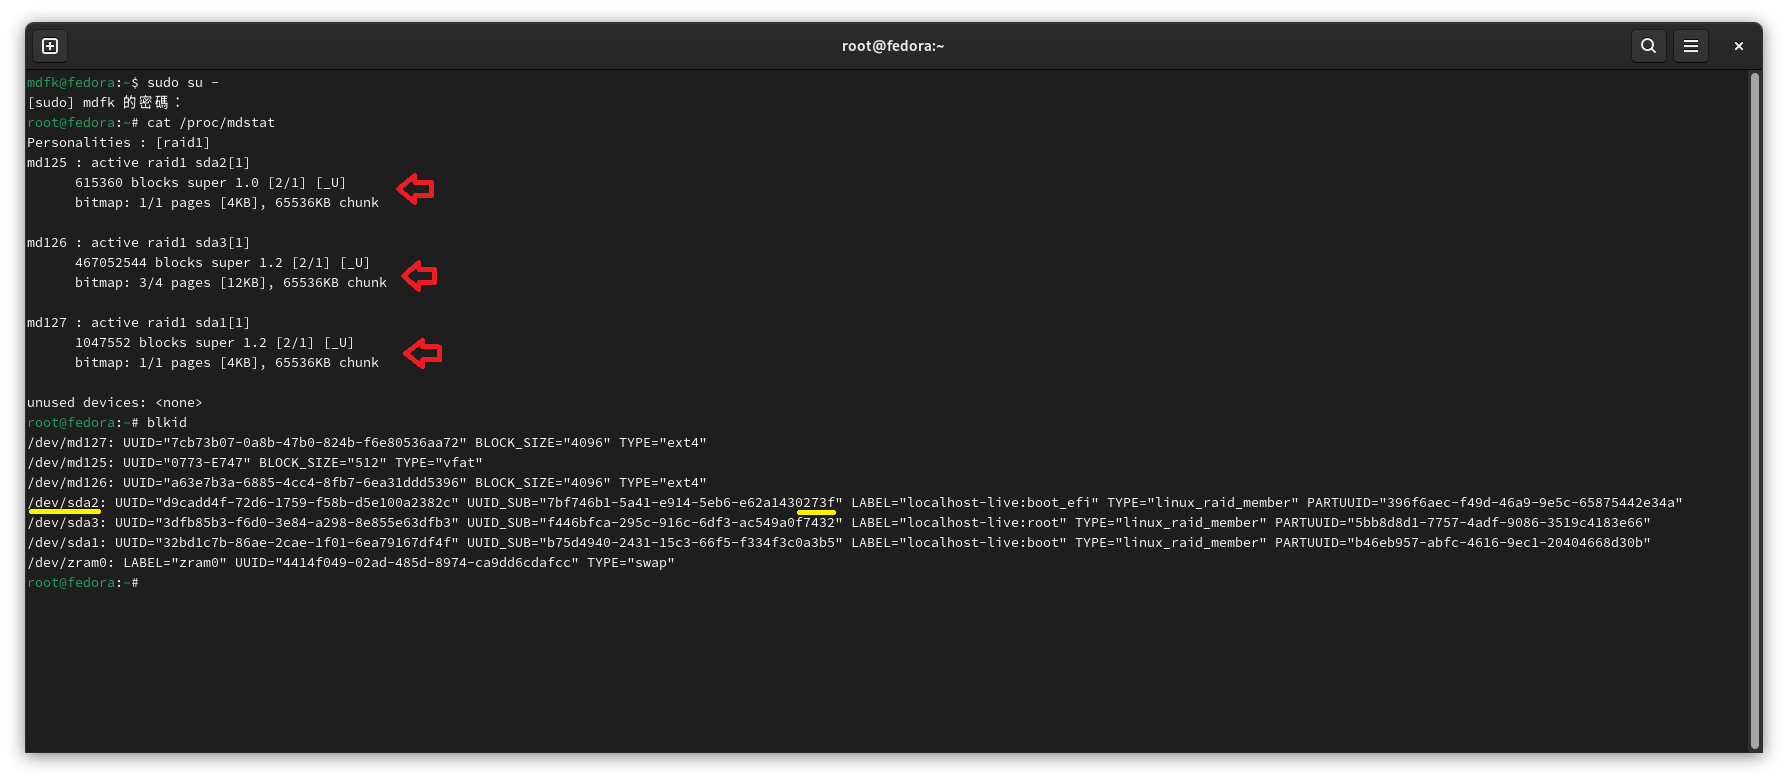](https://mdfk.goddamn.idv.tw/uploads/images/gallery/2024-06/NvWimage.png)
如此一來便可以確信此機制能夠穩定運作沒有問題 ^^
## 後語
透過以上實作,可以發現現在在UEFI環境下Linux設定Software Raid再也不像以前那麼困難了,在某些不想花大錢買中高階Server的環境下,或許可以透過這種方式獲得一定程度的Raid保護,再加上良好的備份應該也就可以符合不少使用情境,希望以上的技術分享會有幫助。
# Kali Linux
# Kali Linux ZH_TW 繁體中文化
### 環境
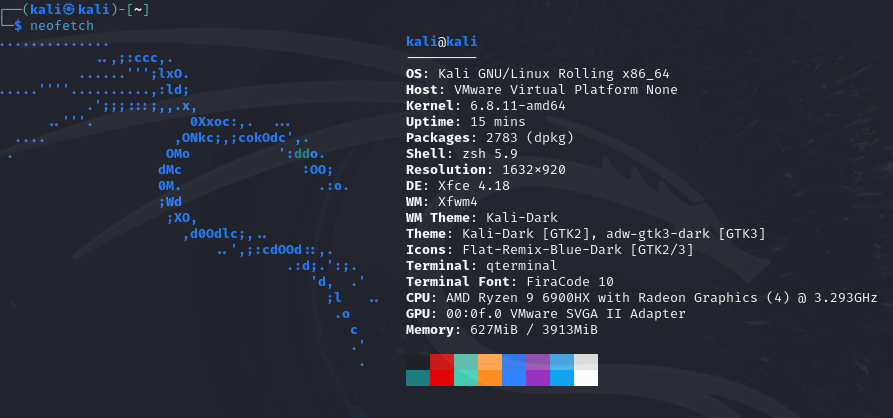
### 設定時區
如果你不是用ISO安裝是直接下載VM版本的Kali Linux預設的時區是不對的,在中文化前先來變更一下時區設定
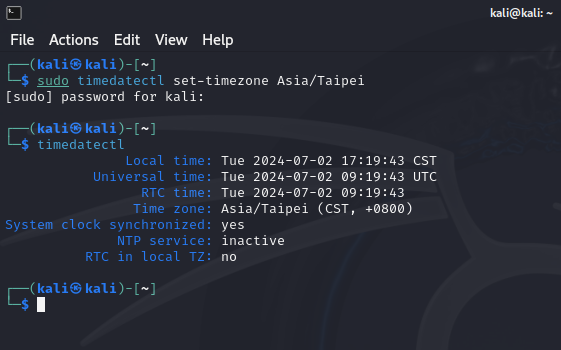
```
sudo timedatectl set-timezone Asia/Taipei
timedatectl
```
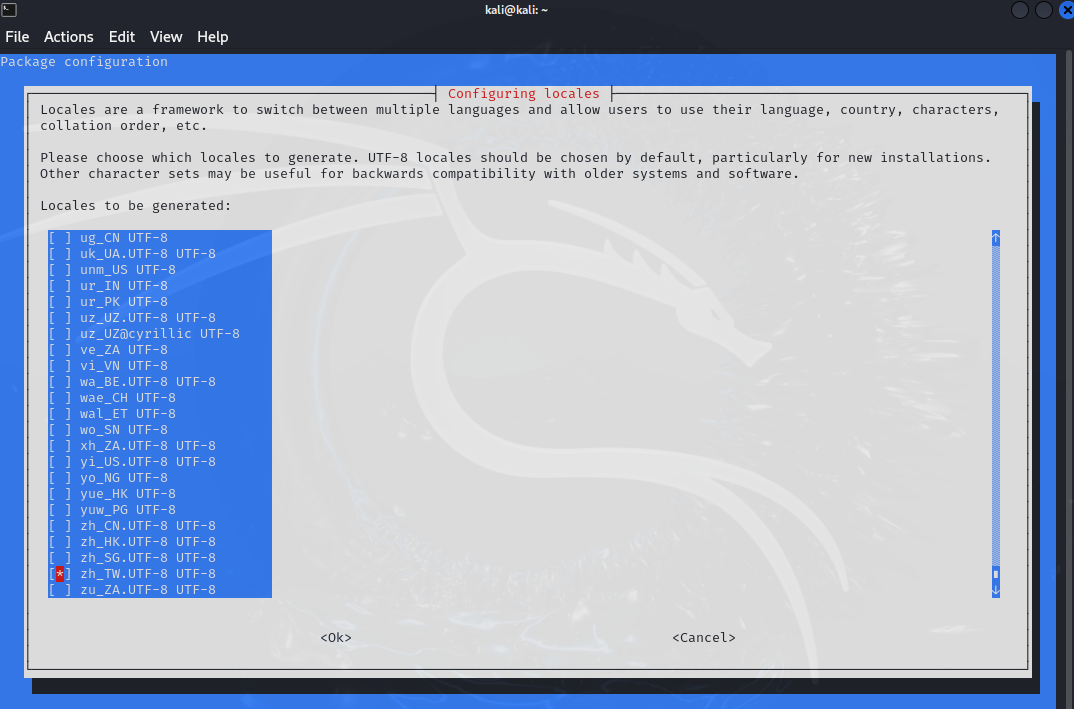
### 設定語系
```
sudo dpkg-reconfigure locales
```
勾選 "zh\_TW.UTF-8" 後按 <ok>
選擇預設語系 "zh\_TW.UTF-8"
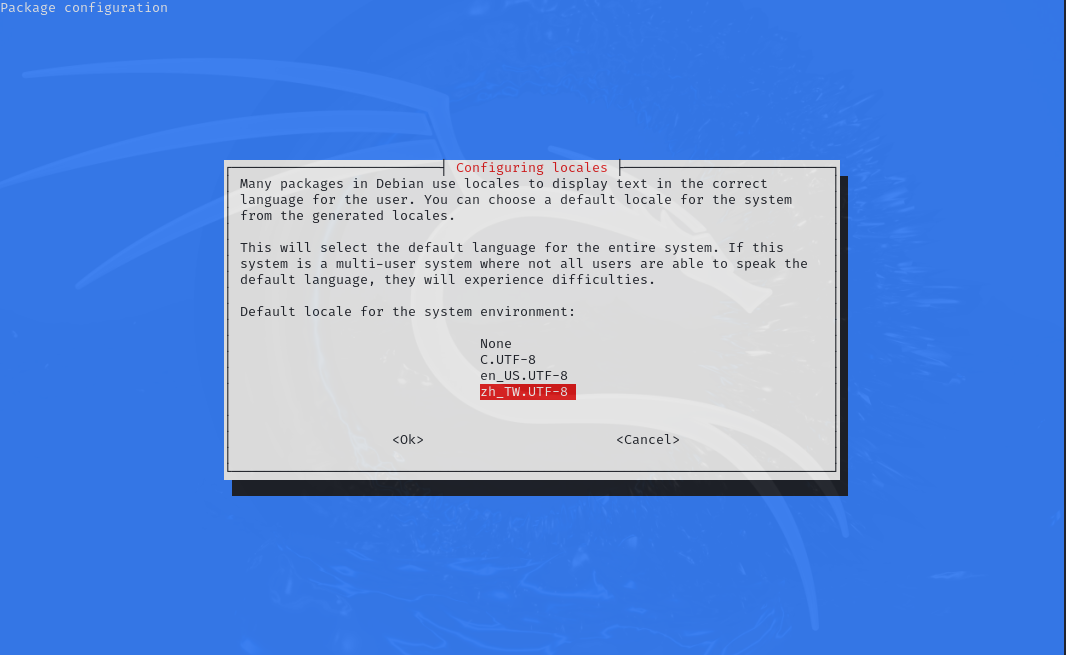
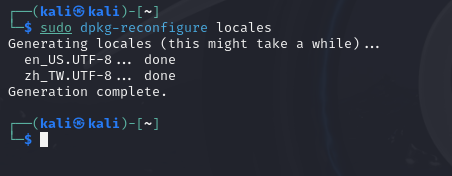
完成之後重新開機
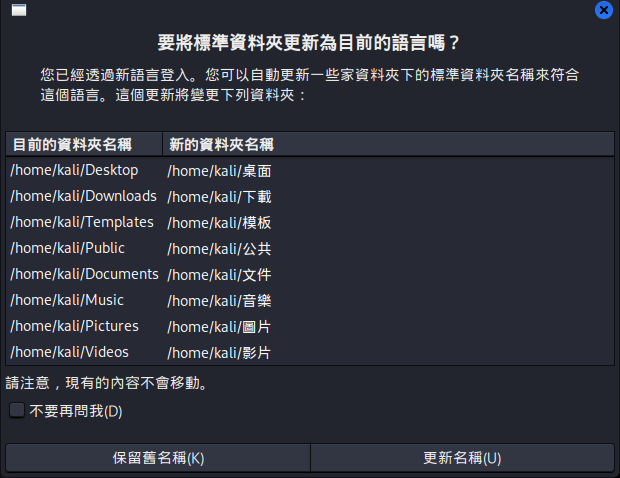
重開完成之後,會出現以下畫面,自己選擇是否要更名
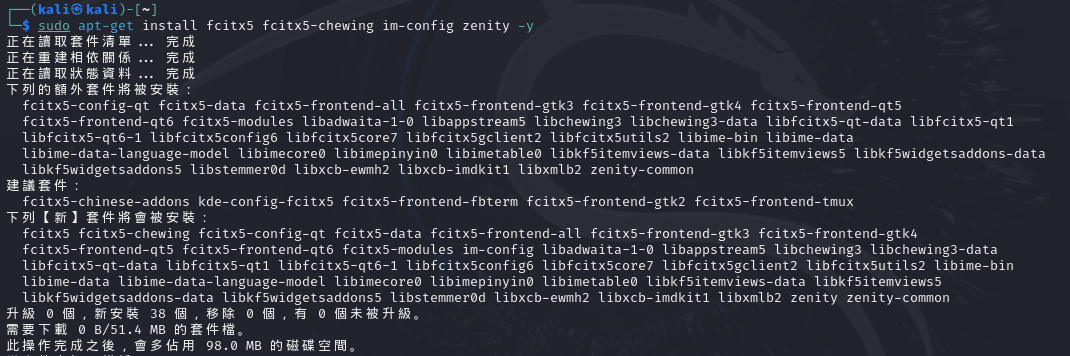
### 安裝fcitx5中文輸入法
```
sudo apt-get update
sudo apt-get install fcitx5 fcitx5-chewing im-config zenity -y
```
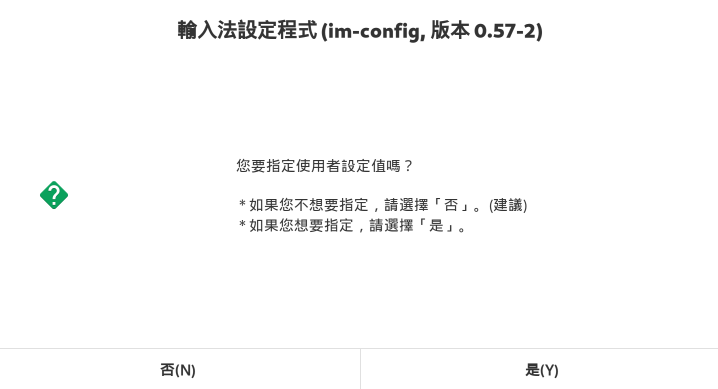
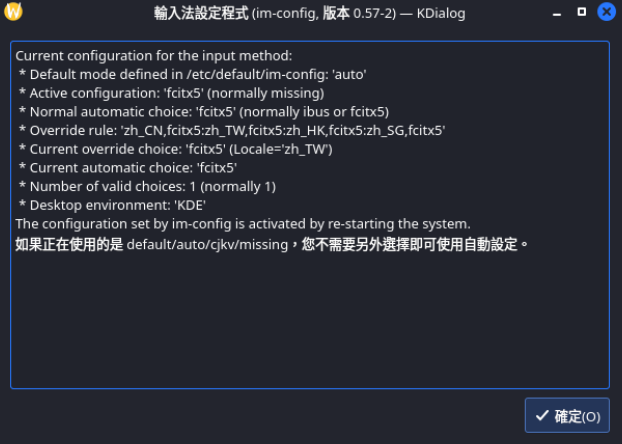
執行im-config
```
im-config
```
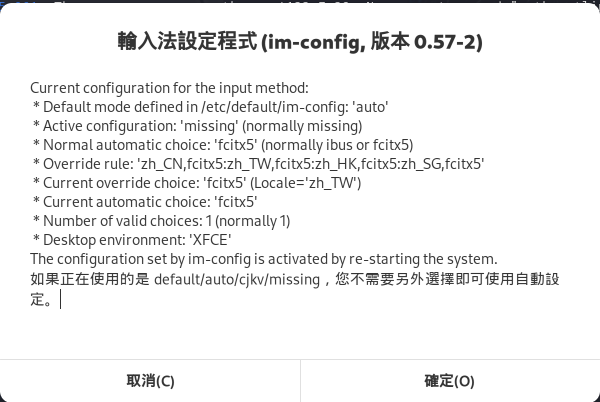
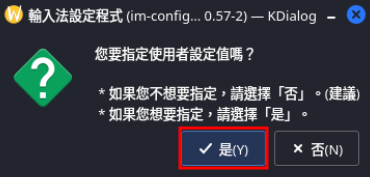
點選"是",指定使用者設定值
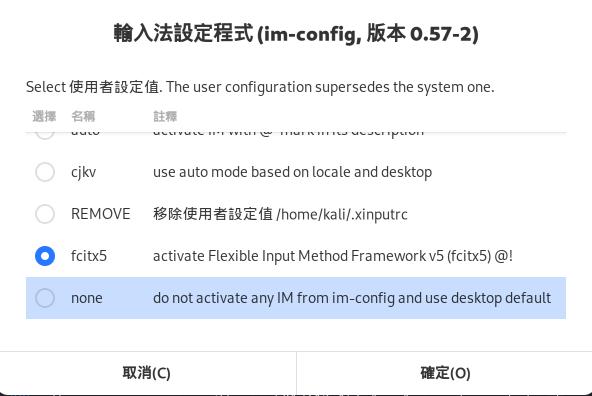
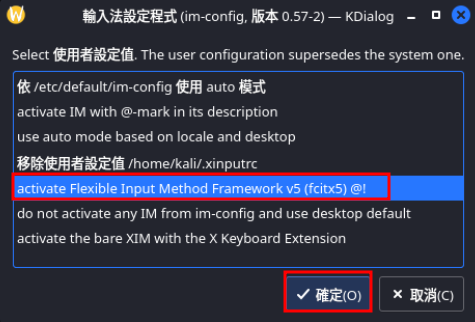
設定使用fcitx5為預設輸入法
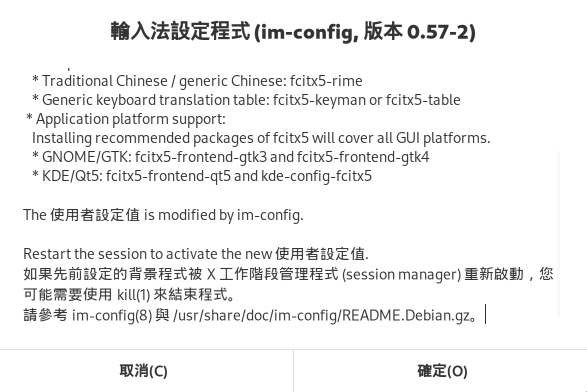
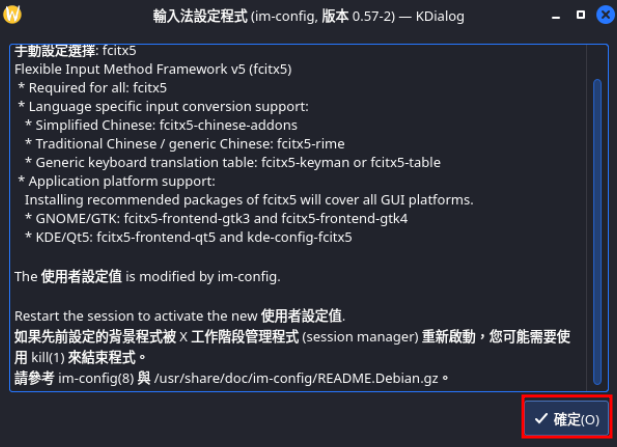
點選"確定",完成 im-config 設定
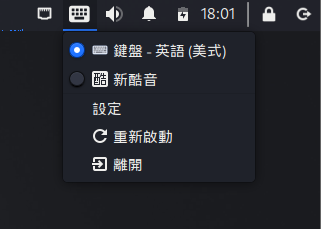
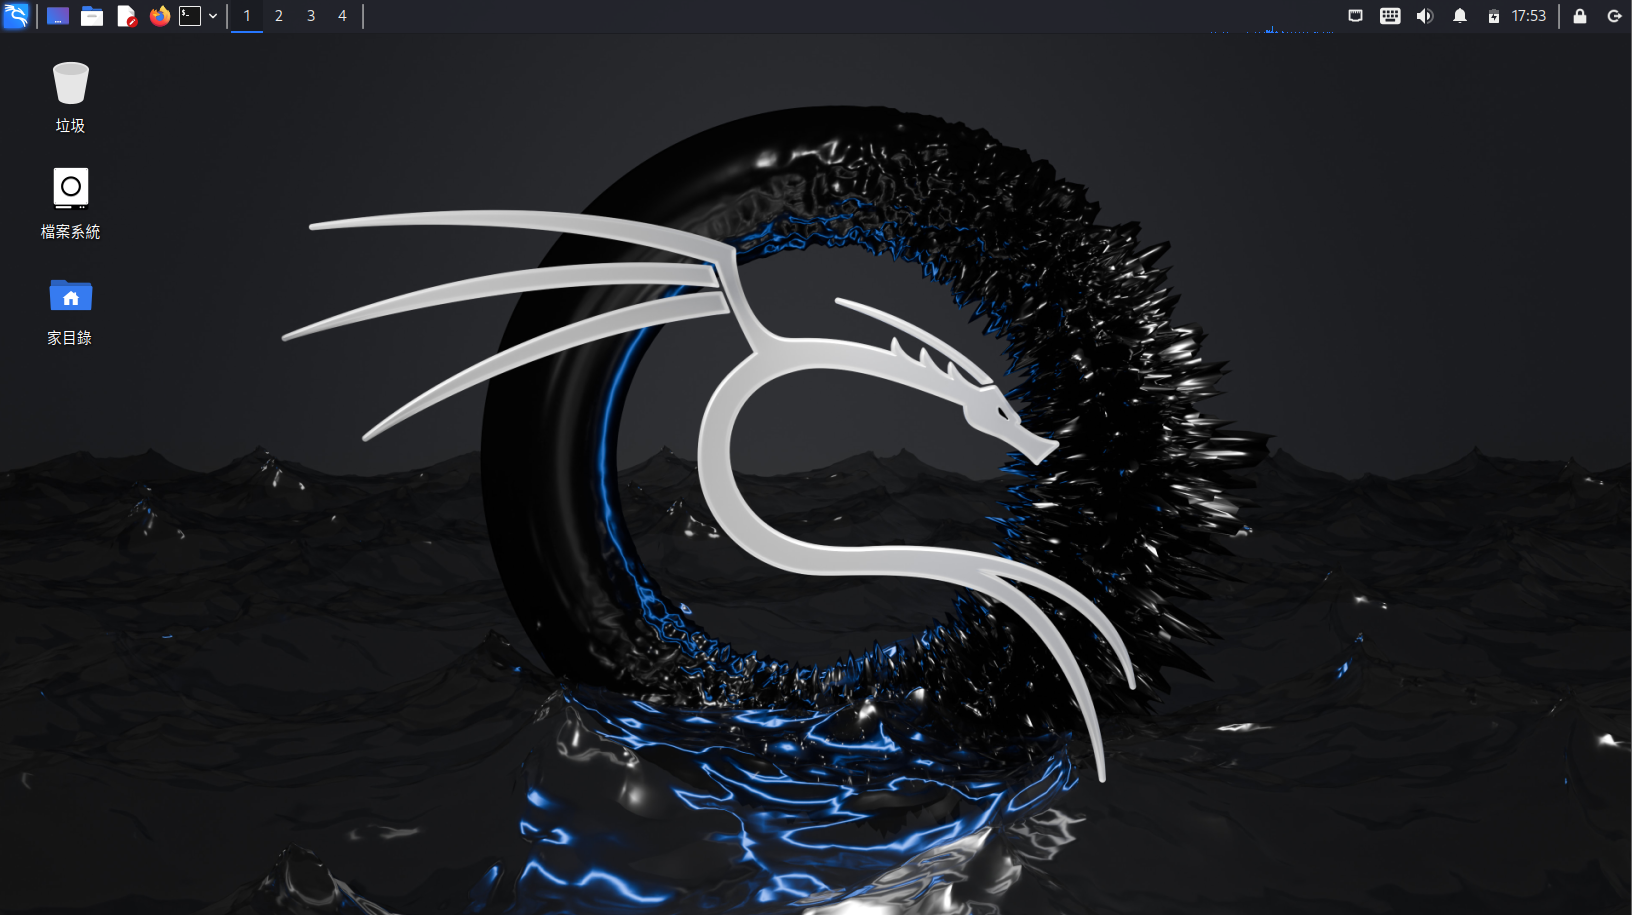
重新開機後,右上角即會出現輸入法了
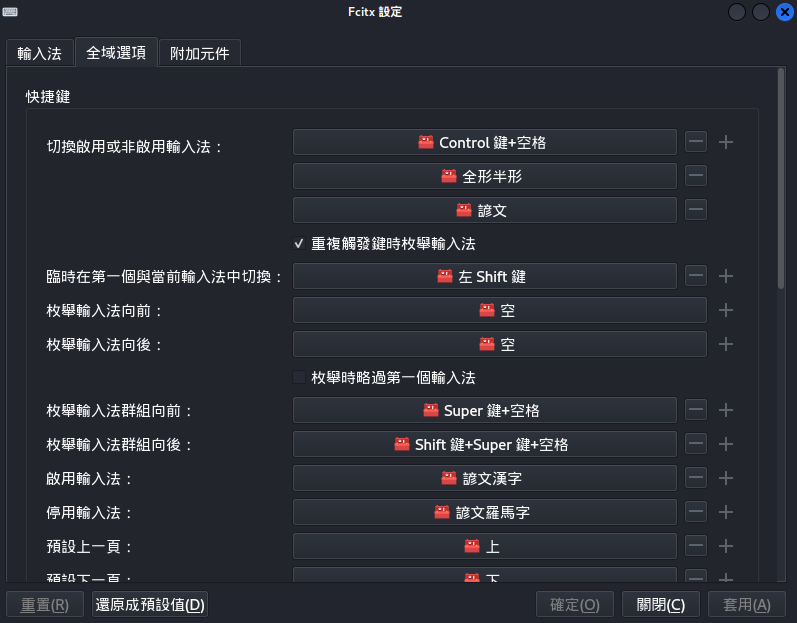
執行Fcitx5設定可以更進階的設定切換輸入法按鍵
# Kali Linux 改 KDE Plasma 桌面環境
### 前言
我真的不太喜歡用Kali預設的Xfce,所以我決定要來把Xfce換成KDE Plasma
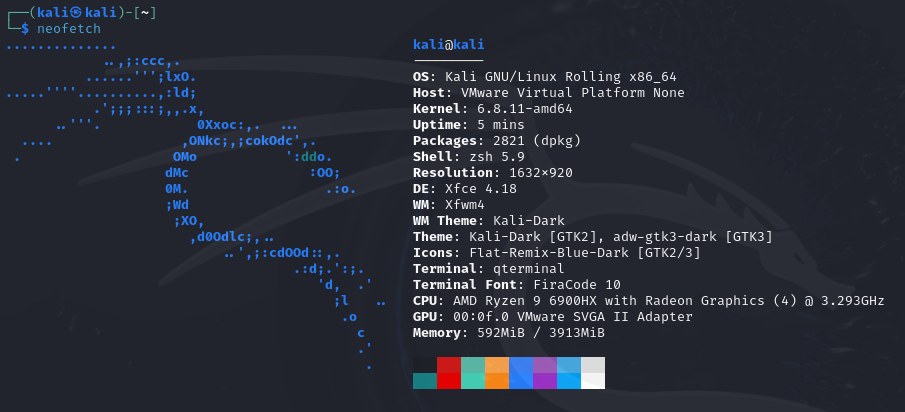
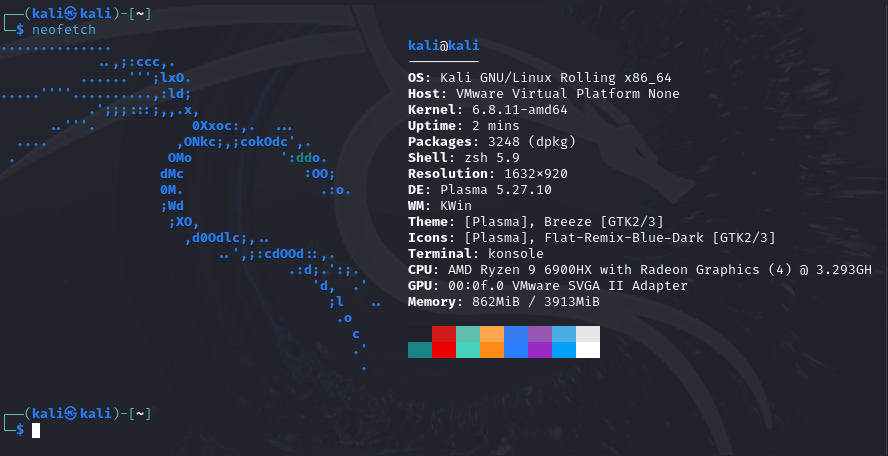
### 系統環境
### 安裝KDE Plasma
```
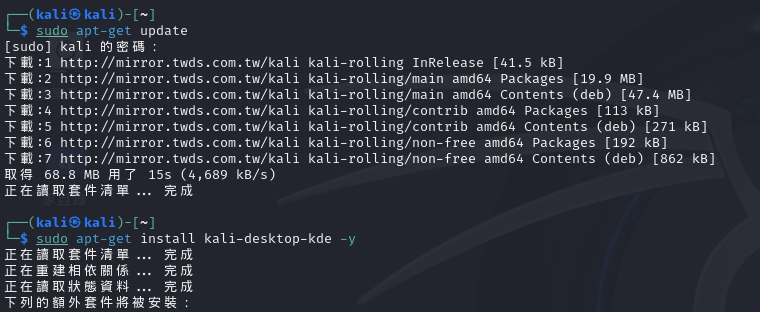
sudo apt-get update
sudo apt-get install kali-desktop-kde -y
```
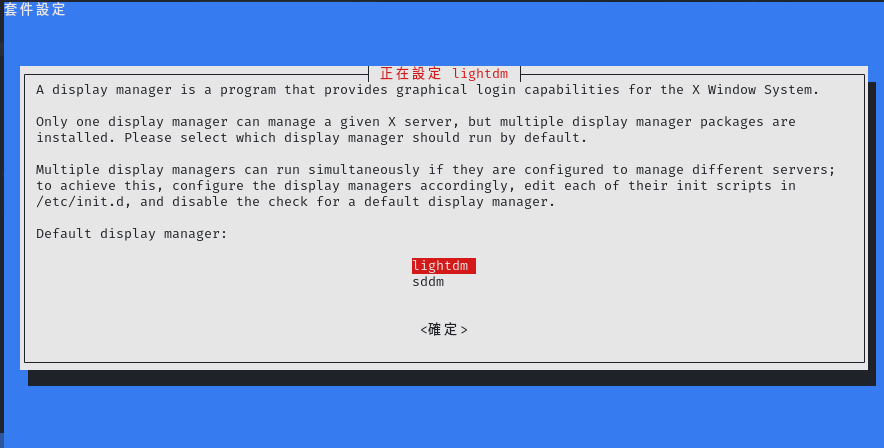
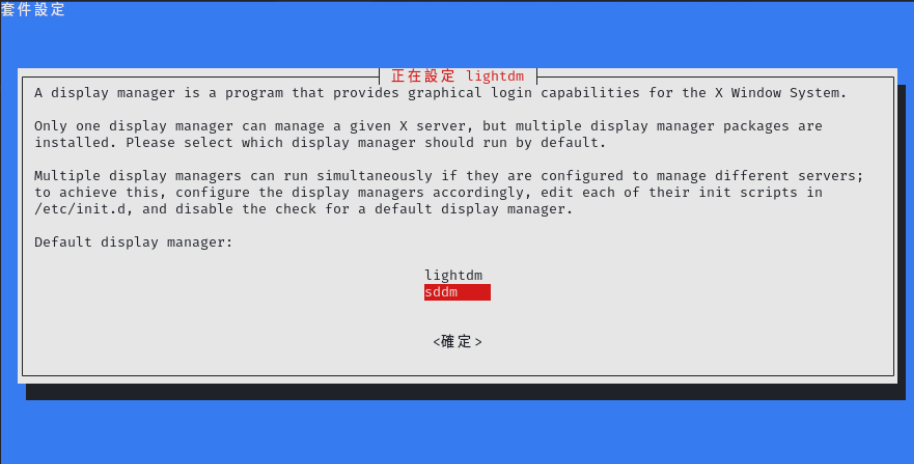
跳出下面畫面,SDDM是KDE預設的Display Manager,LightDM是Xfce預設的Display Manager,在這邊我們先選LightDM(不然會有問題),晚一點移除Xfce後再改為使用SDDM
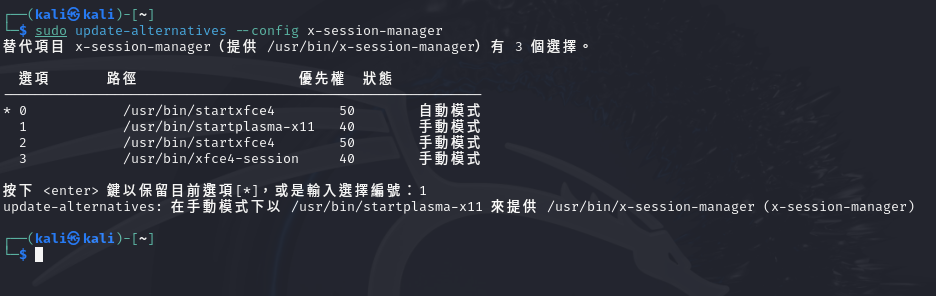
執行下面指令更換為預設KDE
```
sudo update-alternatives --config x-session-manager
```
登出
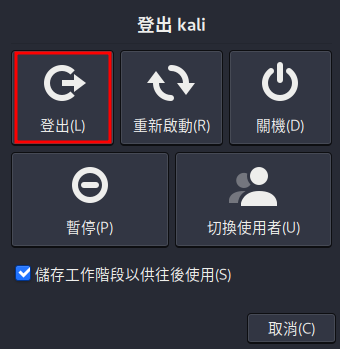
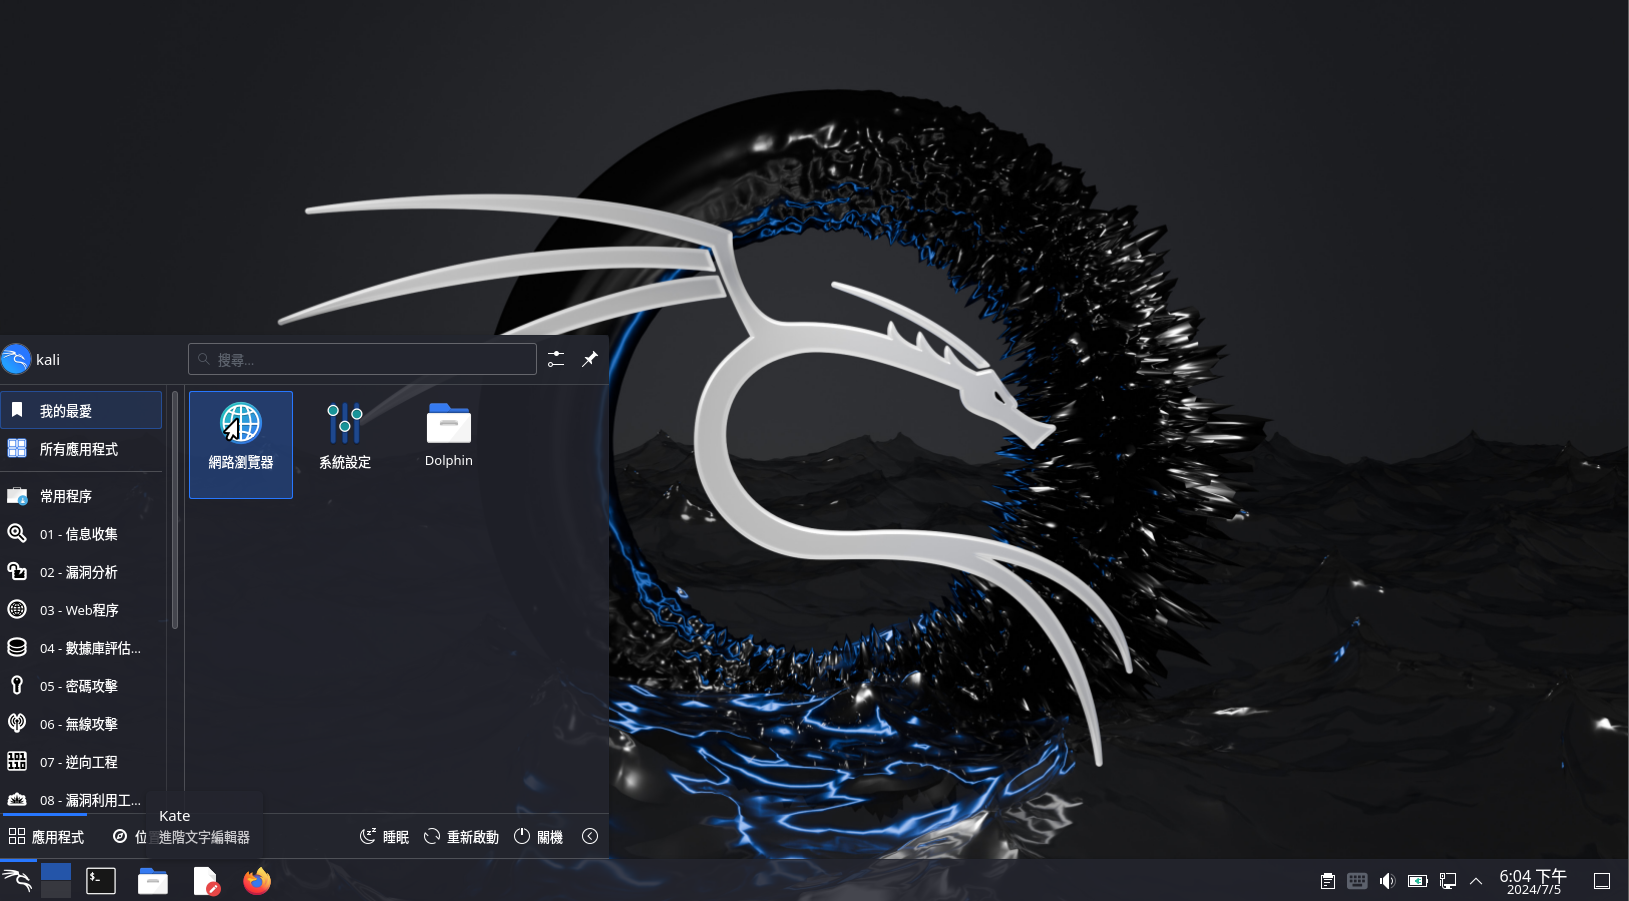
再重新登入,桌面就變成美美的KDE Plasma了 ^0^
### 移除Xfce、改用SDDM
```
sudo apt purge --autoremove kali-desktop-xfce
sudo dpkg-reconfigure sddm
sudo systemctl reboot
```
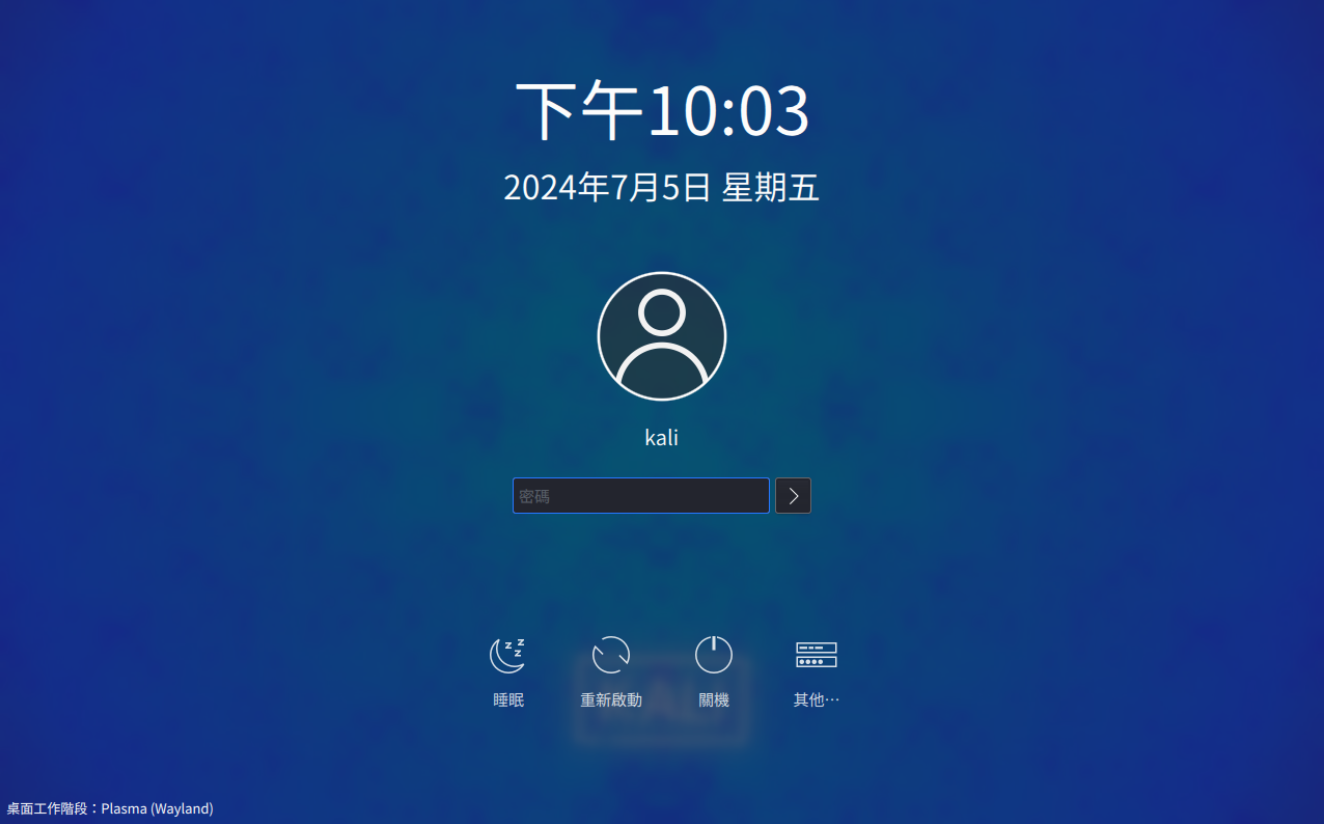
重新開機後,Dosplay Manager就改成KDE的登入畫面了
進到桌面,重新設定im-config (可參照 [https://mdfk.goddamn.idv.tw/books/linux/page/kali-linux-zh-tw](https://mdfk.goddamn.idv.tw/books/linux/page/kali-linux-zh-tw) 中文化設定)
```
im-config
```
完成後重新開機,大功告成