Proxmox VE
疑難雜症
LXC Container Permission denied 備份失敗
錯誤訊息 : LXC Container 備份時出現下列錯誤訊息,備份失敗
INFO: create storage snapshot 'vzdump'
INFO: creating vzdump archive '/mnt/pve/xxxxxx/dump/vzdump-lxc-401-2024_06_08-00_19_50.tar.zst'
INFO: tar: /mnt/pve/xxxxxx/dump/vzdump-lxc-401-2024_06_08-00_19_50.tmp: Cannot open: Permission denied
INFO: tar: Error is not recoverable: exiting now
問題成因 :
只有在 非特權容器 (Unpriviledged container) 才會發生,如果是 特權容器 (Priviledged container) 則可以順利備份。這兩種模式在 vzdump 程式備份時使用的身份不一樣,前者會使用大於 100000 的 UID,而後者直接用 root 執行。
解決方式 : 修改 pve /etc/vzdump.conf
mkdir /temp && mkdir /temp/vzdump
vim /etc/vzdump.conf
# vzdump default settings
tmpdir: /temp/vzdump
#dumpdir: DIR
#storage: STORAGE_ID
#mode: snapshot|suspend|stop
#bwlimit: KBPS
#performance: [max-workers=N][,pbs-entries-max=N]
#ionice: PRI
#lockwait: MINUTES
#stopwait: MINUTES
#stdexcludes: BOOLEAN
#mailto: ADDRESSLIST
#prune-backups: keep-INTERVAL=N[,...]
#script: FILENAME
#exclude-path: PATHLIST
#pigz: N
#notes-template: {{guestname}}
存檔後即可
資料來源 :
節省工具箱 Jason Tools http://blog.jason.tools/2021/07/proxmox-ve-vzdump-lxc-fail.html
Storage 相關
Ceph指令
#建立Crush Rule
ceph osd crush rule create-replicated rule-nvme default host nvme
ceph osd crush rule create-replicated rule-hdd default host hdd
ceph osd crush rule rm replicated_rule
為HDD Pool建立SSD快取
ceph osd tier add Ceph_Pool Cache
ceph osd tier cache-mode Cache writeback
ceph osd tier set-overlay Ceph_Pool Cache
ceph osd pool set Cache hit_set_type bloom
#ceph osd pool set Cache hit_set_count 12
#ceph osd pool set Cache hit_set_period 14400
ceph osd pool set Cache target_max_bytes xxxxxx
ceph osd pool set Cache target_max_objects xxxxxx
ceph osd pool set Cache min_read_recency_for_promote 2
ceph osd pool set Cache min_write_recency_for_promote 2
ceph osd pool set Cache cache_target_dirty_ratio 0.4
ceph osd pool set Cache cache_target_dirty_high_ratio 0.6
ceph osd pool set Cache cache_target_full_ratio 0.8
ceph osd pool set Cache cache_min_flush_age 600
ceph osd pool set Cache cache_min_evict_age 1800
#remove Cache Pool
ceph osd tier cache-mode Cache readproxy
radow -p Cache ls
radow -p Cache cache-flush-evict-all
ceph osd tire remove-overlay Ceph_Pool
ceph osd tire remove Ceph_Pool Cache
ceph delete Cache Cache --yes-i-really-really-mean-it
#移除以前是Ceph LVM的Disk Lable
ceph-volume lvm zap /dev/sdX --destroy
#確認Ceph 狀態
ceph -s
ceph osd pool stats
#關閉ceph cluster準備
ceph osd set noout
ceph osd set nobackfill
ceph osd set norecover
#ceph cluster開機後執行
ceph osd unset noout
ceph osd unset nobackfill
ceph osd unset norecover
ZFS指令
設定ZFS使用SSD做Cache與Log
zpool add ZFS_Pool cache << /dev/xxxx >>
zpool add ZFS_Pool log << /dev/xxxx >>
顯示ZFS相關資訊
zfs list

zpool list

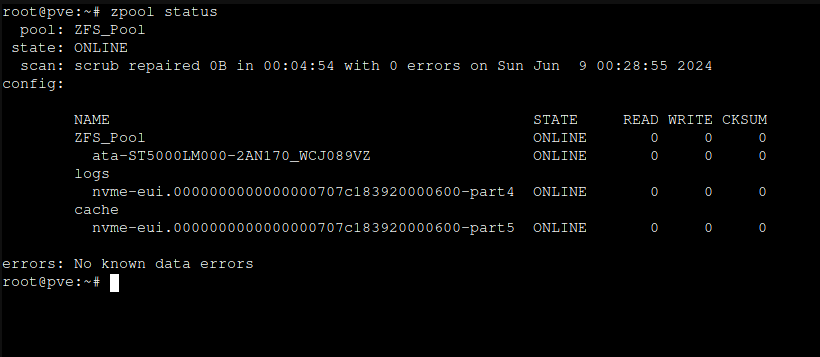
zpool status
GuestOS相關
Guest OS安裝Qemu Guest Agent
各版本OS安裝Qemu Guest Agent的方式
Windows 2012以後
最新的VirtIO ISO中有 Qemu-GA可以安裝
https://fedorapeople.org/groups/virt/virtio-win/direct-downloads/stable-virtio/virtio-win.iso
Windows 2008 R2 / 7
最後能安裝的版本為 100.0
https://fedorapeople.org/groups/virt/virtio-win/direct-downloads/archive-qemu-ga/qemu-ga-win-100.0.0.0-3.el7ev/
注意 !! 只要安裝了比100更新的版本會造成安裝錯誤,並無法再安裝任何版本的Qemu-GA,請勿必注意 !!
Windows 2003(含) 以前
無任何Qemu-GA可以安裝
CentOS/Redhat/Rocky
dnf install qemu-guest-agent -y
systemctl enable qemu-guest-agent
systemctl start qemu-guest-agent
Ubuntu / Debian
apt update && apt -y install qemu-guest-agent
systemctl enable qemu-guest-agent
systemctl start qemu-guest-agent