‼️請注意,由於密碼是明碼,請在變更完後一段時間將此GPO與ps1刪除,以策安全。
### 環境 Server:Windows 2019 Active Directory Client:Windows 11 Pro ### 設定方式 1、首先,先建議一個 Power Shell ps1檔備用。 執行命令提示字元 "cmd",我在 C:\\temp下面透過 Copy con建立一個 Change-LocalAdminPassword.ps1,將下面的指令貼入,最後 Ctrl+Z儲存離開。 ``` $newPassword = "密碼" $adminUsername = "帳號" $adminUser = [ADSI]"WinNT://./$adminUsername, user" $adminUser.SetPassword($newPassword) $adminUser.SetInfo() ``` 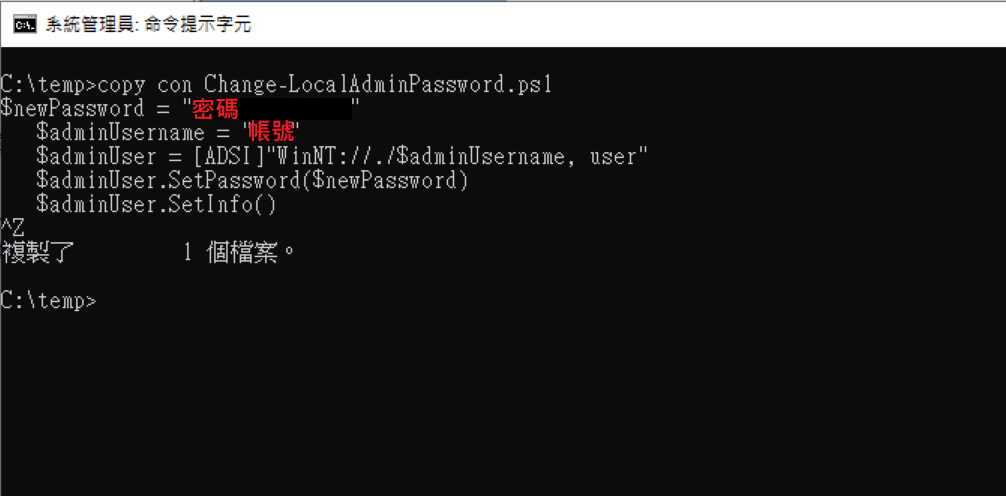 2、至群組原則管理,新增一個物件。 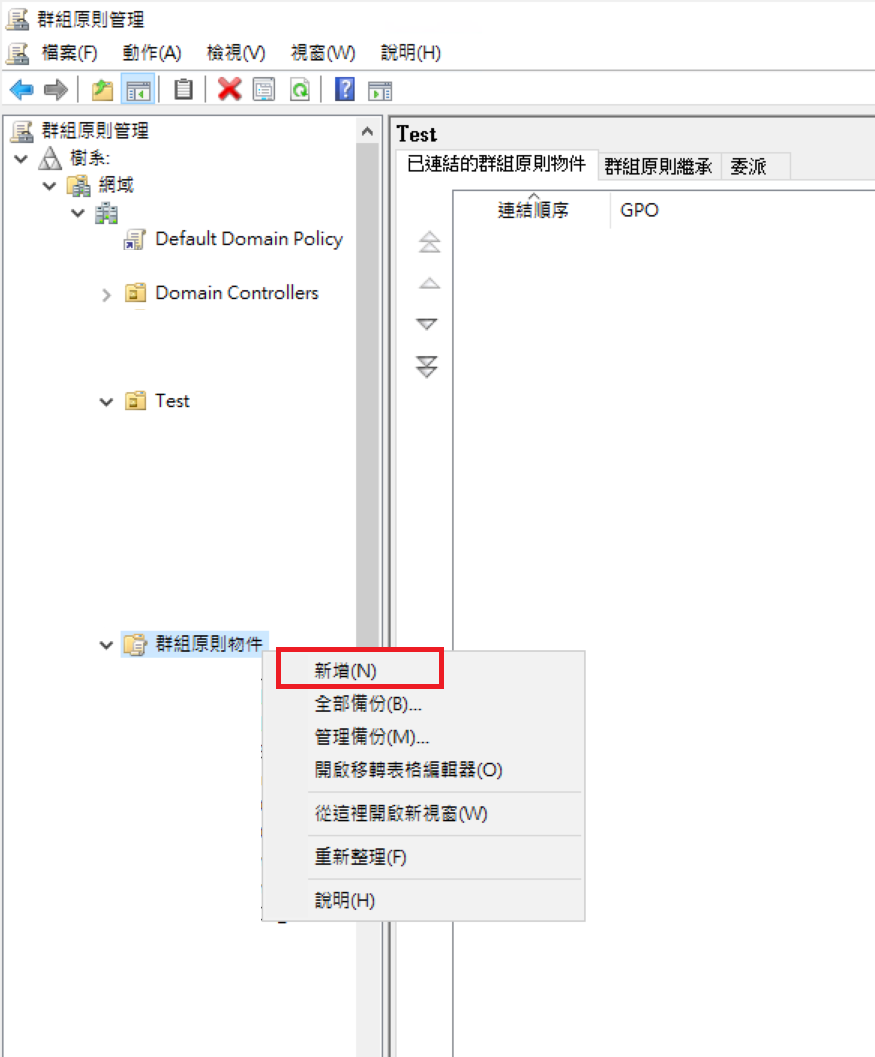 建立一條 Change\_LocalAdmin的GPO。 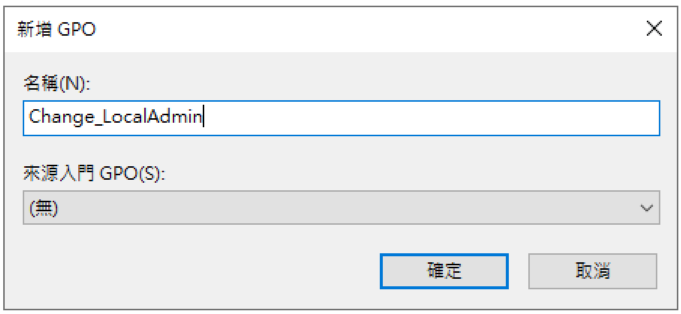 3、針對剛剛建立的物件進行編輯。 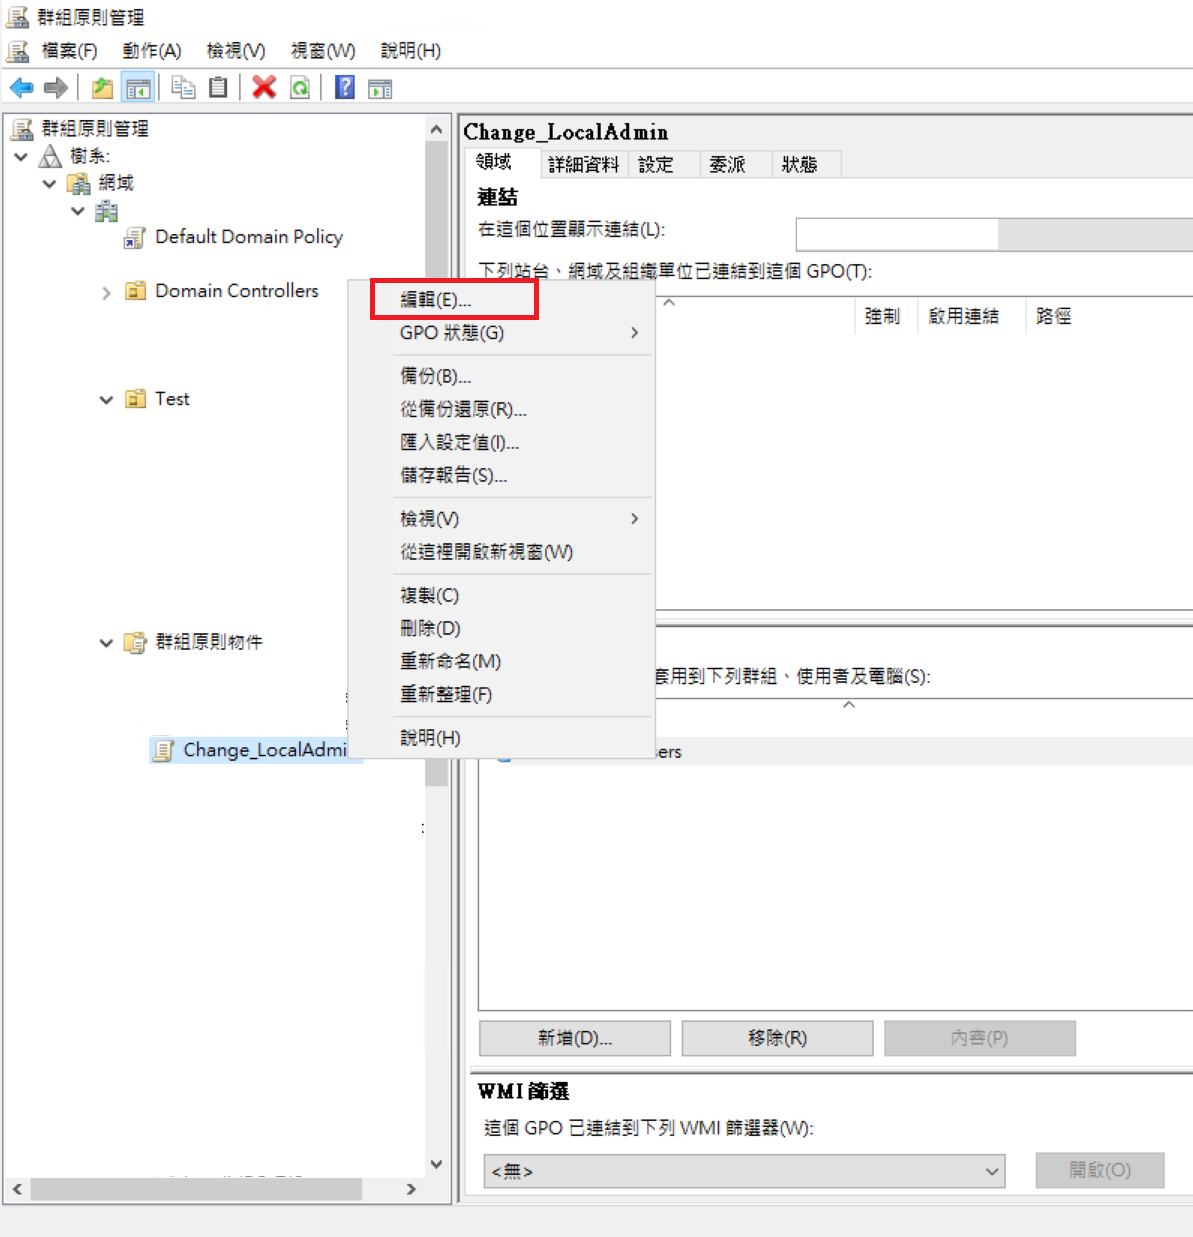 至 電腦設定 => 原則 => 系統管理範本 => Windows元件 => Windows PowerShell => 開啟指令碼執行,允許指令碼執行。 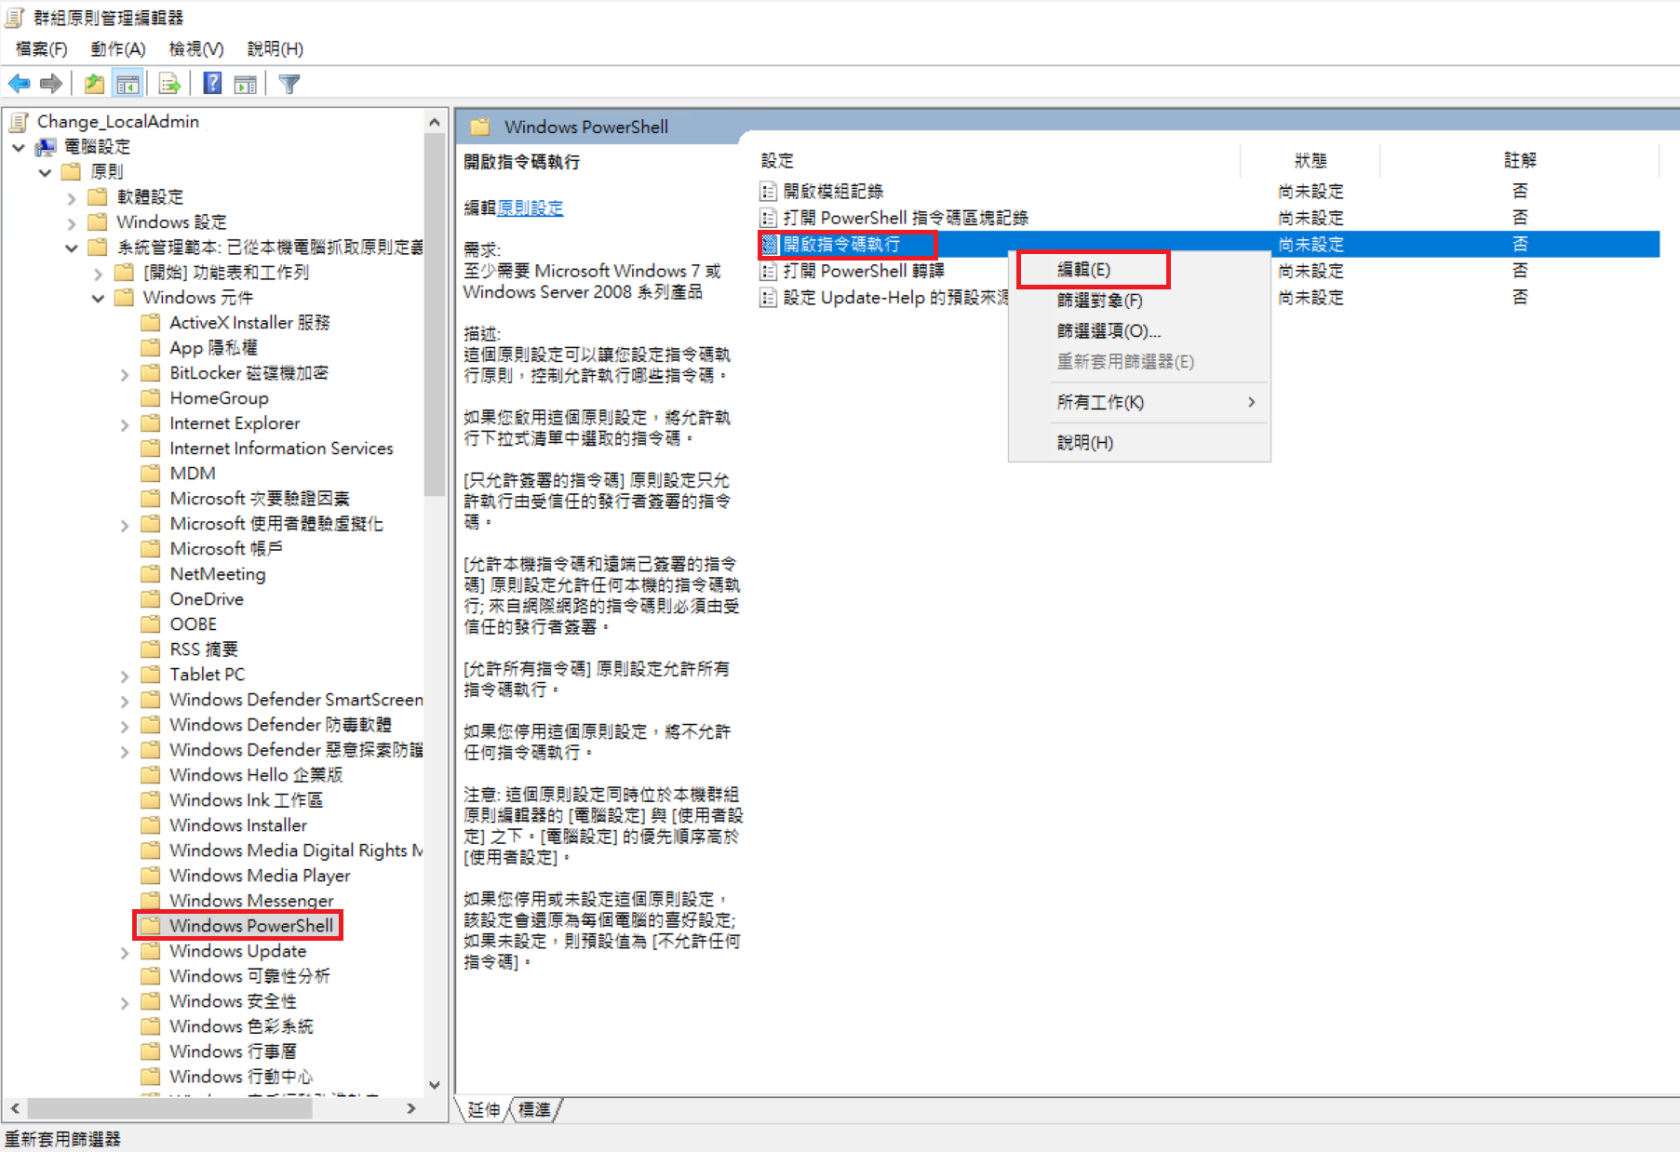 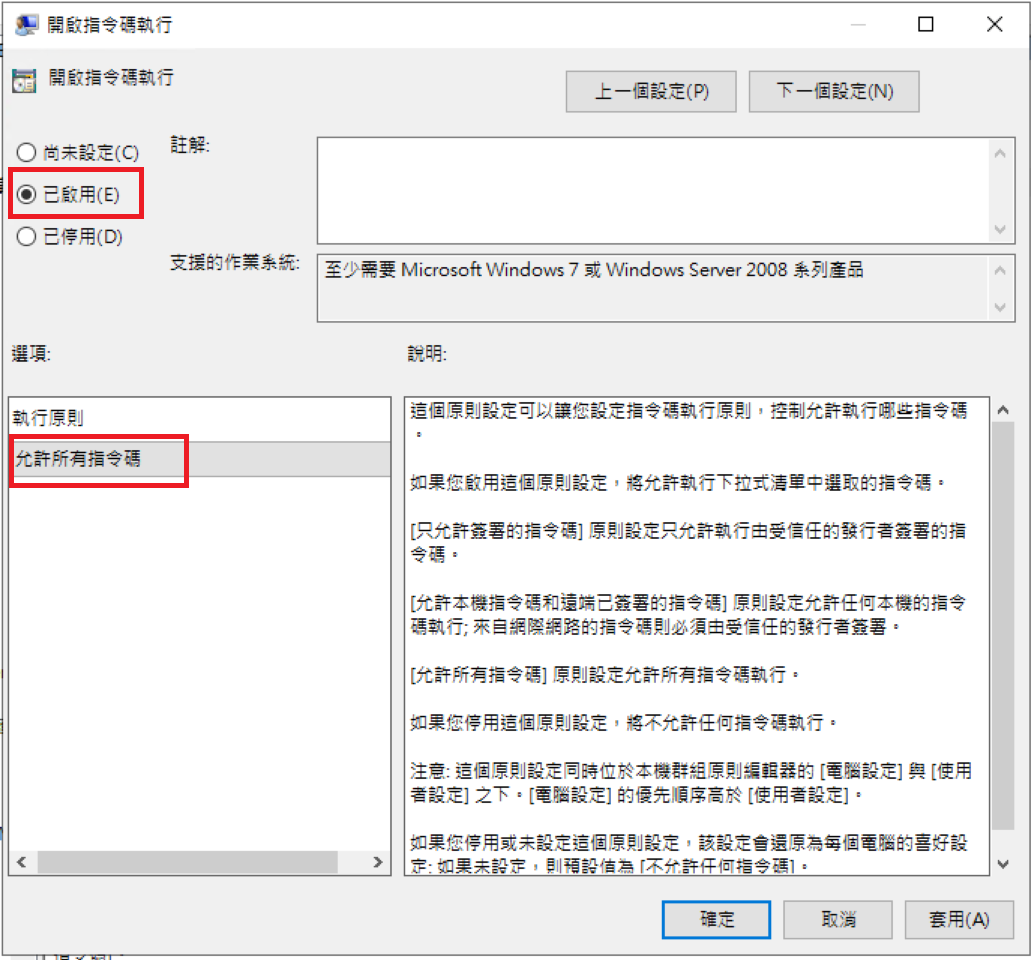 4、至 電腦設定 => 原則 => Windows設定 => 指令碼 => 啟動,設定Logon Script。 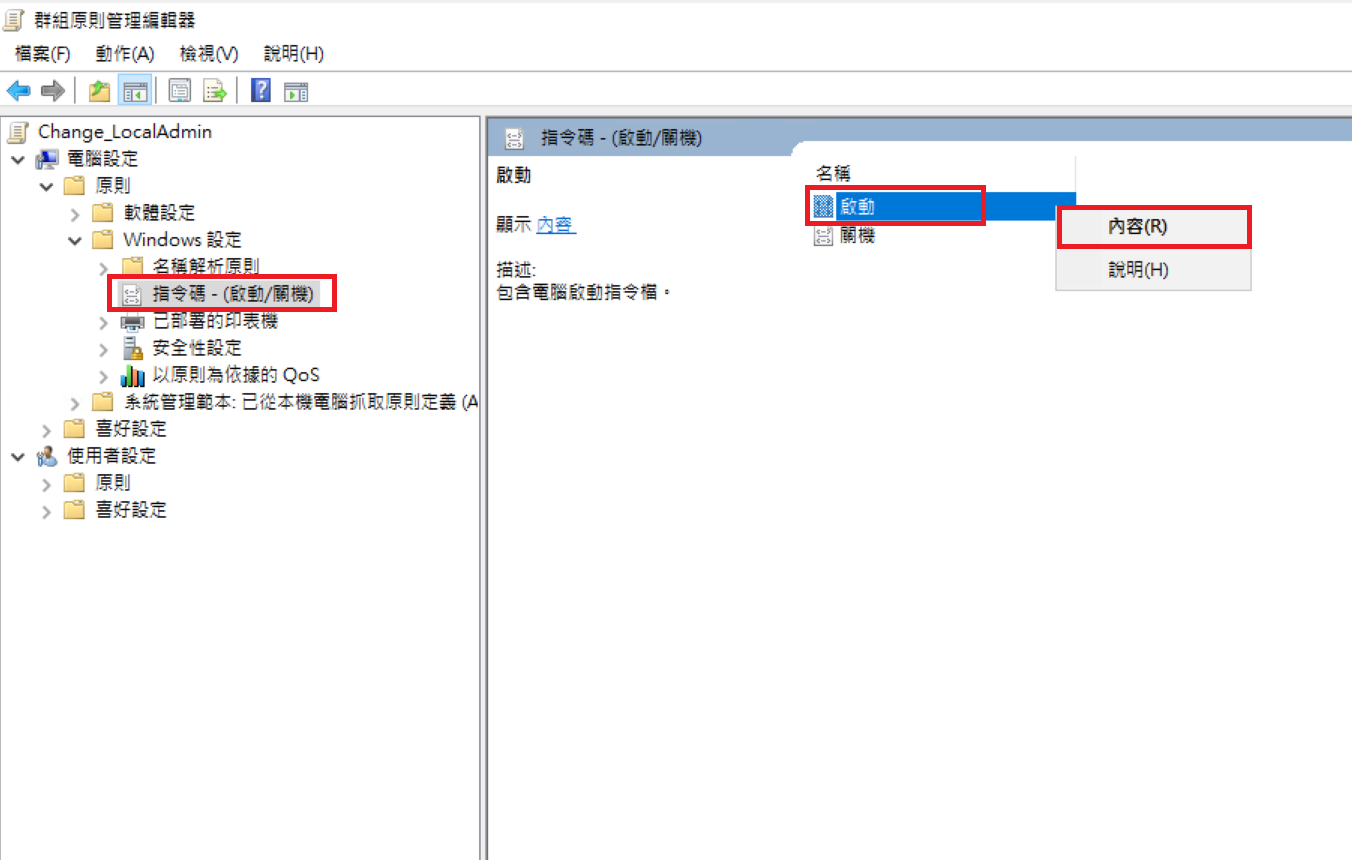 點選PowerShell指令碼,新增 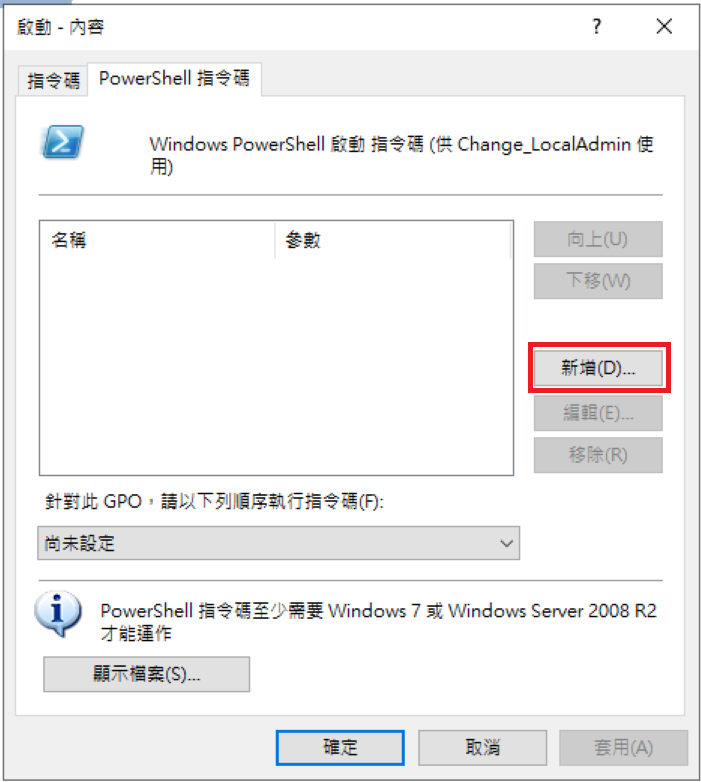 點選瀏覽,先記下目錄位置 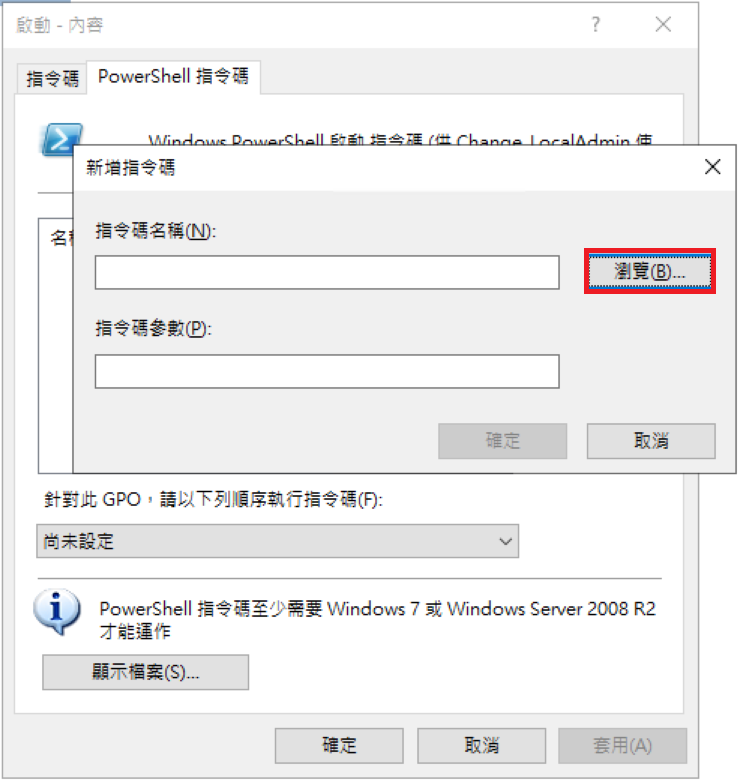 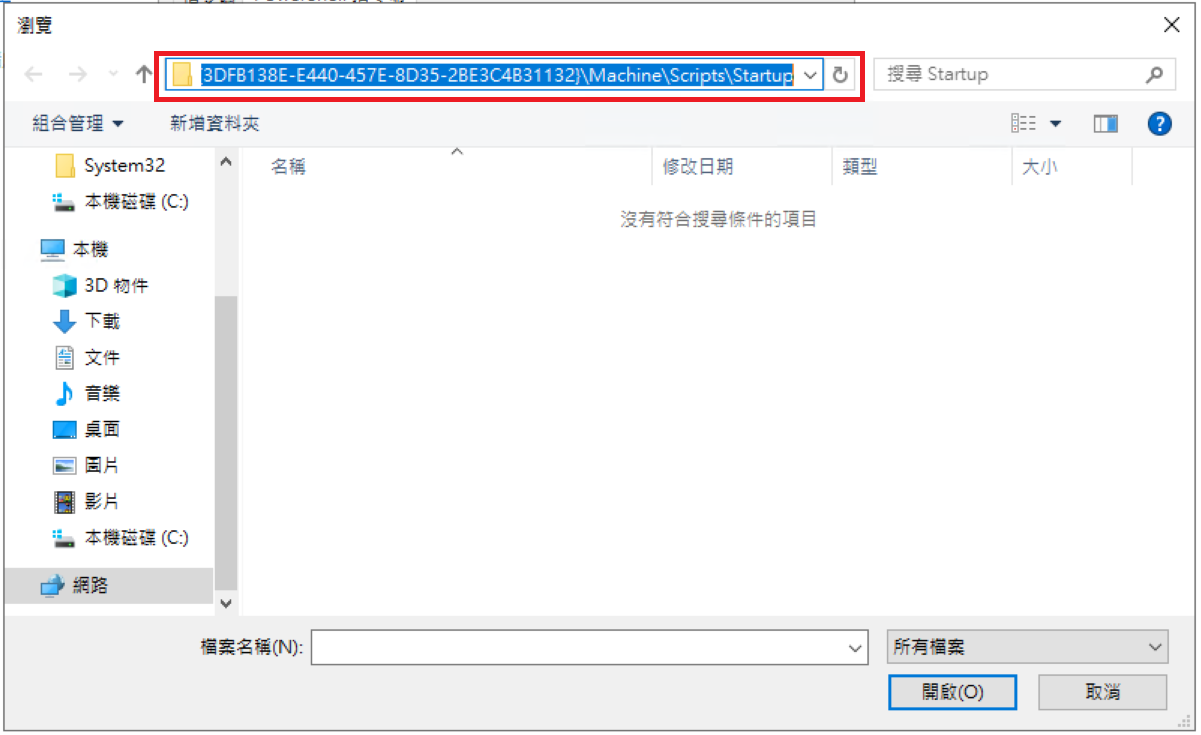 你將會在 C:\\Windows\\SYSVOL\\ 下面找到一樣的路徑,將步驟1建立的ps1檔Copy至此。 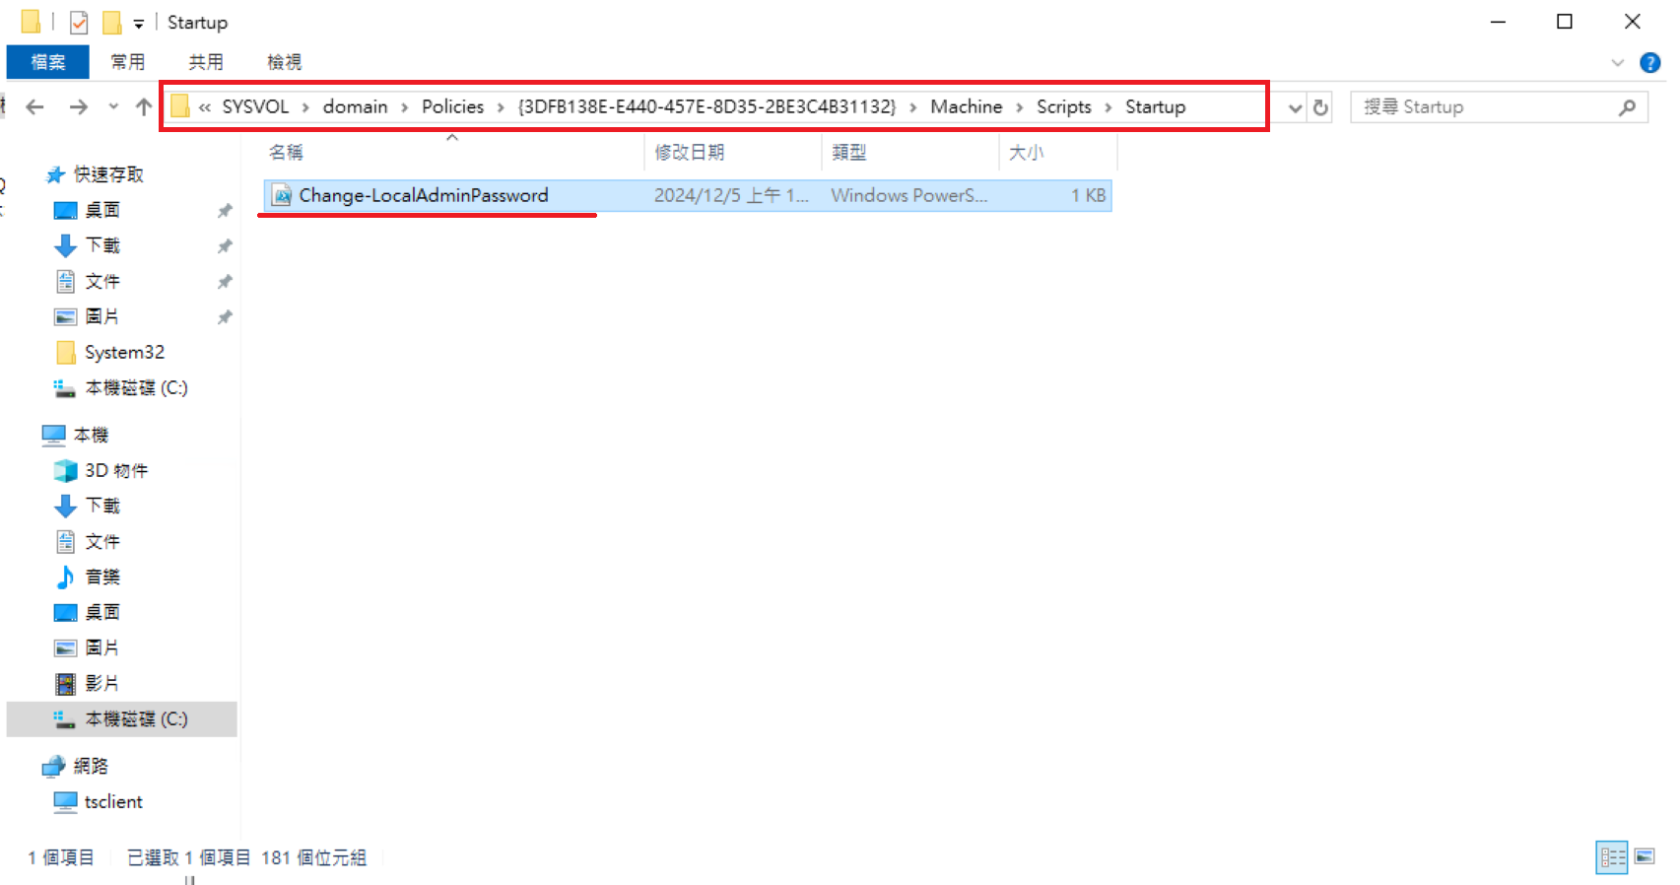 回到剛剛指令碼的選擇畫面,就可以看到了 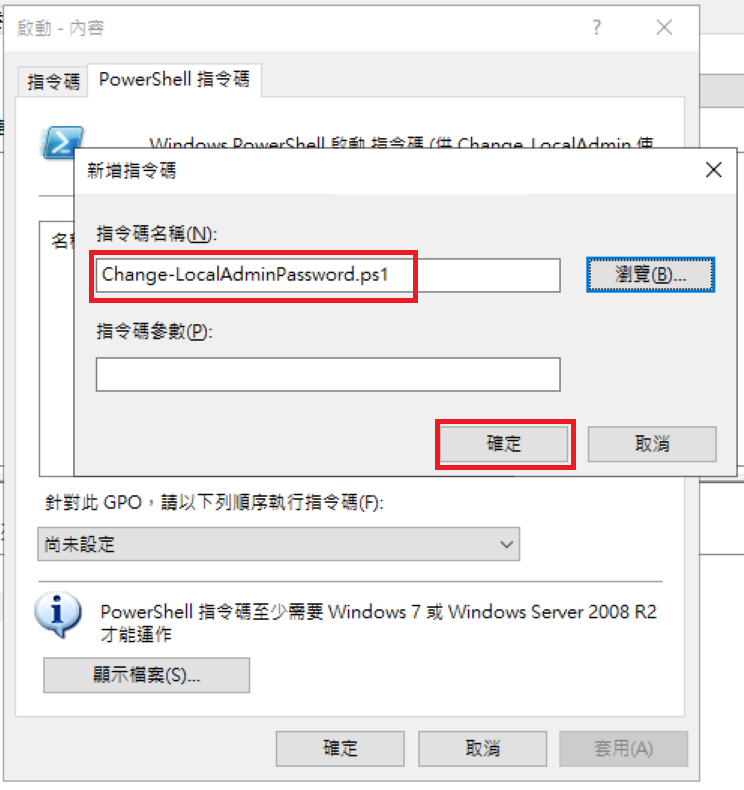 變更執行順序後,確定離開 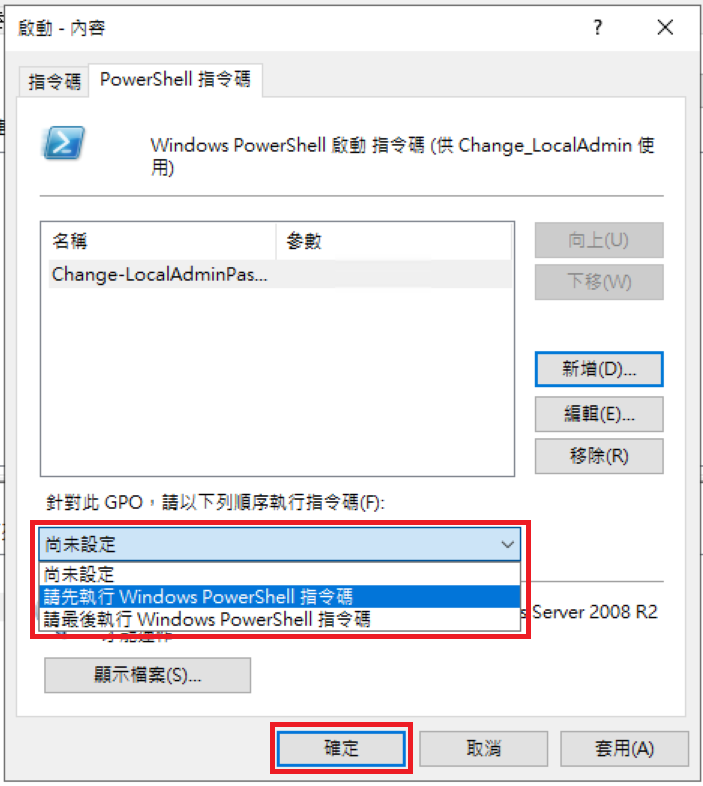 5、此時點選到GPO物件,應該就可以透過下圖看到剛剛設定的內容了。  將此GPO物件,拖曳至我們測試用的 Test OU即可。 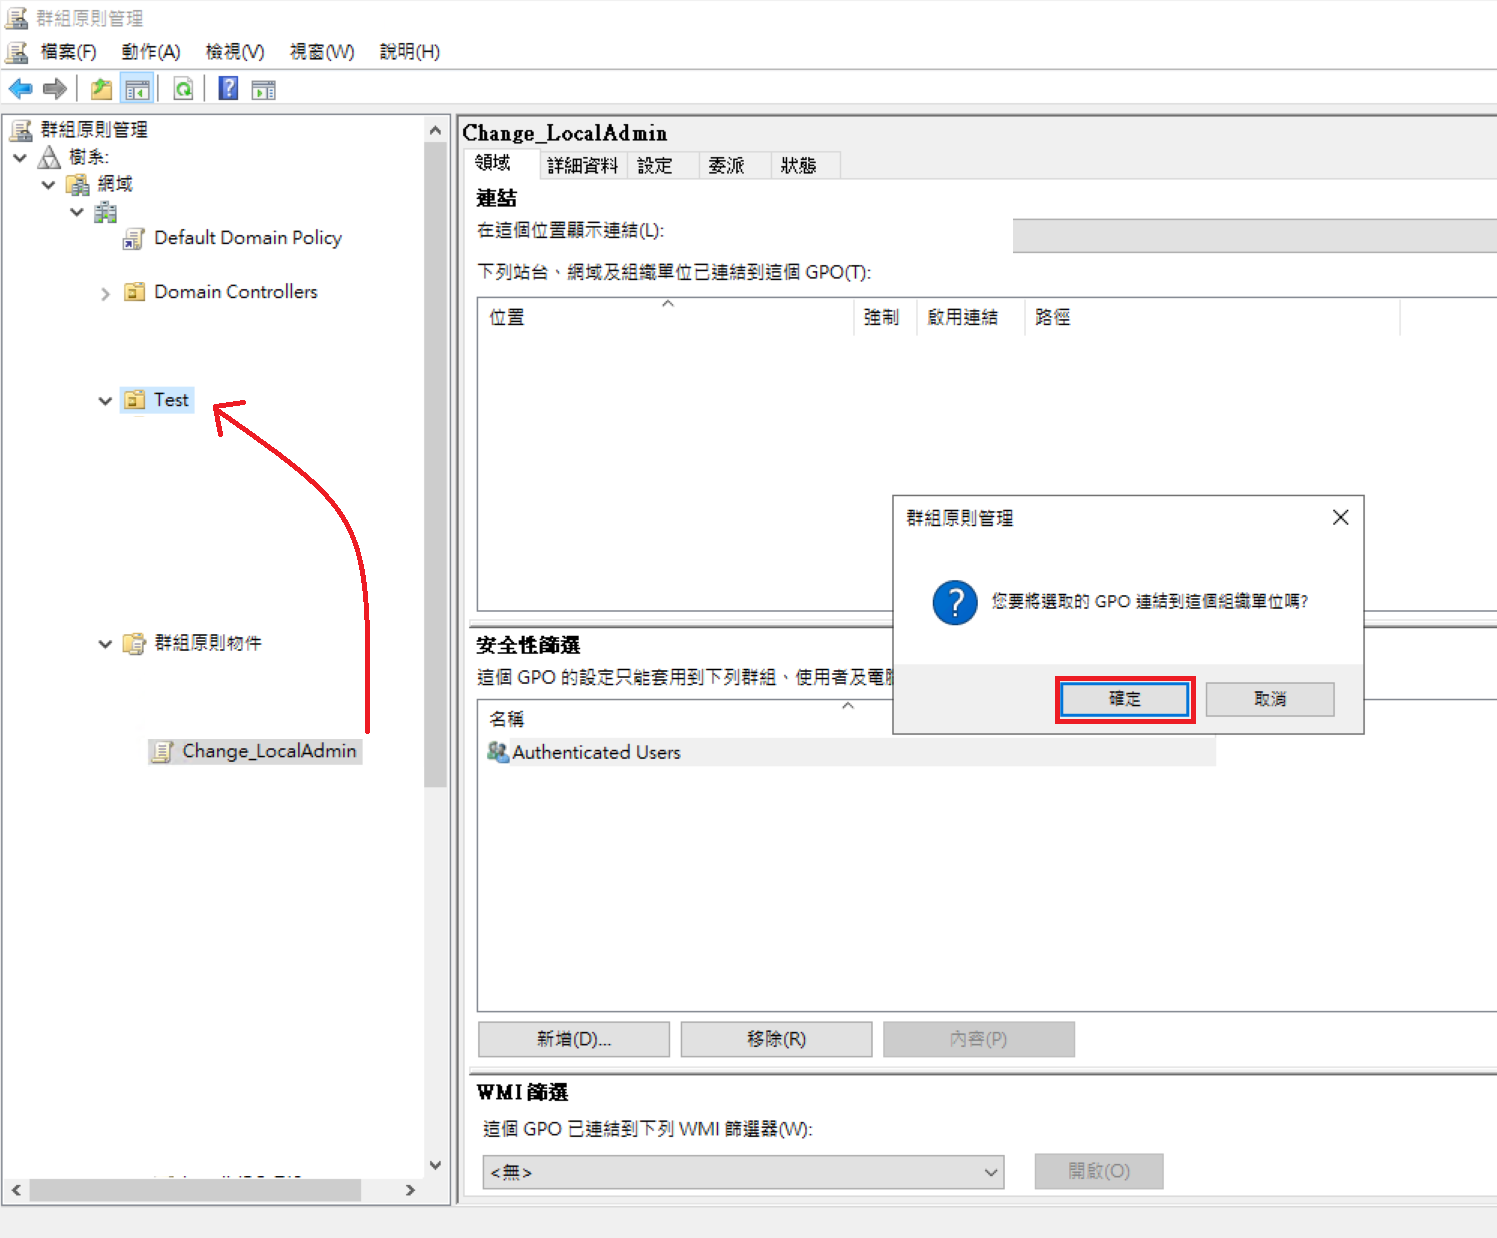 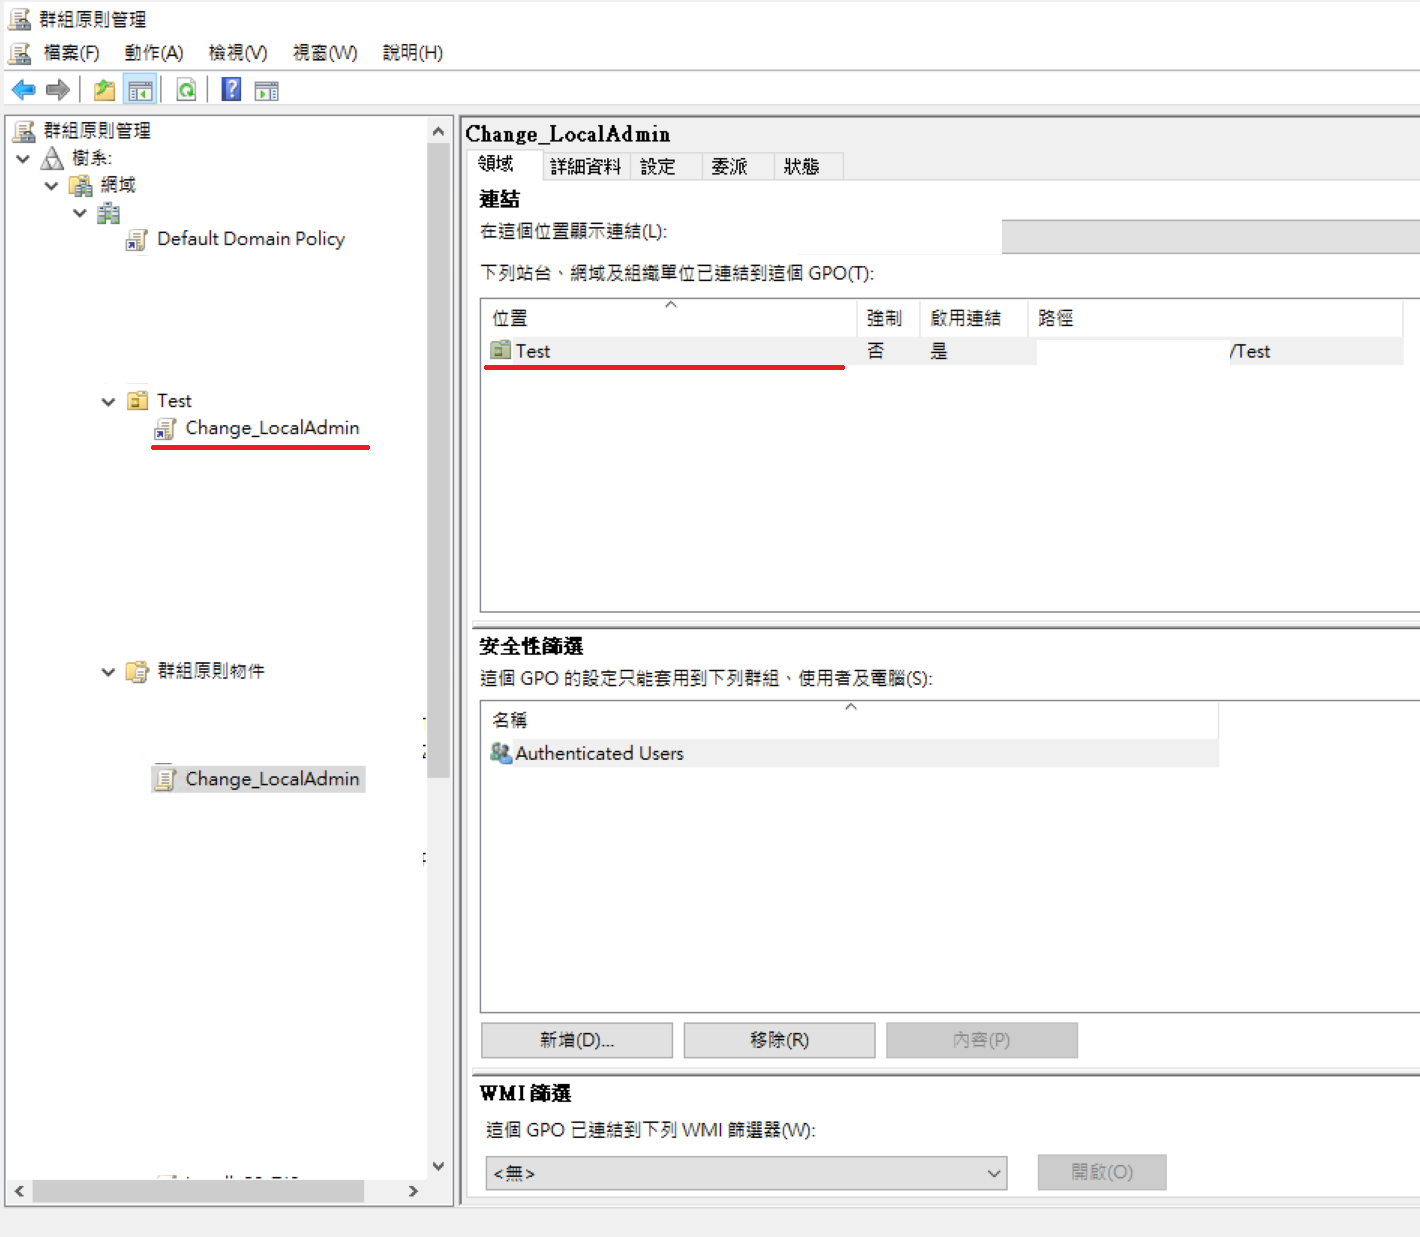 ### 反向檢查 我們到此Test OU的電腦上,執行 gpupdate /force ``` gpupdate /force ``` 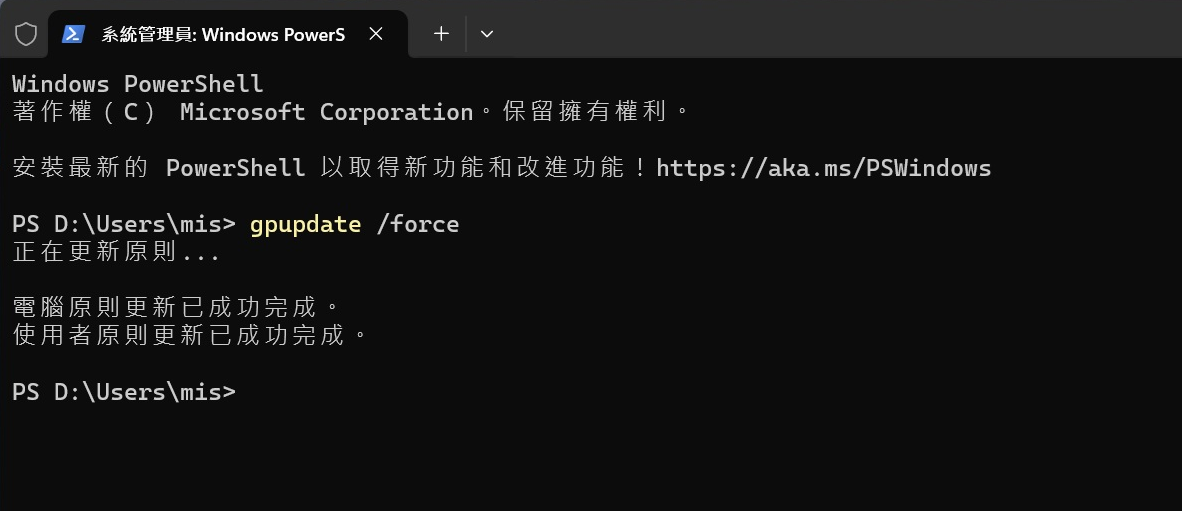 再執行 gpresult /R,確認 GPO 是否有套到,這樣就可以了喔。 ``` gpresult /R ``` 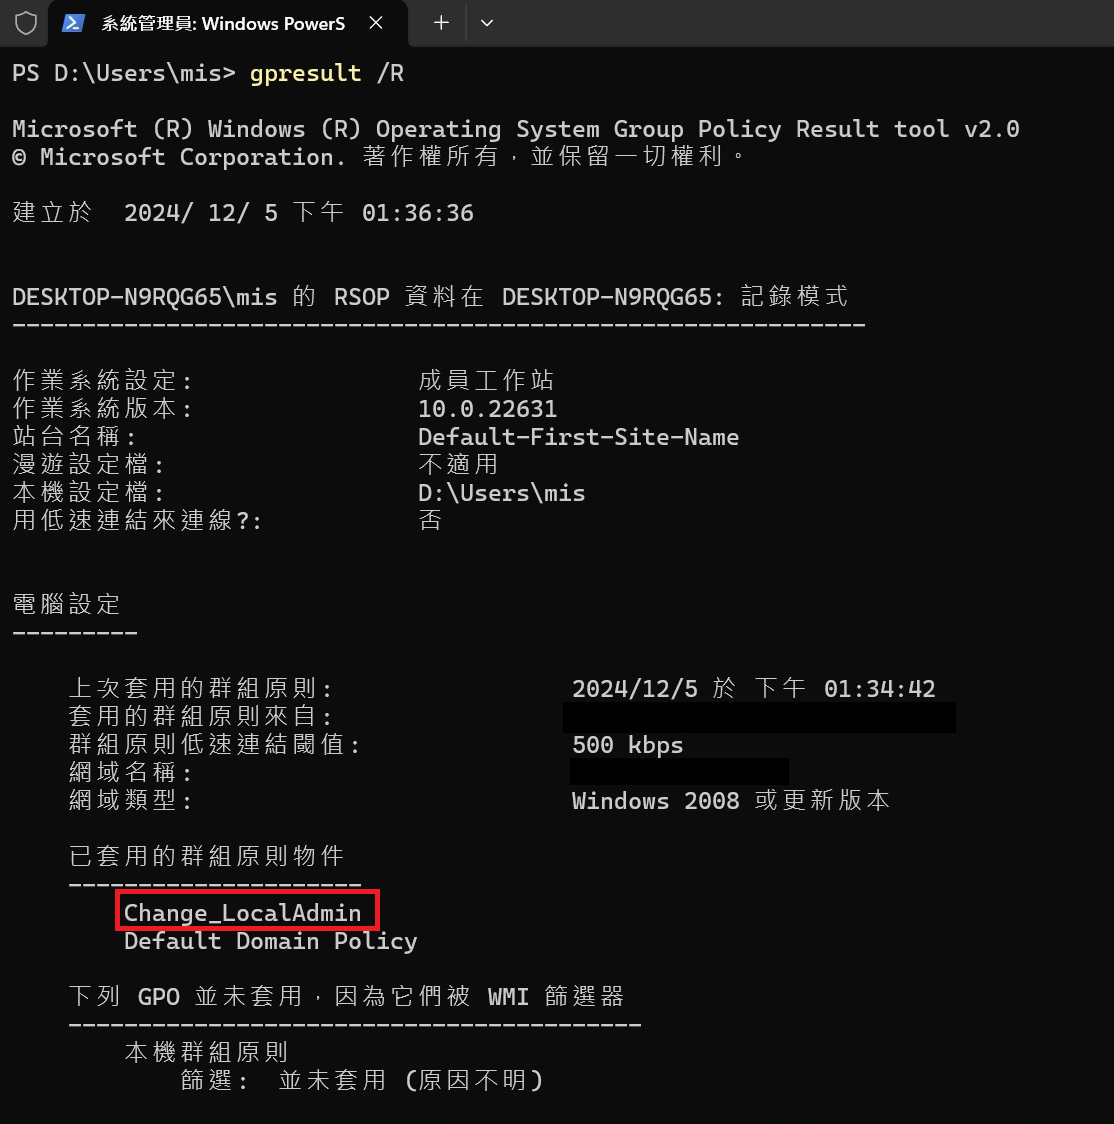 # Windows Software Raid # Windows Software Raid - Legacy MBR ### 前言 上次寫到了Linux的Software Raid [https://mdfk.goddamn.idv.tw/books/linux/page/linux-software-raid-mdadm](https://mdfk.goddamn.idv.tw/books/linux/page/linux-software-raid-mdadm) 相對於Linux現在在UEFI Bios上Sofrware Raid設定起來很方便,現在的Windows Software Raid在UEFI Bios上操作起來就如同Legacy Bios上的Linux Software Raid一樣很麻煩,此篇先回顧一下"想當年" Legacy Bios上Windows Software Raid是如何建立的,下一篇再來談現在UEFI Bios上面如何建立。 But ...... 一定要先說在前面,在Windows 2003那個年代除非使用Hardware Raid Card否則是沒什麼更好的Raid選擇,一些最便宜的Server大多都只能用這個方式來達成資料冗餘,但在Windows Software Raid在Intel® 快速儲存技術(Intel RST / IRST / RSTe / VROC)技術出來之後,現在Windows Software Raid在實務上基本上**完全沒有人會去使用**,如今一台Workstation等級的機器就算沒有Harware Raid Card都完全支援Intel Software Raid,比起Windows Software Raid來說好用簡單太多Performance又好,這種Windows Software Raid可謂是時代的眼淚,所以基本上此篇分享就是個單純完全無用的技術分享。 **╮(╯_╰)╭** ### 設定方式資料來源 : [https://learn.microsoft.com/en-us/troubleshoot/windows-server/backup-and-storage/mirror-system-boot-partition-raid1](https://learn.microsoft.com/en-us/troubleshoot/windows-server/backup-and-storage/mirror-system-boot-partition-raid1)
#### 測試環境 鍵人我使用Hyperv第一代來模擬Legacy Bios環境,HDD1先安裝好Windows 2003 R2 OS,HDD2為同大小完全新的HDD 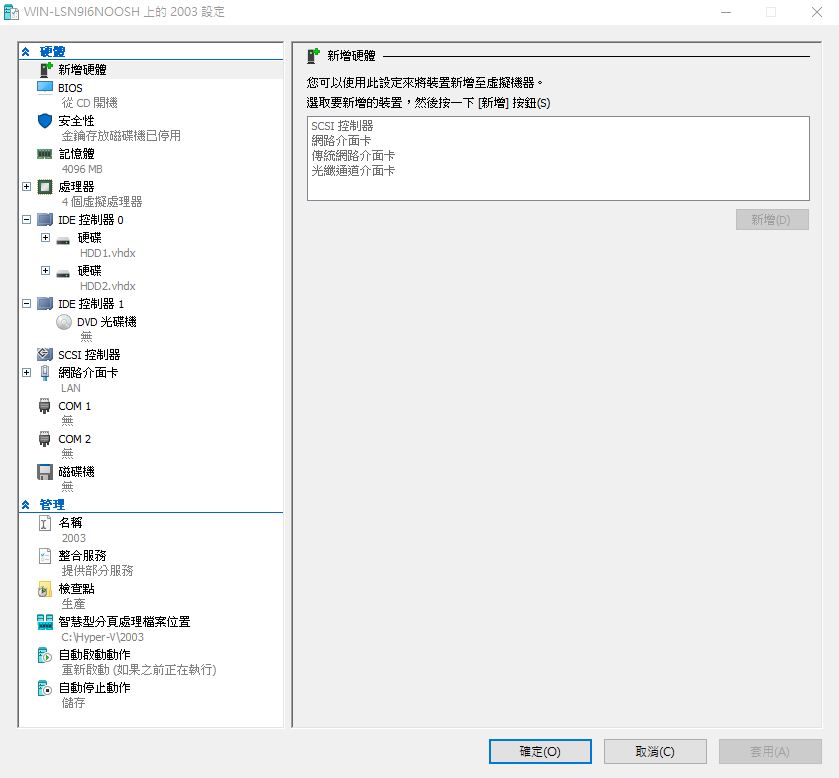 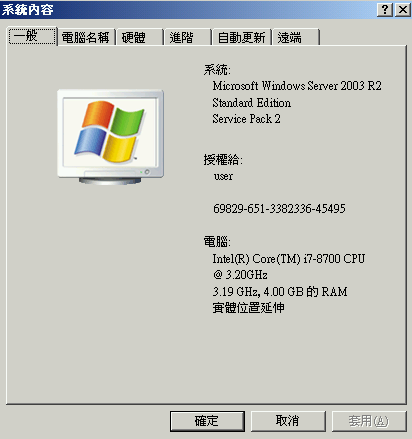 #### 建立鏡像磁碟(Mirror) 至 "電腦管理" => "磁碟管理" 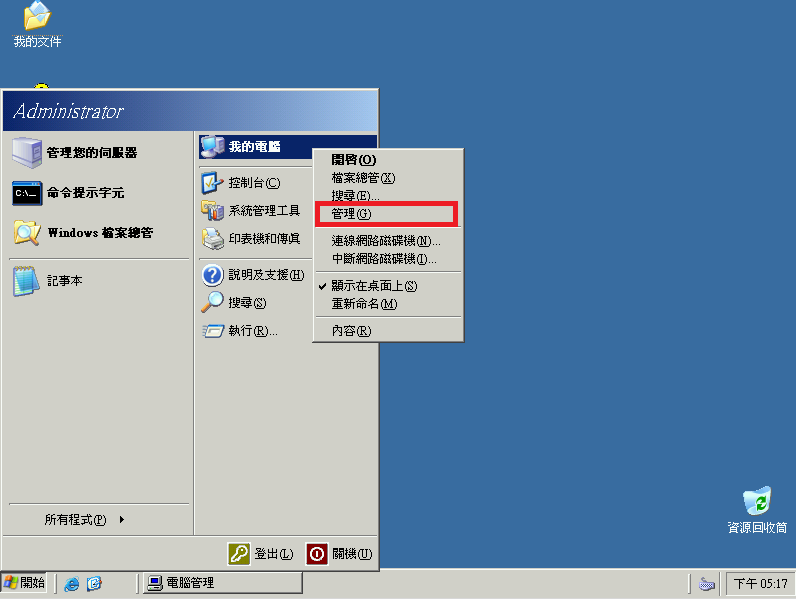 可看到 磁碟1 (HDD2) 是完全乾淨的磁碟 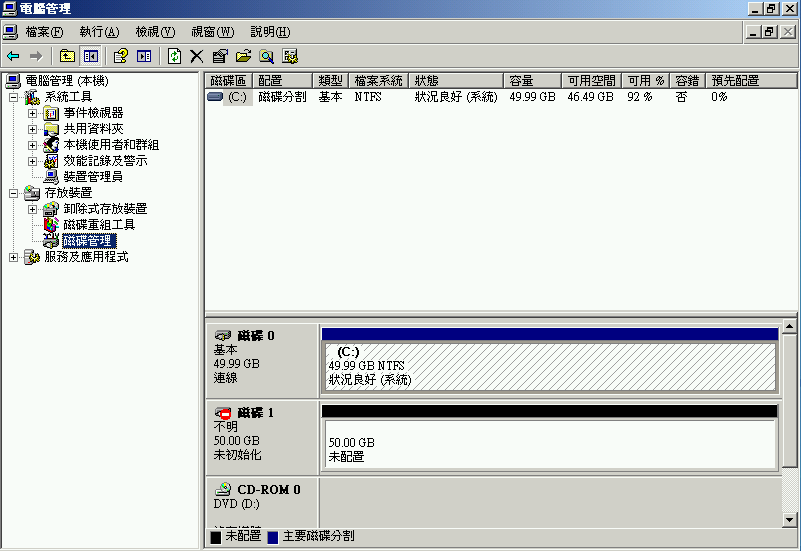 磁碟1 右鍵 => 初始化磁碟 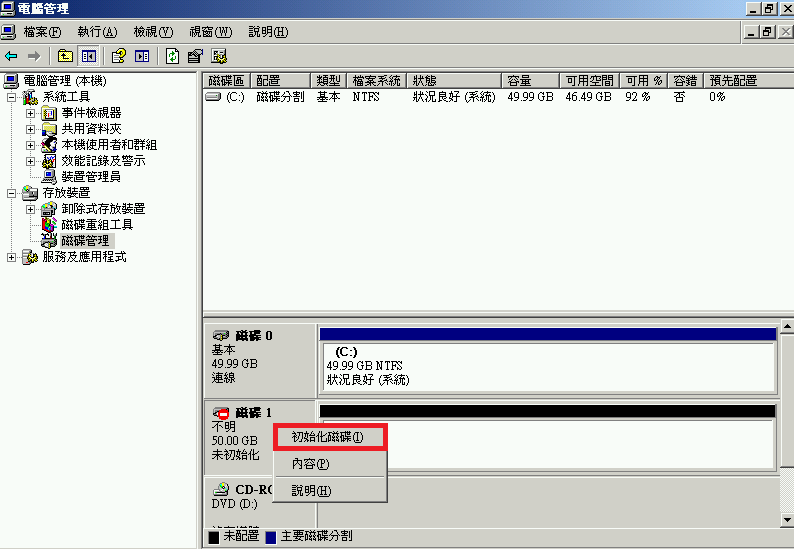 磁碟0 (HDD1) 右鍵 => 轉換成動態磁碟 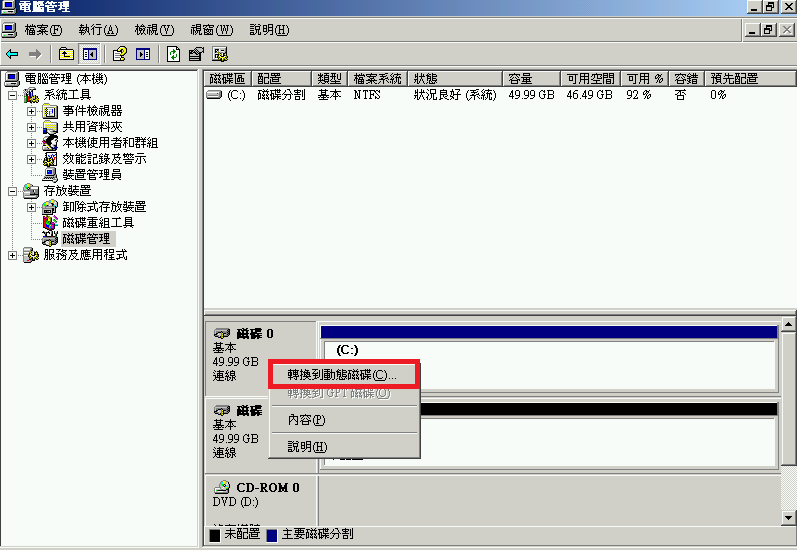 將兩顆磁碟都轉換成動態磁碟,完成後將重新開機 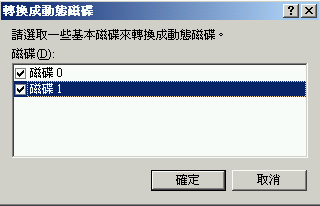 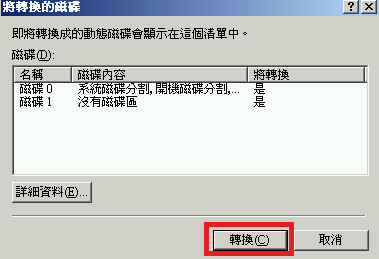 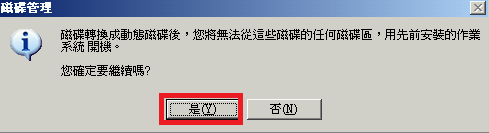 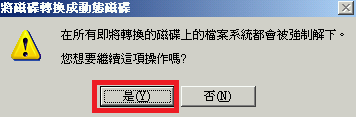 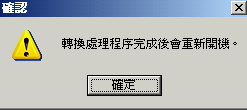 重開機後,再回到磁碟管理,磁碟0 上右鍵 "新增鏡像" 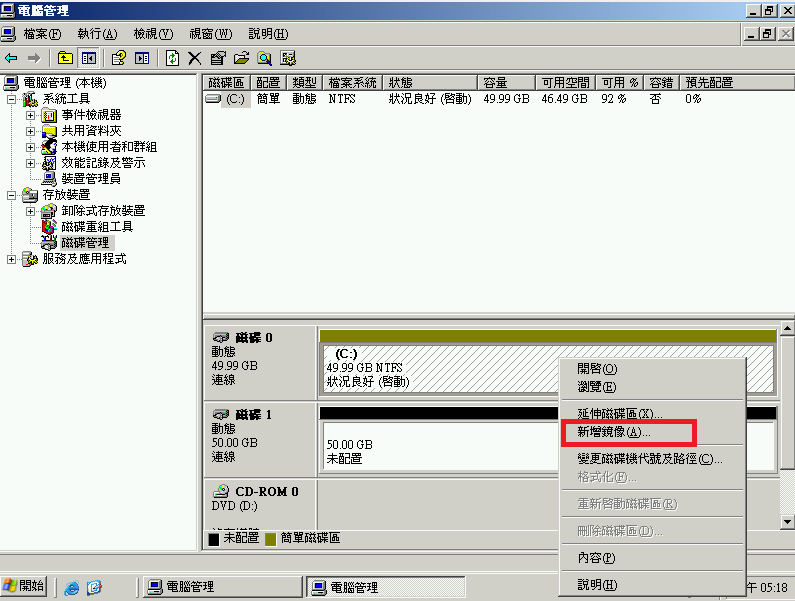 選取磁碟1(HDD2)作為鏡像目標 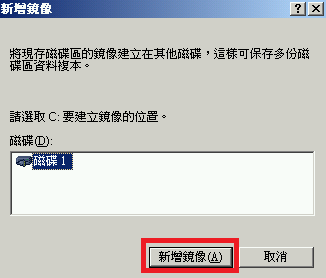 靜候Mirror同步完成 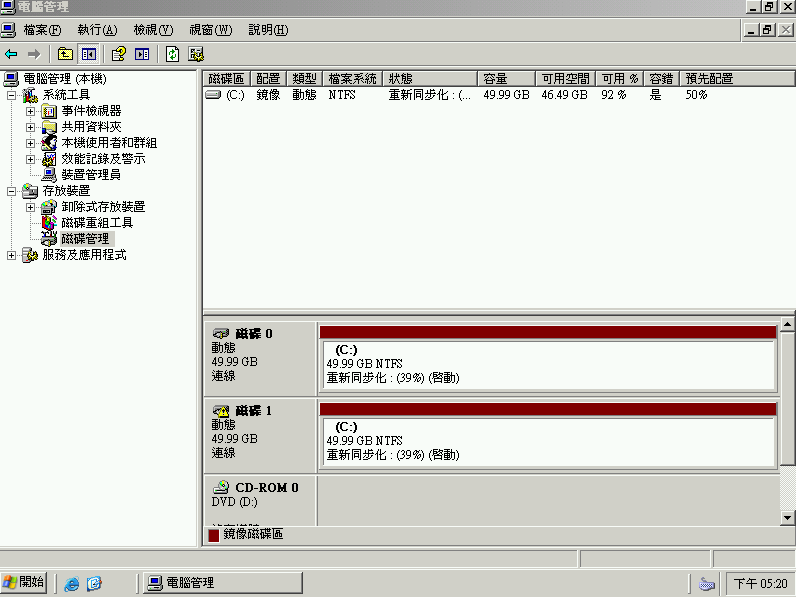 Mirror完成 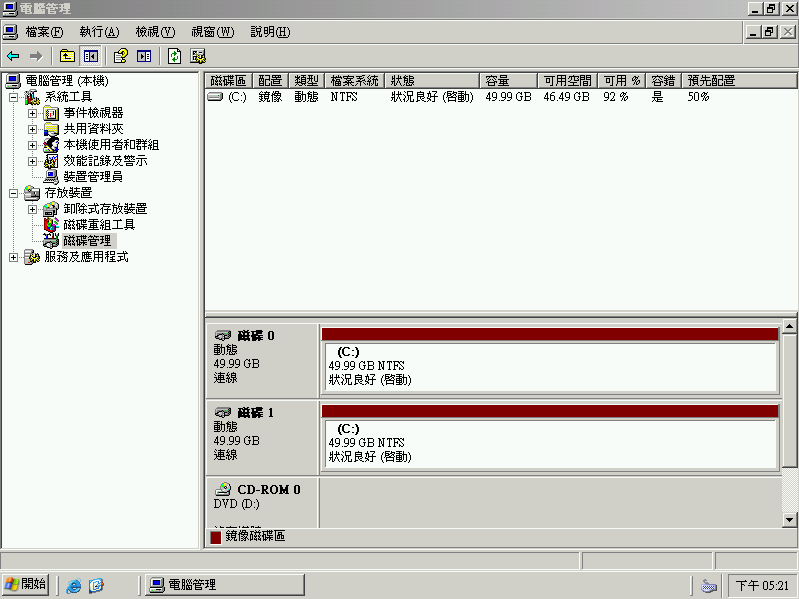 ### 磁碟故障測試 先在桌面上建立一個文字檔,來確認Raid功能是否正常 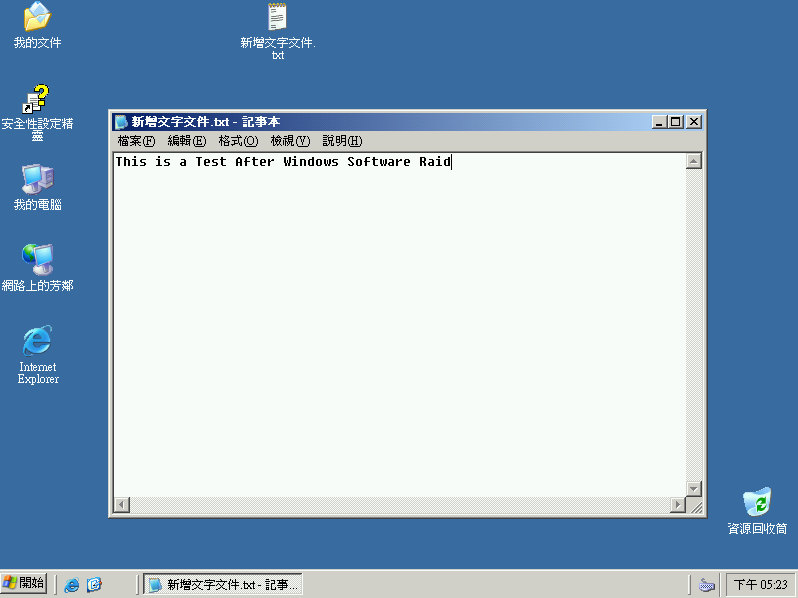 關機,將HDD1移除 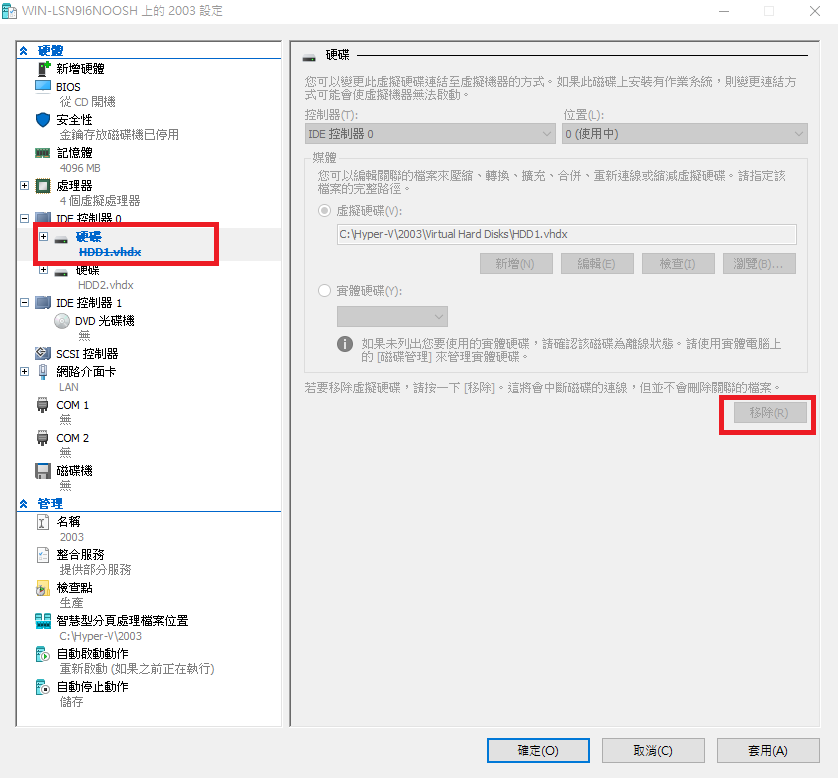 開機正常,資料正確,來加上一筆資料 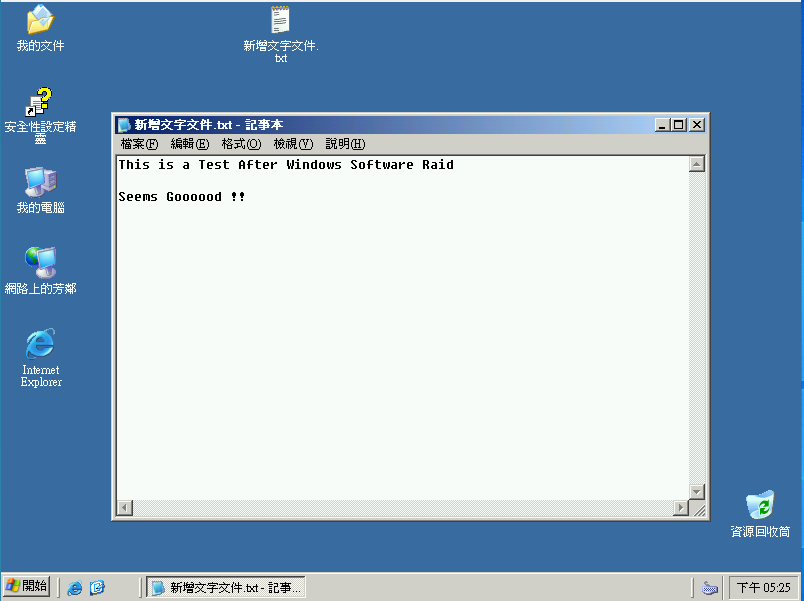 裝置管理員顯示只有一顆HDD  磁碟管理顯示一顆HDD遺失  關機,我把HDD2改為IDE 0,增加一顆HDD3設為IDE 1  開機正常,裝置管理員顯示為2個HDD 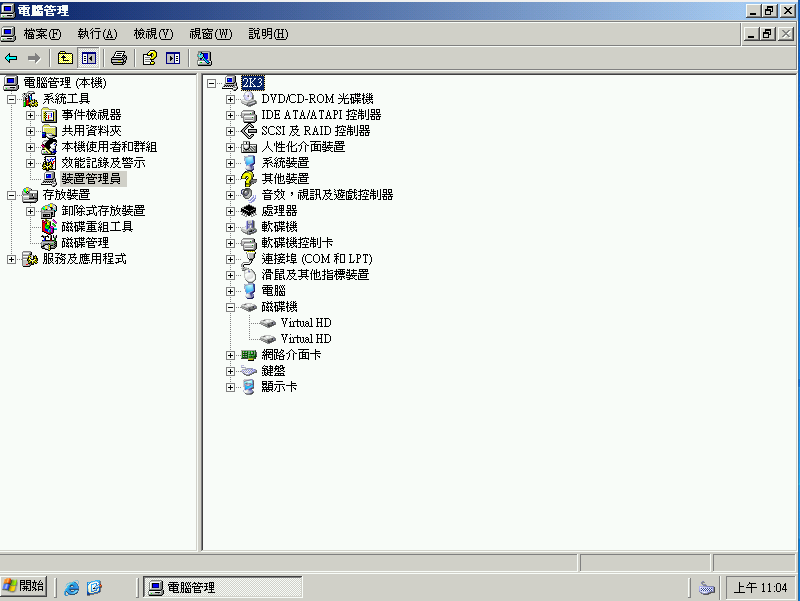 磁碟管理員顯示磁碟1 (HDD3)未配置,Mirror失敗 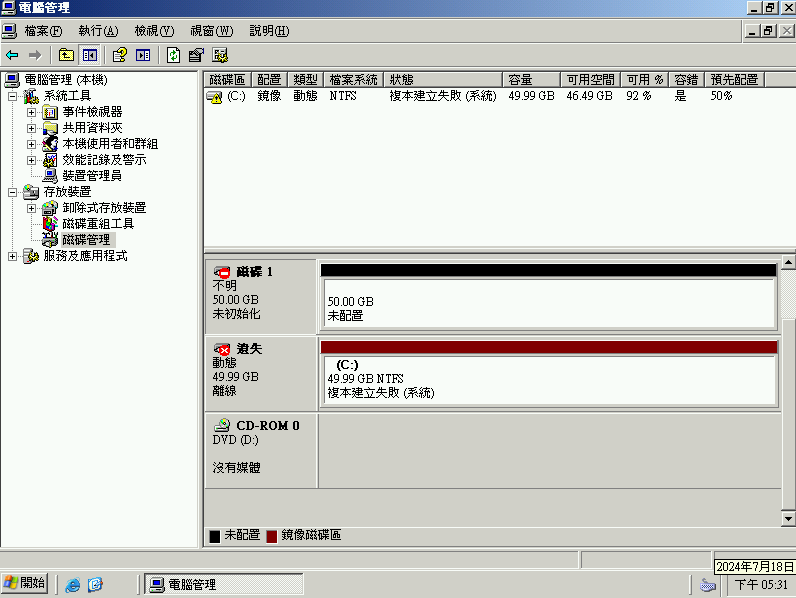 初始化磁碟1 (HDD3) 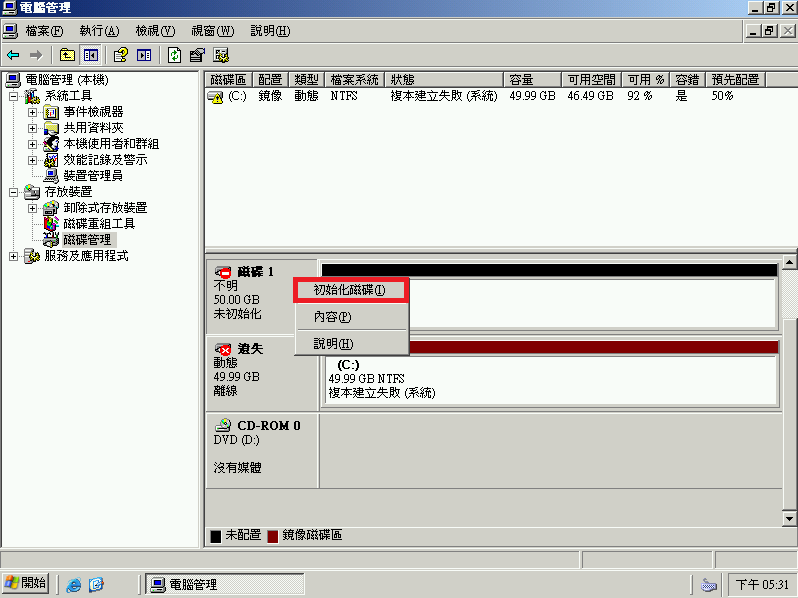 移除原本的Mirror 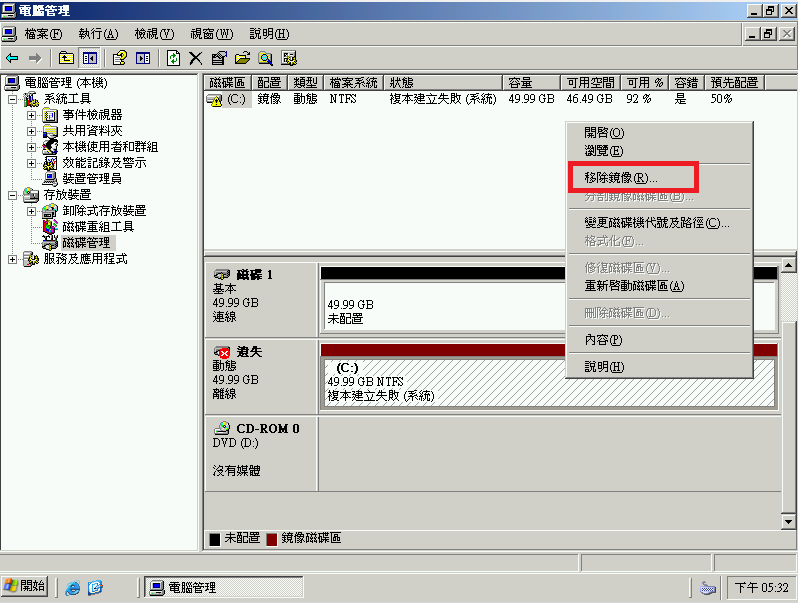 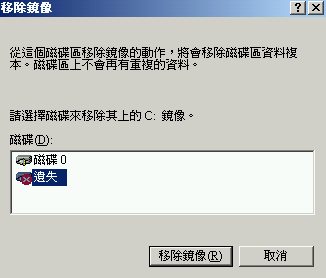 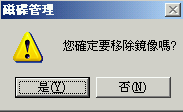 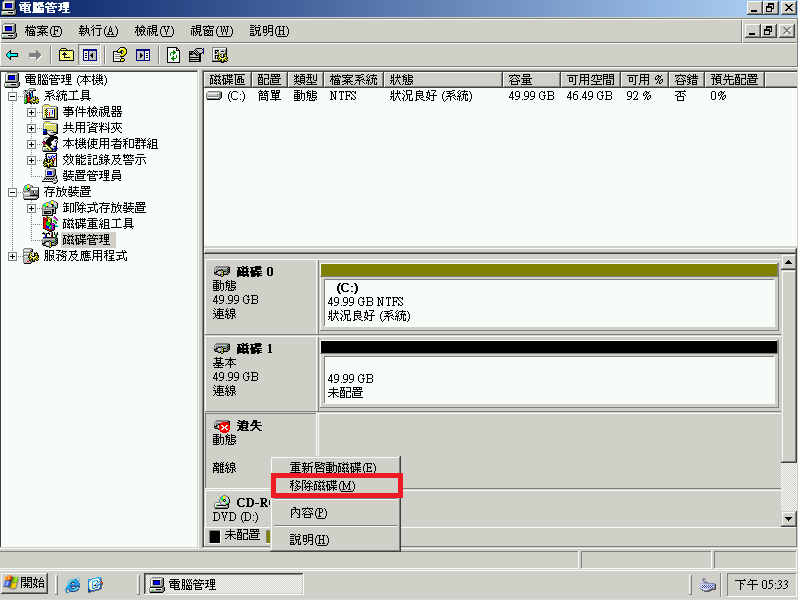 重建Mirror (步驟請參照上面不贅述)  ### 切換磁碟開機與重新同步 上面展示了磁碟故障時如何重建Mirror,但如果磁碟不是全死,要如何取出磁碟檢測後讓Raid重新同步 ? 首先我們先到資料匣選項將隱藏檔顯示出來 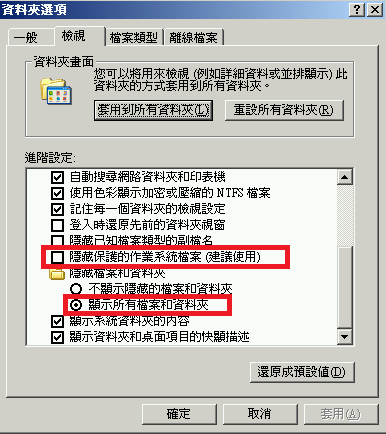 編輯C:\\boot.ini 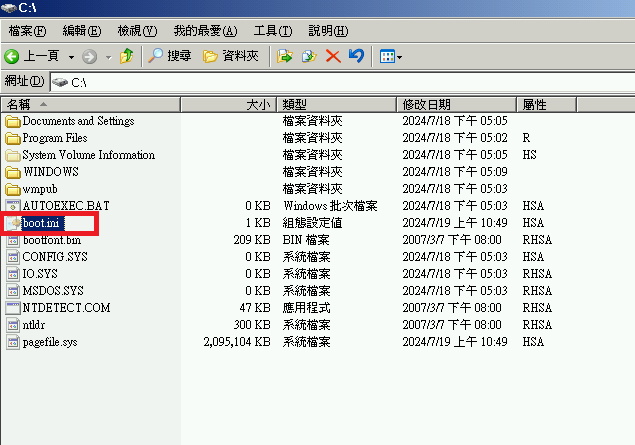 複製operating system到第二行,並修改 rdisk 與描述 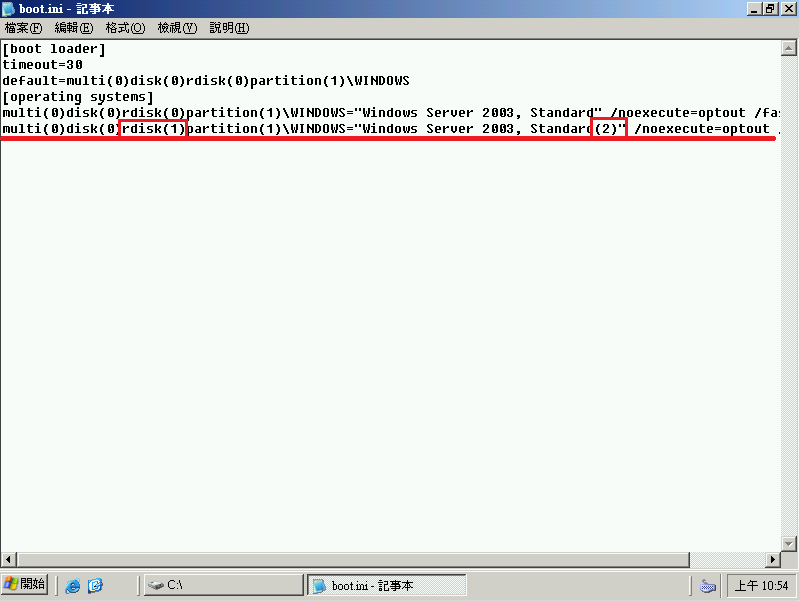 重新開機,出現開機選單就可以選擇你想用哪一顆磁碟開機了,在此我們先選擇用**HDD3**開機 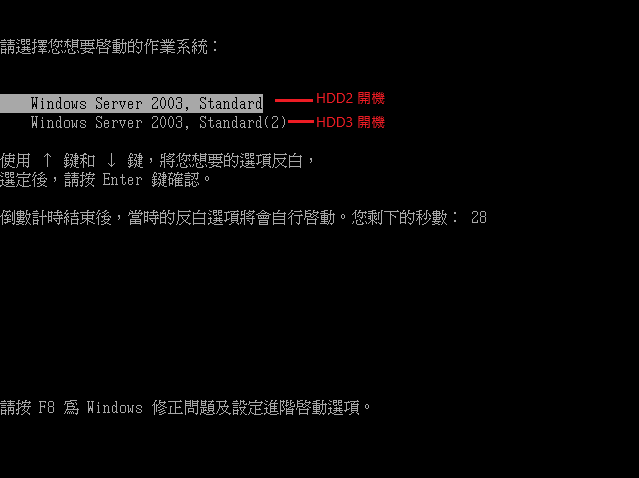 開進OS,桌面上的文字檔再加上一筆註記,我們即將測試移除HDD2 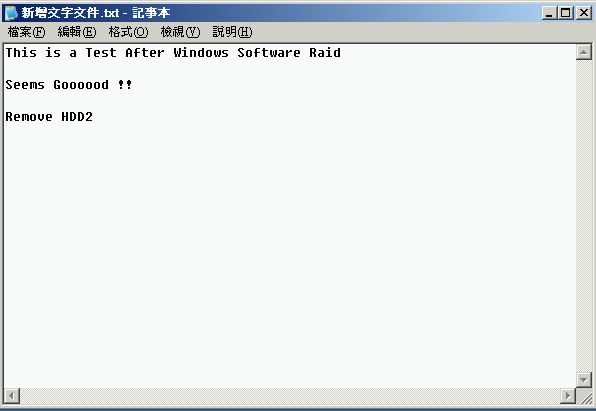 關機,移除HDD2 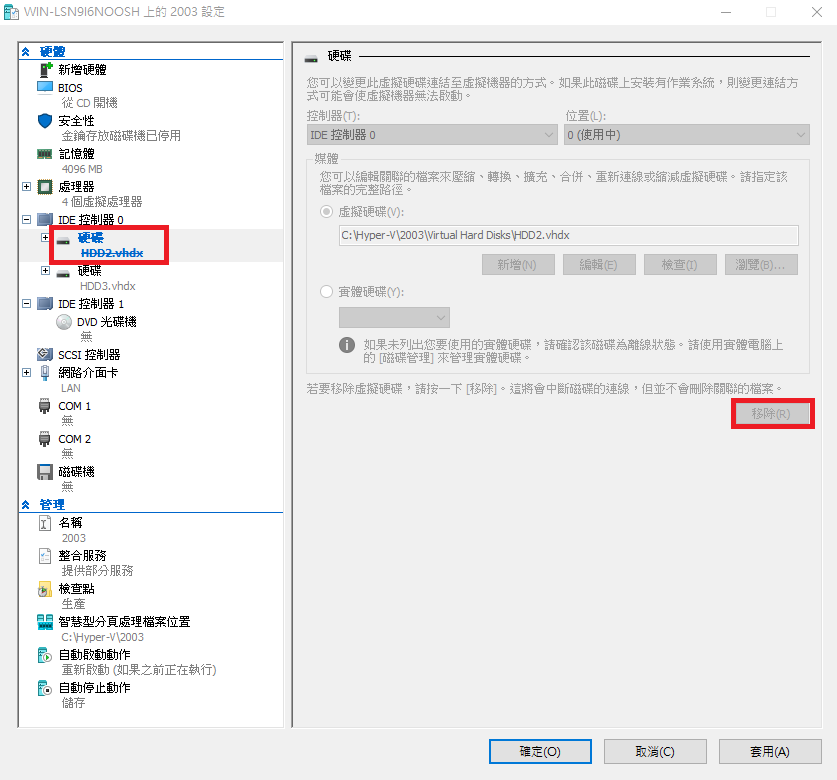 再次選擇使用**HDD3**開機 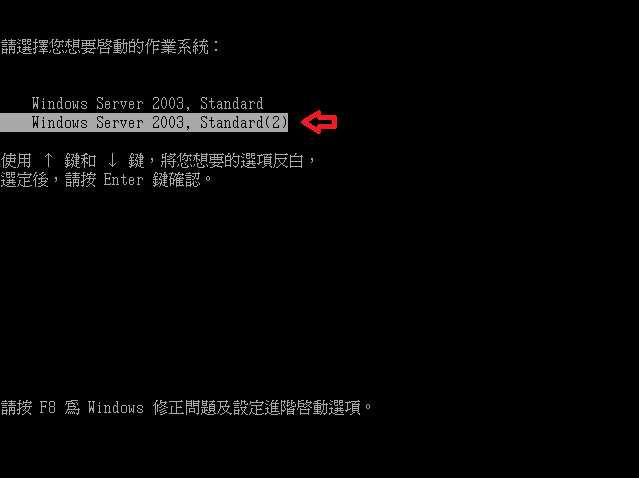 **錯誤 !!** 這是正常的,因為IDE 0不見了,所以原本 IDE 1 的 HDD3 在系統上被當作 IDE 0了 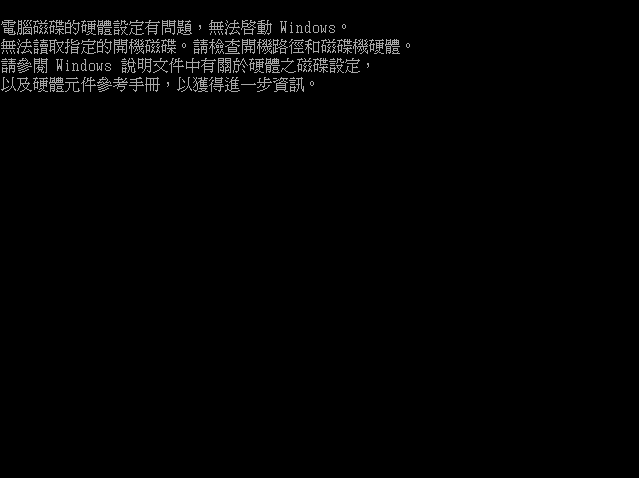 選擇第一個開機 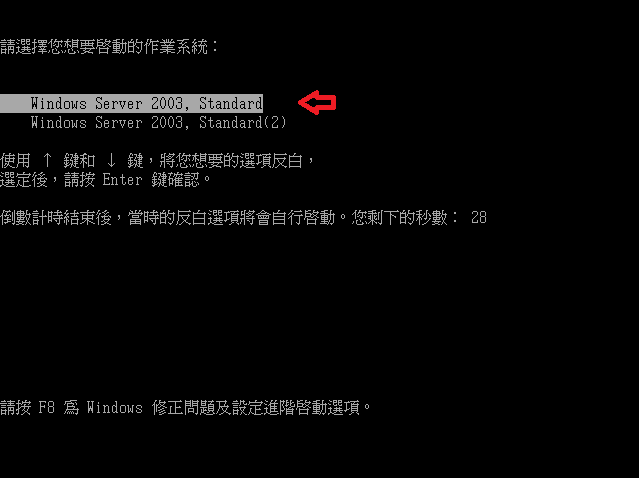 開機正常,只剩下一顆HDD  HDD3被當作是"磁碟0"了 (因為是IDE 0) 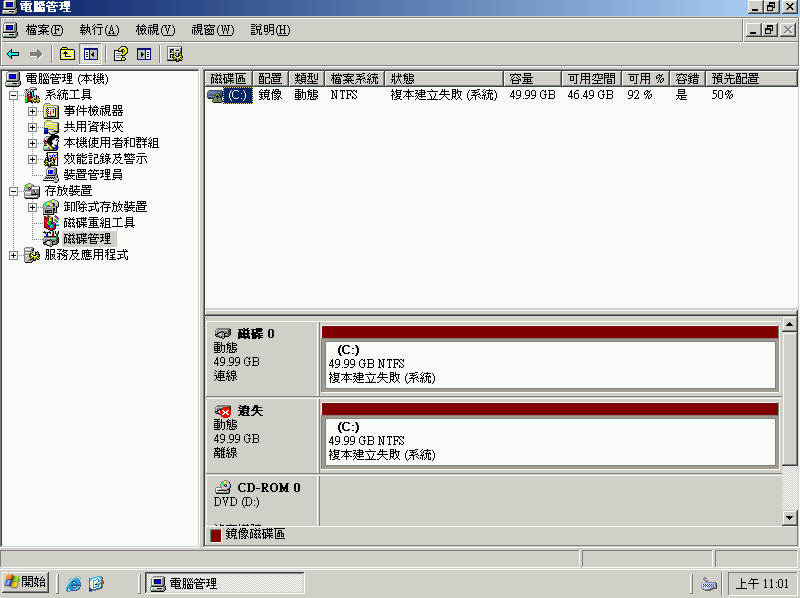 確認資料正確  關機,把HDD2加回來 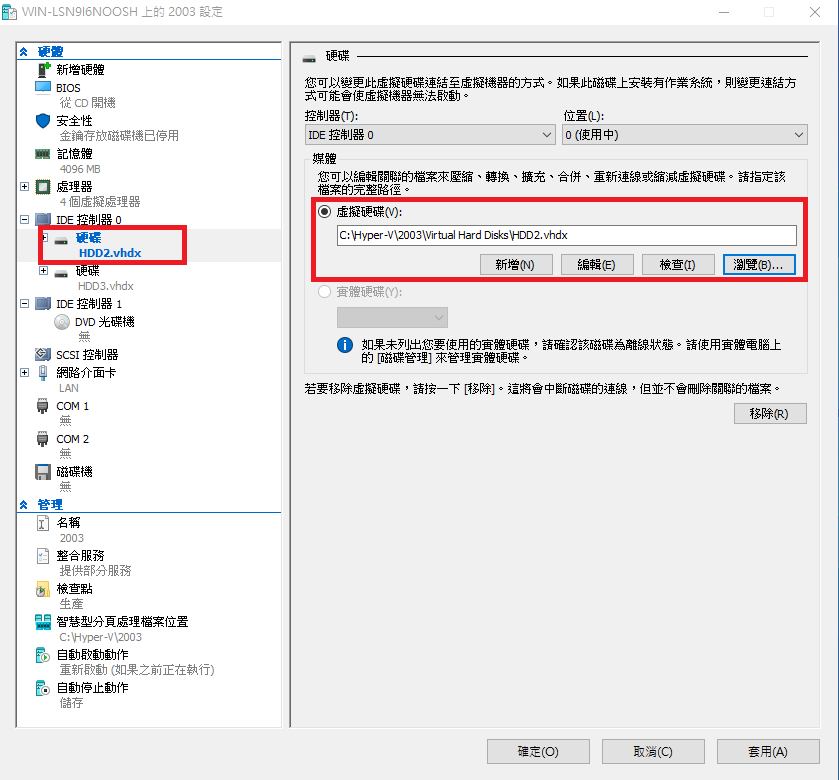 使用HDD2開機  **BSOD !!** **(ノ゚0゚)ノ~** 這是正常的,因為HDD2的資料不同步 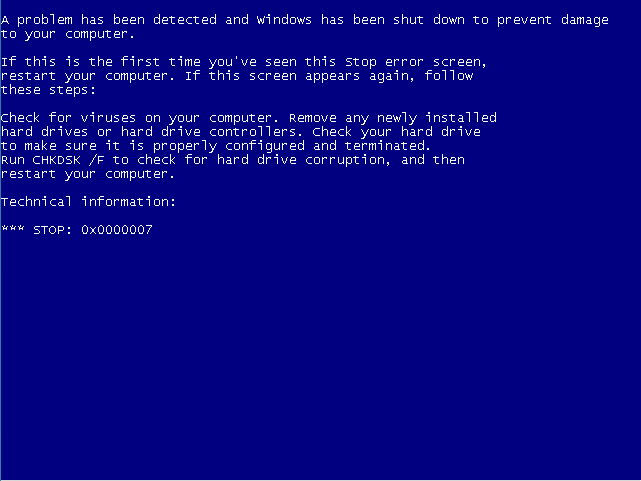 使用HDD3開機  開機正常,磁碟顯示為2  磁碟管理顯示"磁碟0" (HDD2) Raid不同步 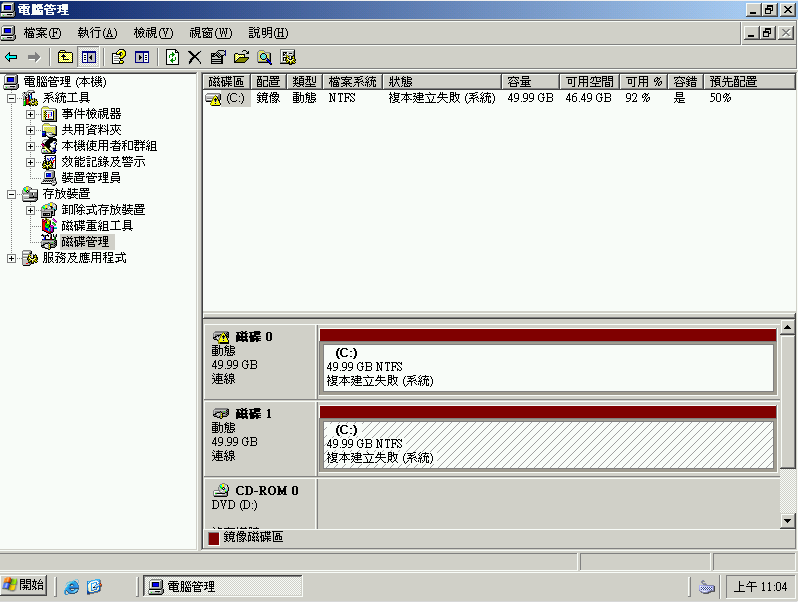 在此我們桌面上的文字檔再加上一筆註記,我們來測試Rebuild HDD2 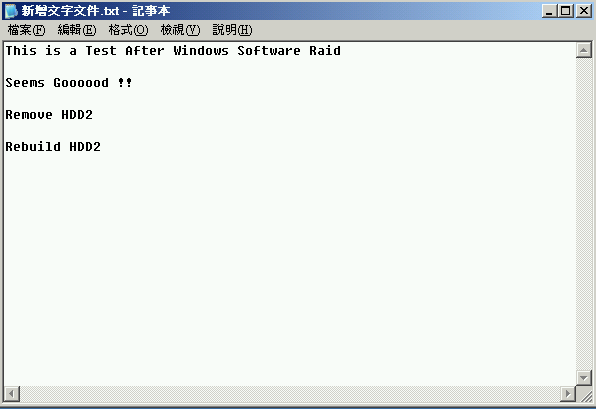 "磁碟0" (HDD2) 點選 "重新啟動磁碟區" 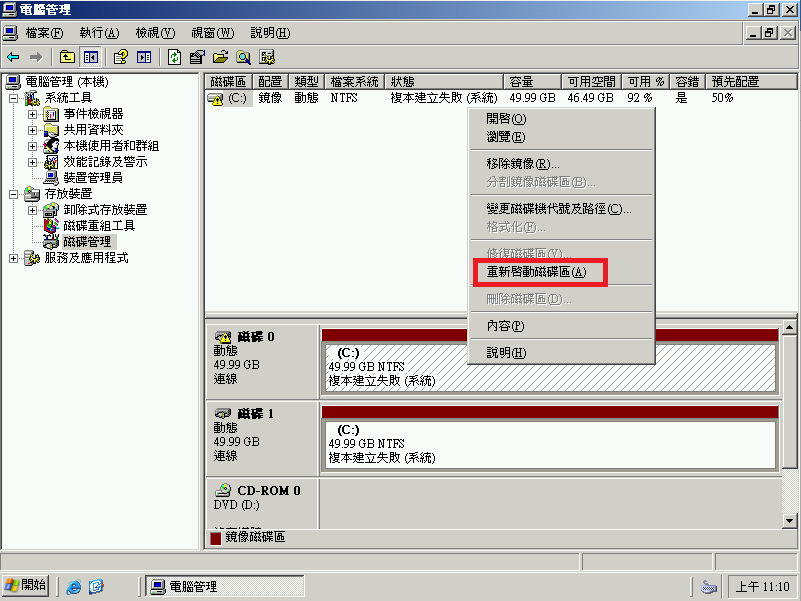 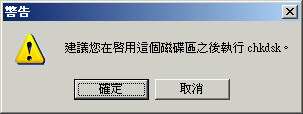 Raid Rebuild 中 ......  靜待Raid Rebuid完成 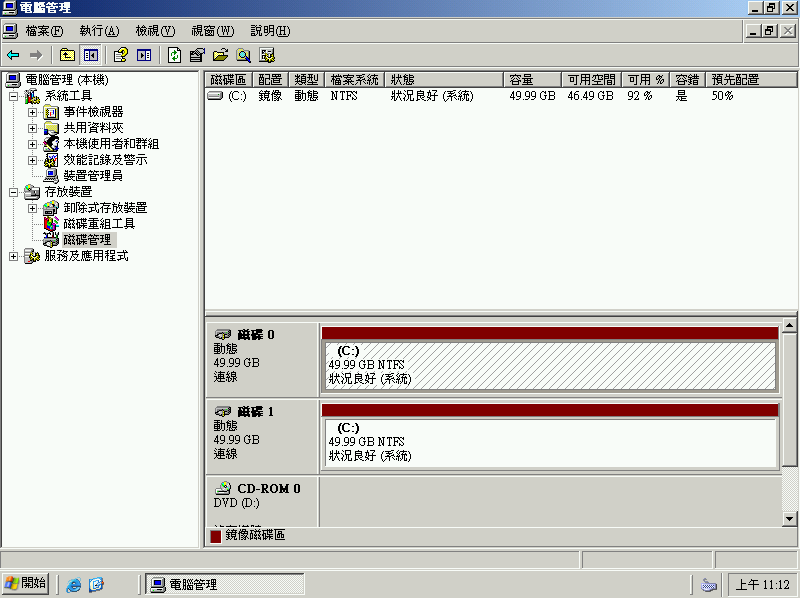 重新開機,選擇HDD2開機  **開機正常 !! 資料正確 !! ⸜(。˃ ᵕ ˂ )⸝♡**  ### 後話 前面說過,在Windows 2003那個年代除非使用Hardware Raid Card否則是沒什麼更好的Raid選擇,一些最便宜的Server大多都只能用這個方式來達成資料冗餘,但在Windows Software Raid在Intel® 快速儲存技術(Intel RST / IRST / RSTe / VROC)技術出來之後,現在Windows Software Raid在實務上基本上**完全沒有人會去使用**,如今一台Workstation等級的機器就算沒有Harware Raid Card都完全支援Intel Software Raid,比起Windows Software Raid來說好用簡單太多Performance又好,這種Windows Software Raid可謂是時代的眼淚,現在也許在某些"特殊"的情境下或許會對大家有幫助......吧 (?) 至於UEFI上設定Windows Software Raid的複雜程度就比MBR上高了不少,欲知詳情下回分解 **( ˶°ㅁ°) !!** # Windows Software Raid - UEFI GPT ### 前言 延續之前 [Windows Software Raid - Legacy MBR 的技術分享](https://mdfk.goddamn.idv.tw/books/windows-server/page/windows-software-raid-legacy-mbr) ,Windows 2003年代還會有一些低階Server有機會那樣做,在Intel® 快速儲存技術(Intel RST / IRST / RSTe / VROC)技術出來之後,現在Windows Software Raid在實務上基本上**完全沒有人會去使用**,如今一台Workstation等級的機器就算沒有Harware Raid Card都完全支援Intel Software Raid,比起Windows Software Raid來說好用簡單太多Performance又好,這種Windows Software Raid可謂是時代的眼淚,此篇 Windows Software Raid - UEFI GPT 相較於 Legacy MBR 在設定上更加麻煩、實用性上更低,基本上就是分享一下現代的Windows Server還是可以在UEFI GPT上還是可以做Software Raid,但...你這輩子應該都不會這樣做。 ### 設定方式資料來源 : [https://learn.microsoft.com/en-us/troubleshoot/windows-server/backup-and-storage/set-up-dynamic-boot-partition-mirroring](https://learn.microsoft.com/en-us/troubleshoot/windows-server/backup-and-storage/set-up-dynamic-boot-partition-mirroring)
#### 測試環境 鍵人我使用Hyperv第二代來模擬UEFI GPT環境,HDD0先安裝好Windows 2022 OS,HDD1為同大小完全新的HDD,同時先刪除Recover磁區 (你真的在Server上用過Recover嗎 ?) **(¬\_¬")** 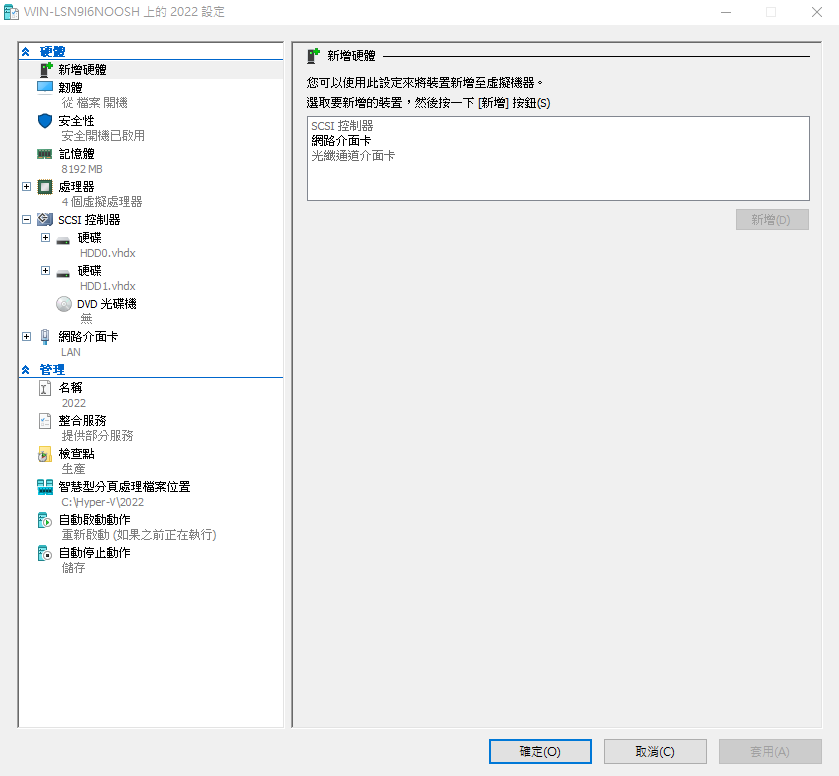 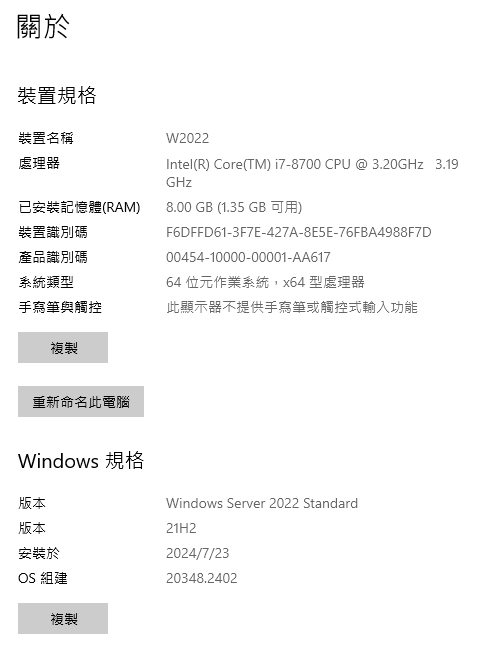 #### 建立鏡像磁碟(Mirror) 至 "電腦管理" => "磁碟管理",可看到 磁碟1 (HDD1) 是完全乾淨的磁碟 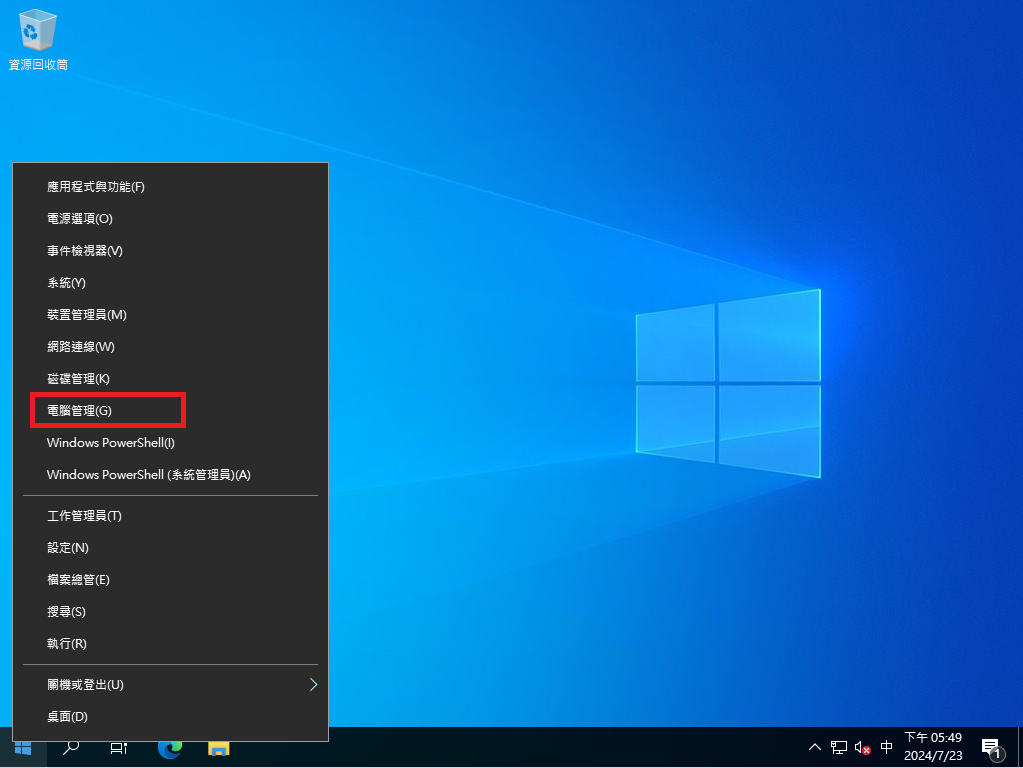 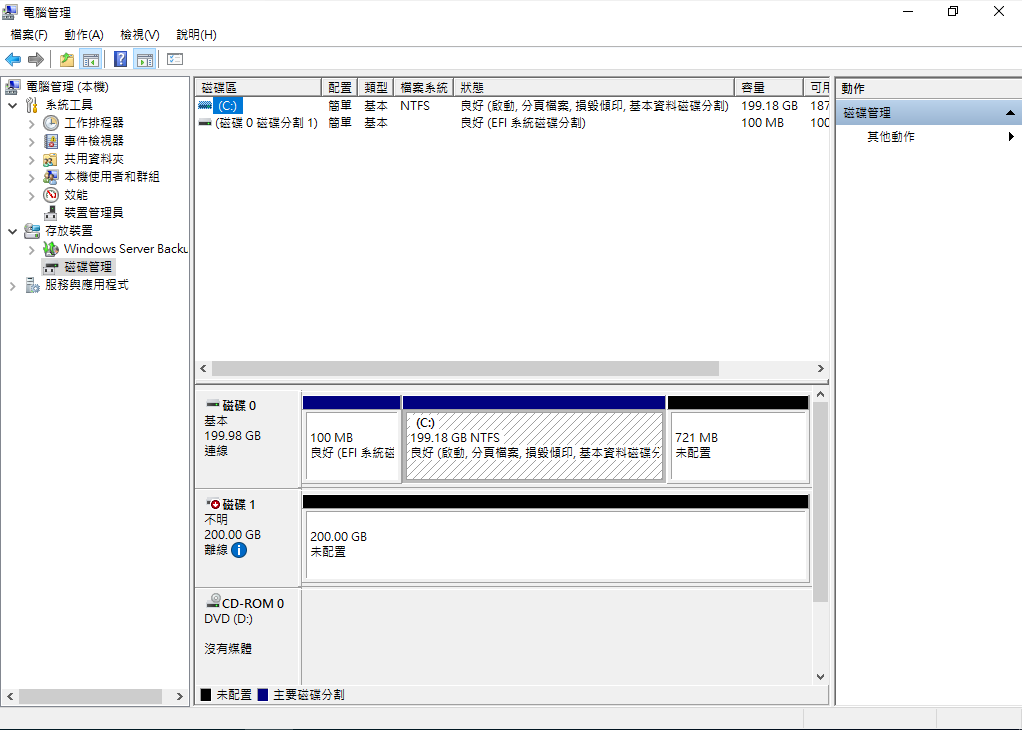 點及右鍵 => 連線 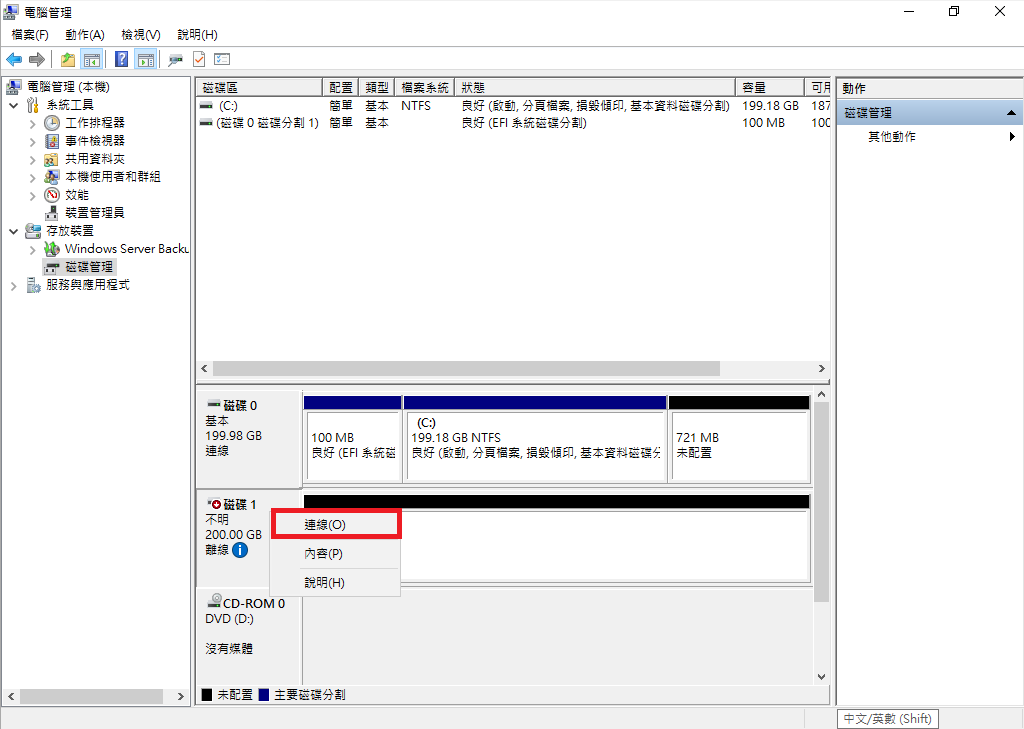 初始化磁碟 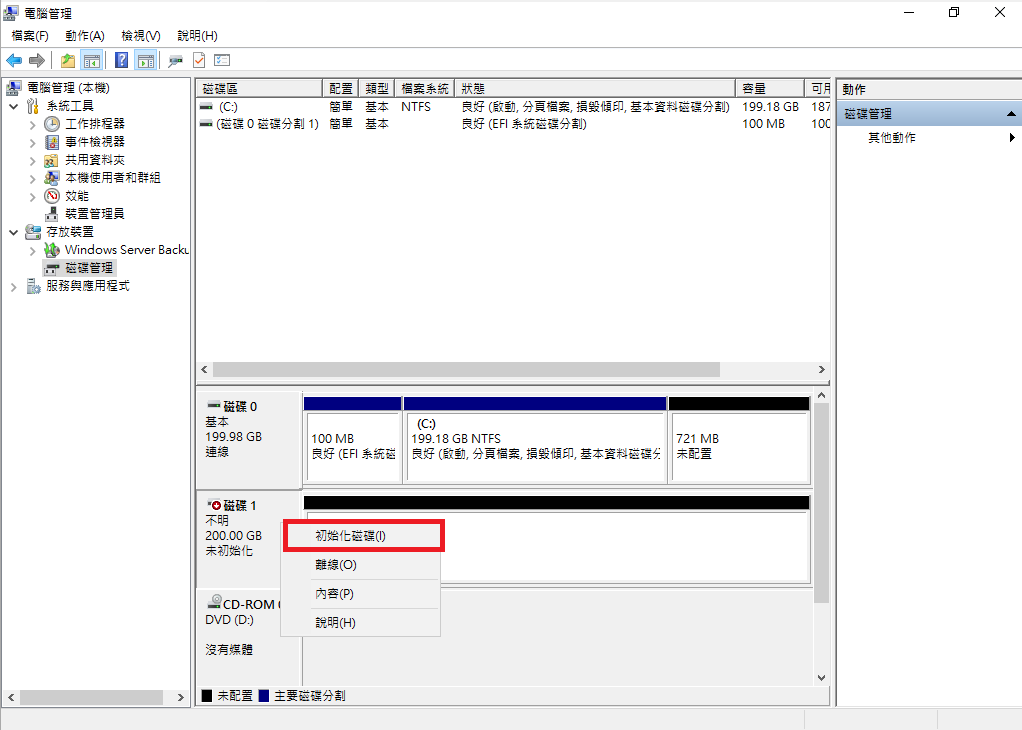 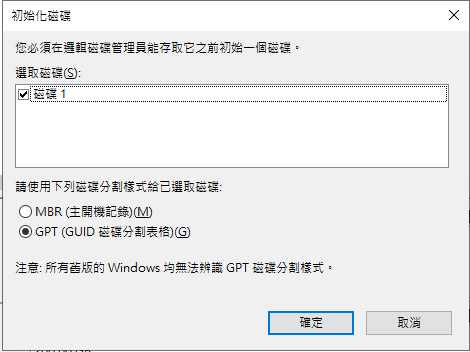 以"**系統管理者身分"**執行Powershell / cmd 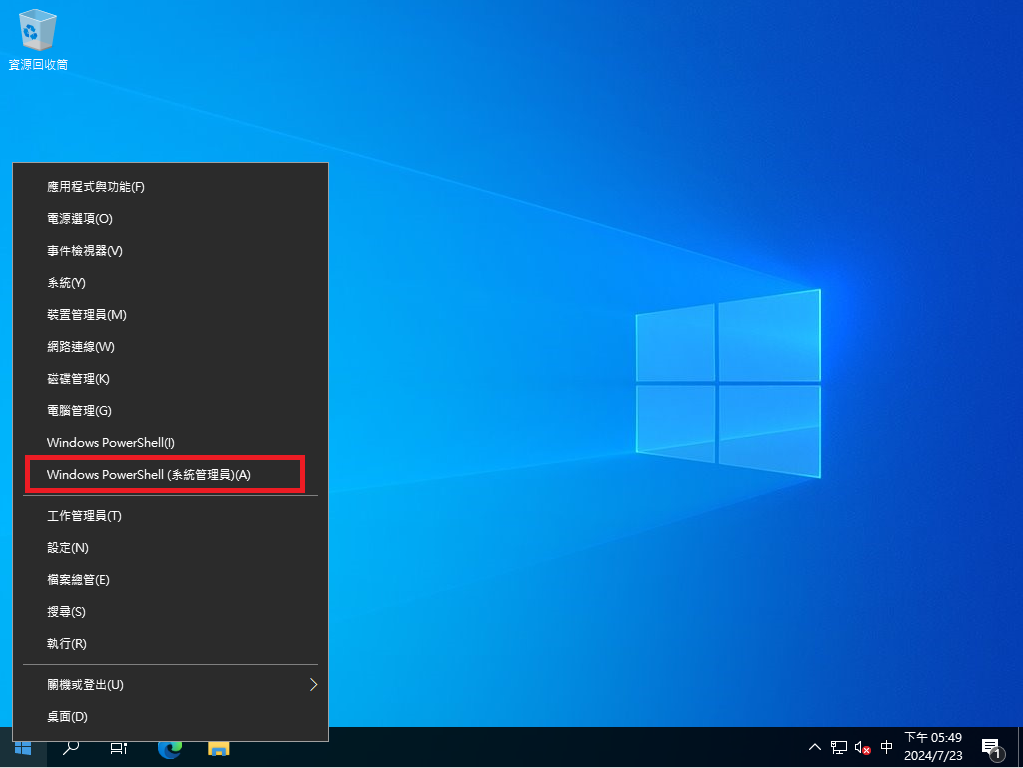 先刪除HDD1的MSR ``` diskpart list disk sel disk 1 list par sel par 1 delete par override list par ```  重新建立 EFI Boot磁區與MSR ``` sel disk 0 list par sel disk 1 create par efi size=100 create par msr size=16 list par ``` 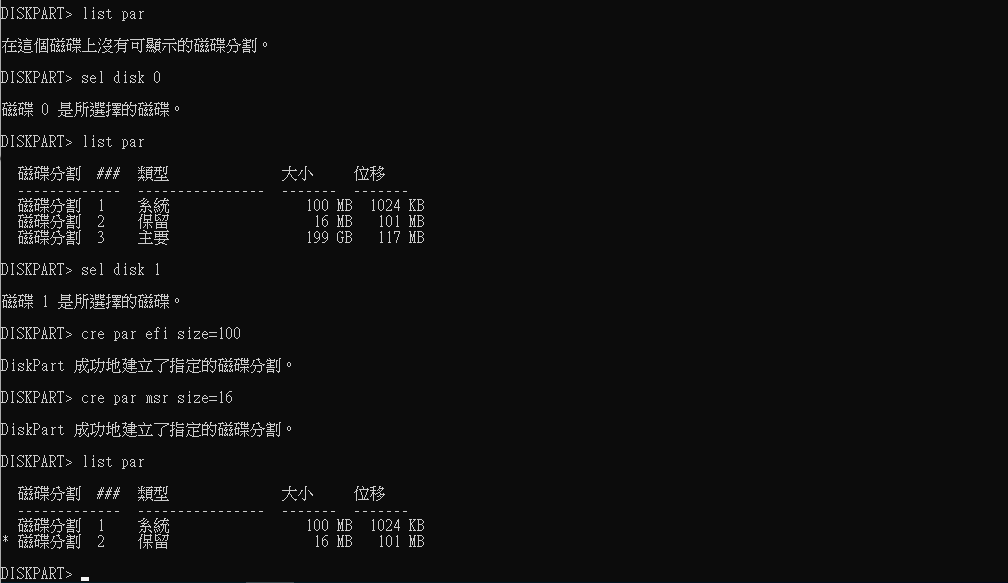 將 磁碟0、磁碟1 轉換為"動態磁碟"後,離開diskpart ``` sel disk 1 convert dynamic sel disk 0 convert dynamic exit ``` 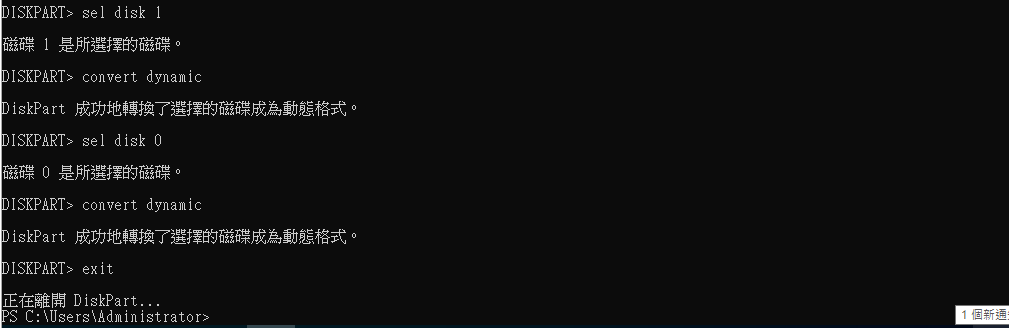 回到 磁碟管理,點選 磁碟0 上新增鏡像 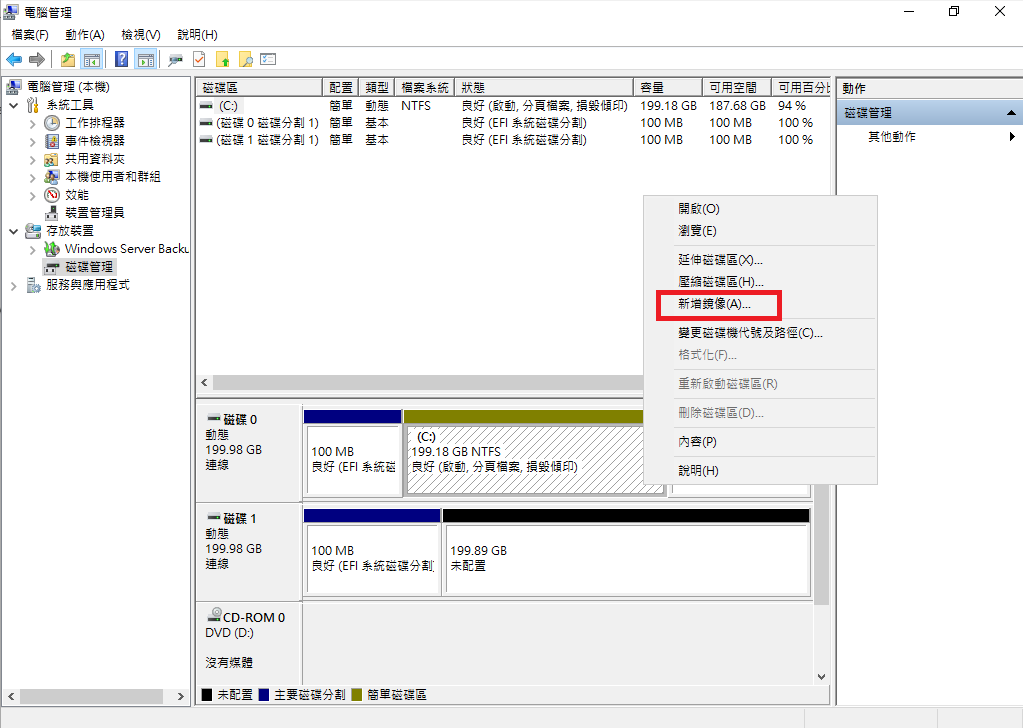 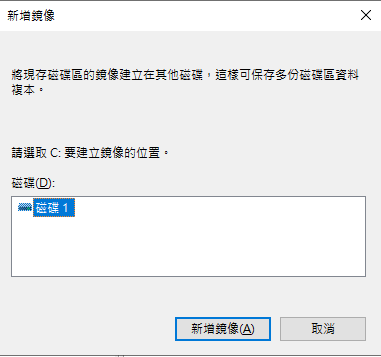 Mirror進行中 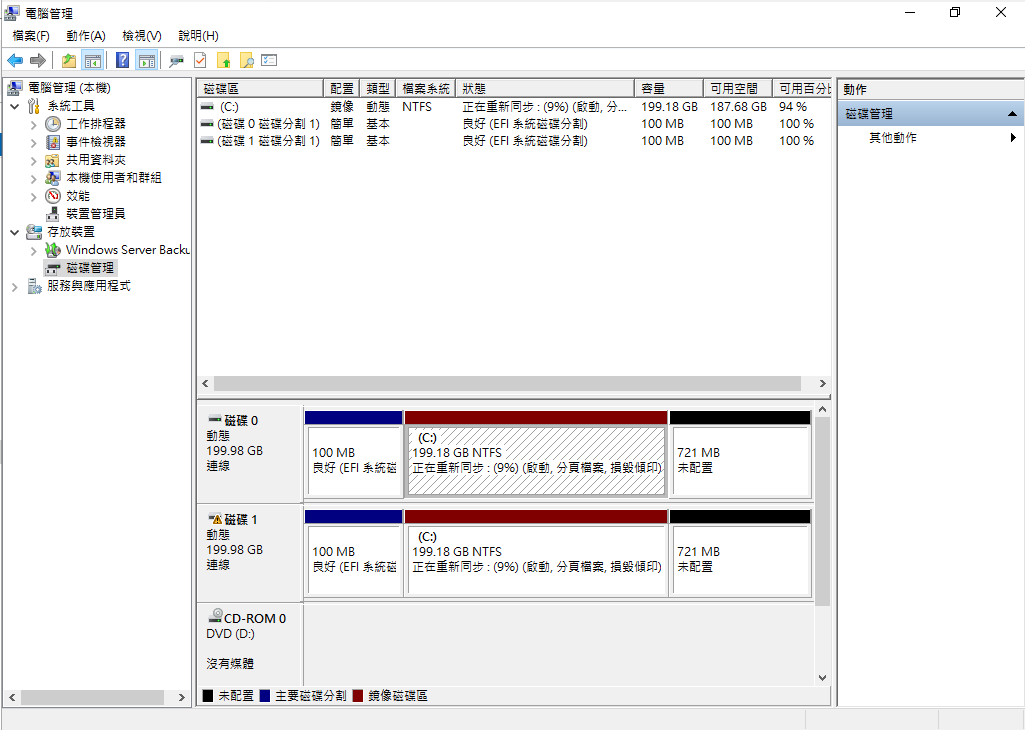 Mirror完成 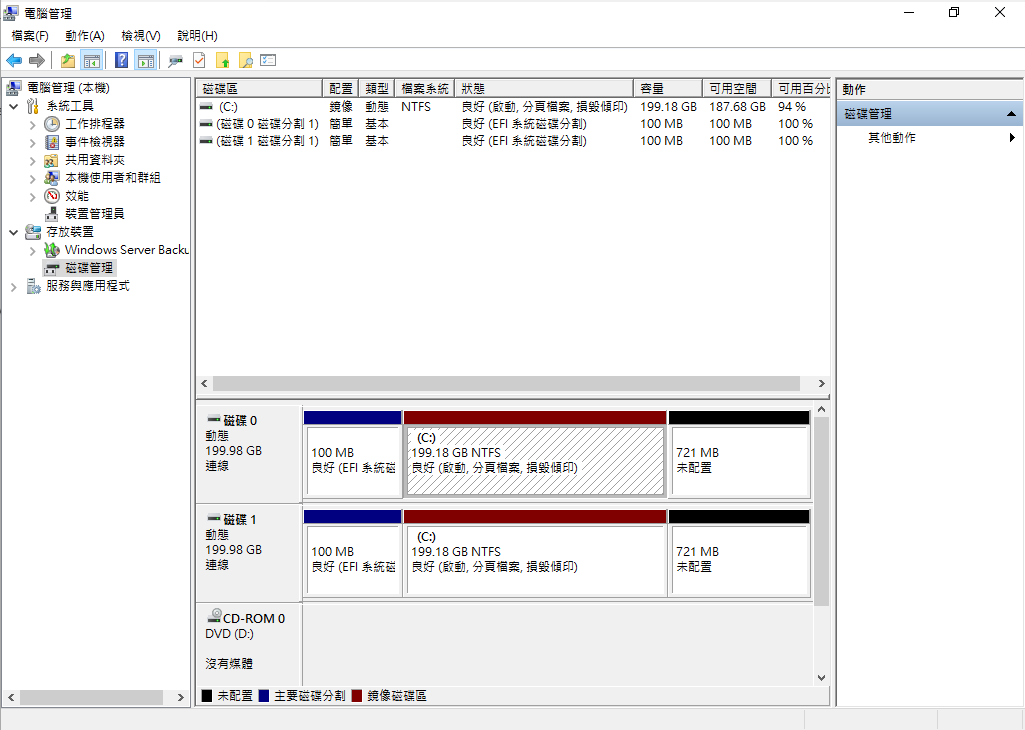 #### 處理EFI Boot Mirror是處理好了,但是EFI可不像是MBR直接使用Active來指定開機的磁區,所以在這裡我們必須對HDD1的EFI磁區進行處理,這樣一但出問題HDD1才能夠獨立開機。 首先先進Diskpart,將剛剛未格式化的EFI磁碟格式化為FAT32,並把HDD0 EFI掛載為P、HDD1 EFI掛載為S ``` diskpart sel disk 1 sel par 1 assign letter=S format fs=FAT32 quick sel disk 0 sel par 1 assign letter=P exit ``` 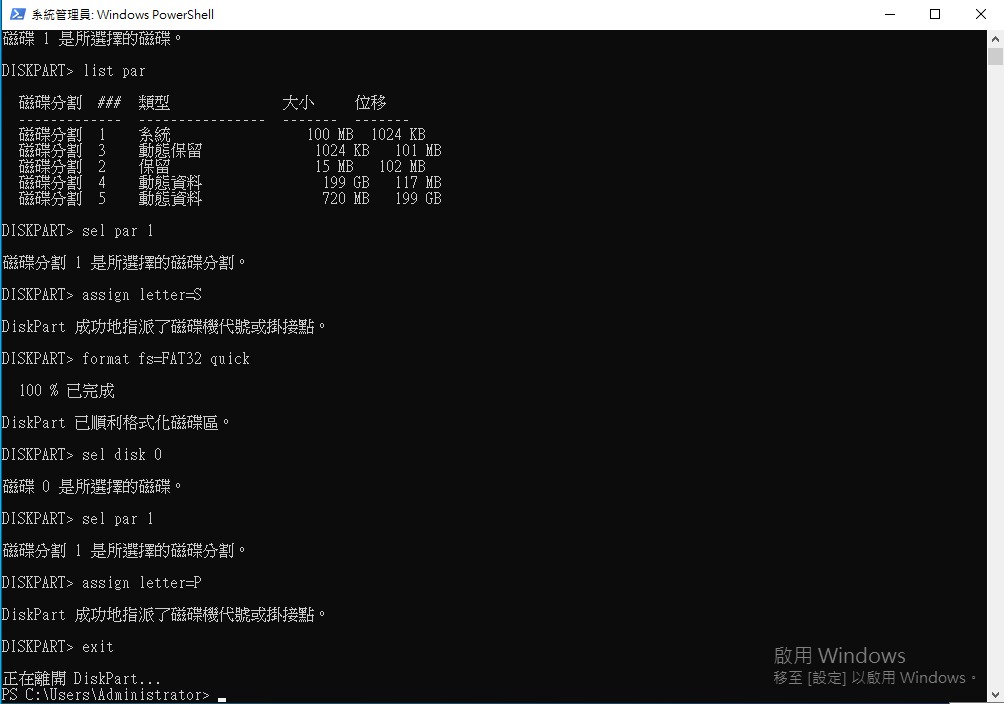 透過bcdedit /enum可以確認到現在EFI的開機的GUID ``` P: cd EFI\Microsoft\Boot bcdedit /enum ``` 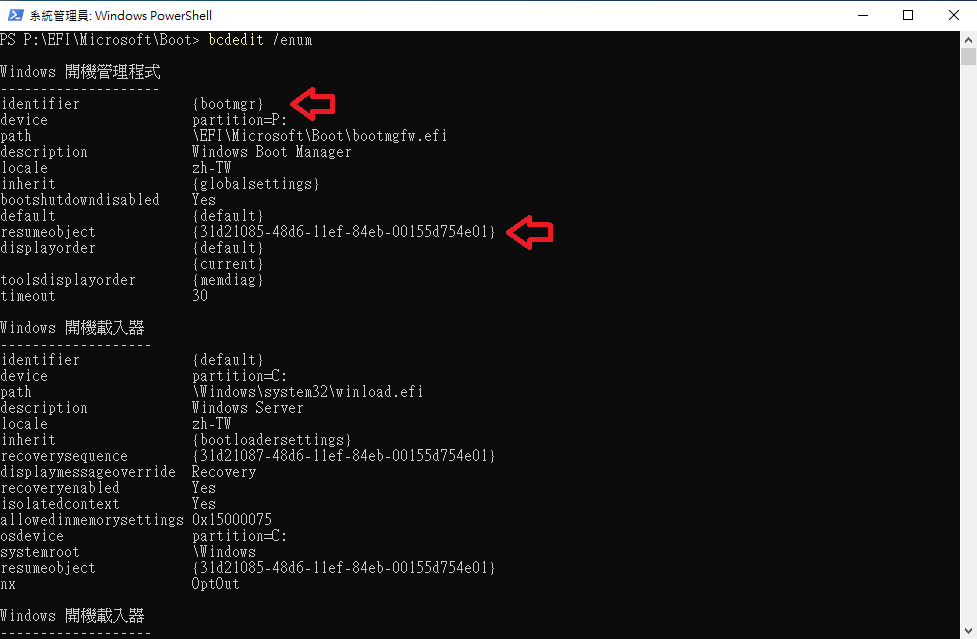 **※此指令只能在CMD下執行※** 將現有 {bootmgr} Clone一份出來,並把S設定為相同的{GUID} ``` cmd bcdedit /copy {bootmgr} /d "Windows Boot Manager Cloned" bcdedit /set {GUID} device partition=S: ``` 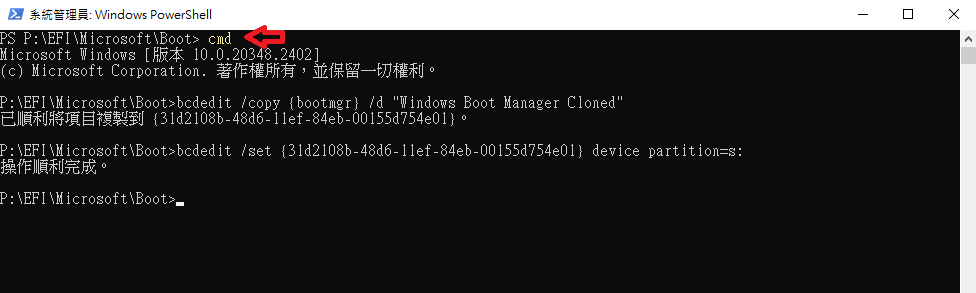 透過 bcdedit /enum all 可看到剛剛建立出來的開機選項 ``` bcdedit /enum all ``` 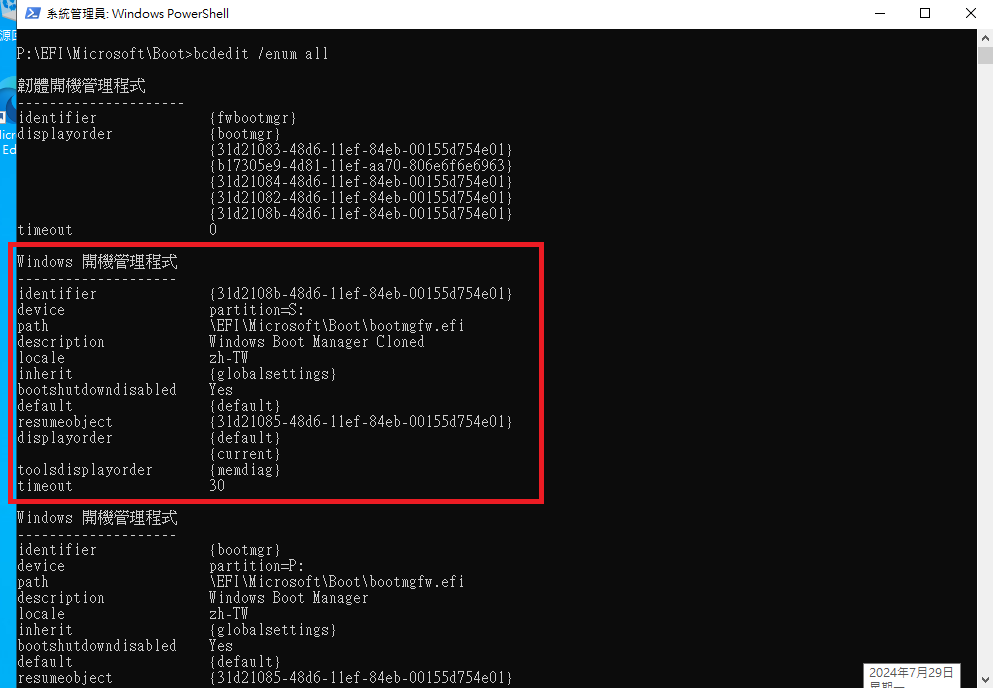 將剛剛的變更匯出為BCD2 ``` bcdedit /export P:\EFI\Microsoft\Boot\BCD2 ``` 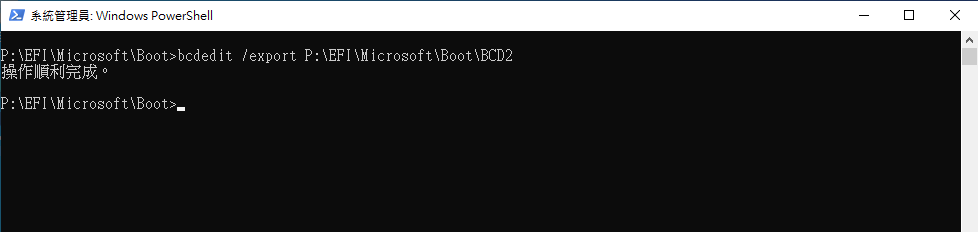 將P的資料全部複製到S ``` robocopy p:\ s:\ /e /r:0 ``` 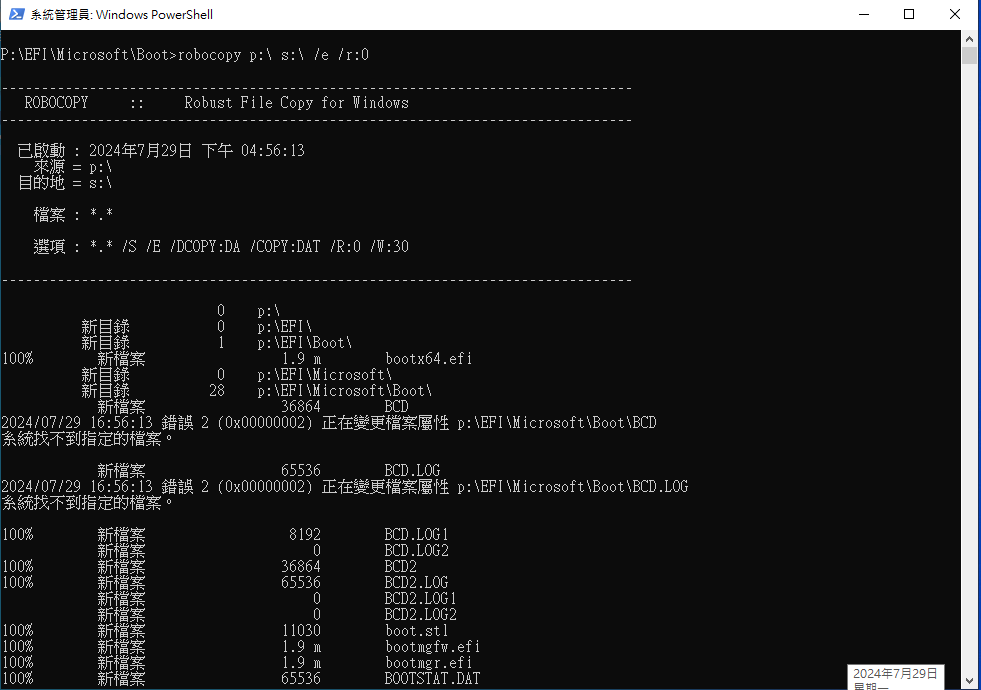 將S的BCD2更名為BCD,並刪除P的BCD2 ``` S: cd EFI\Microsoft\Boot ren BCD2 BCD del P:\EFI\Microsoft\Boot\BCD2 ``` 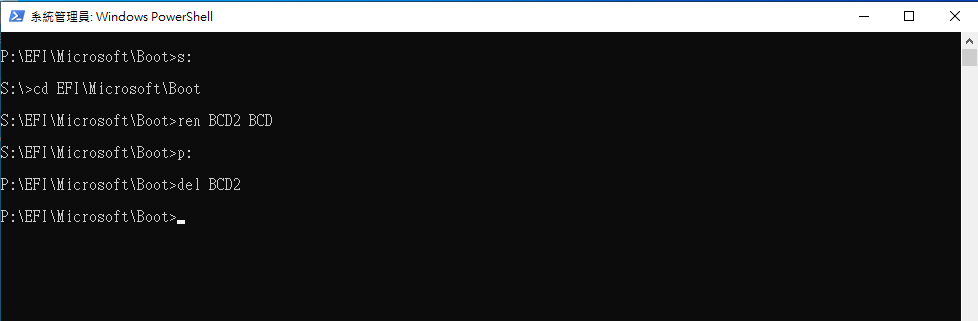 回到diskpart,將磁碟代號 P、S 移除 ``` diskpart list vol sel vol 1 remove letter P sel vol 2 remove letter S exit ``` 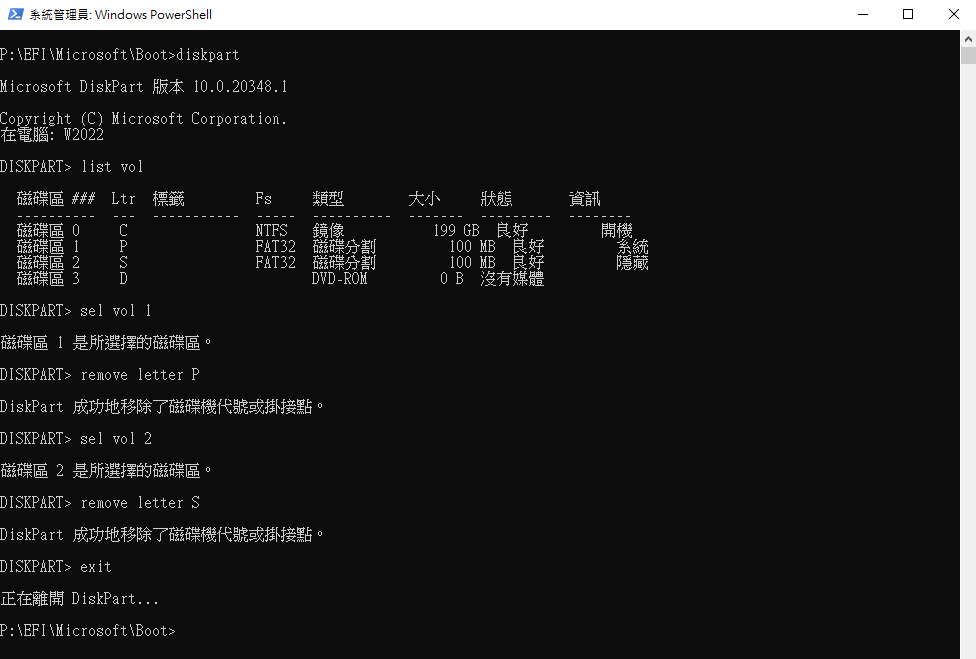 到此EFI開機設定全數完成 (累...) ### 磁碟故障測試 關機,到Hyperv "設定"=>"韌體"中已經可以看到HDD1的 "Windows Boot Manager Cloned" 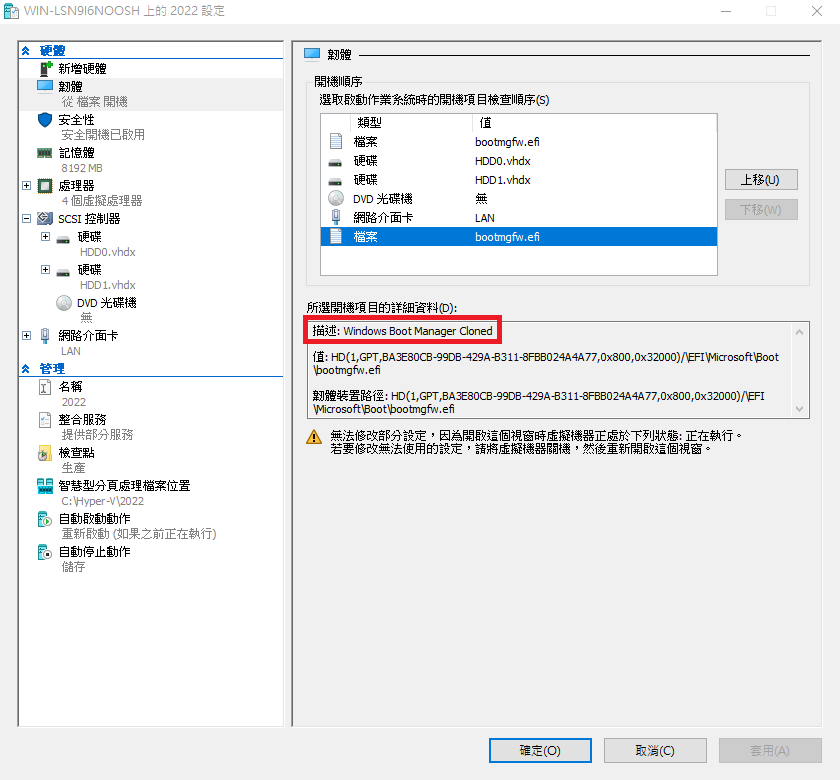 移除HDD0 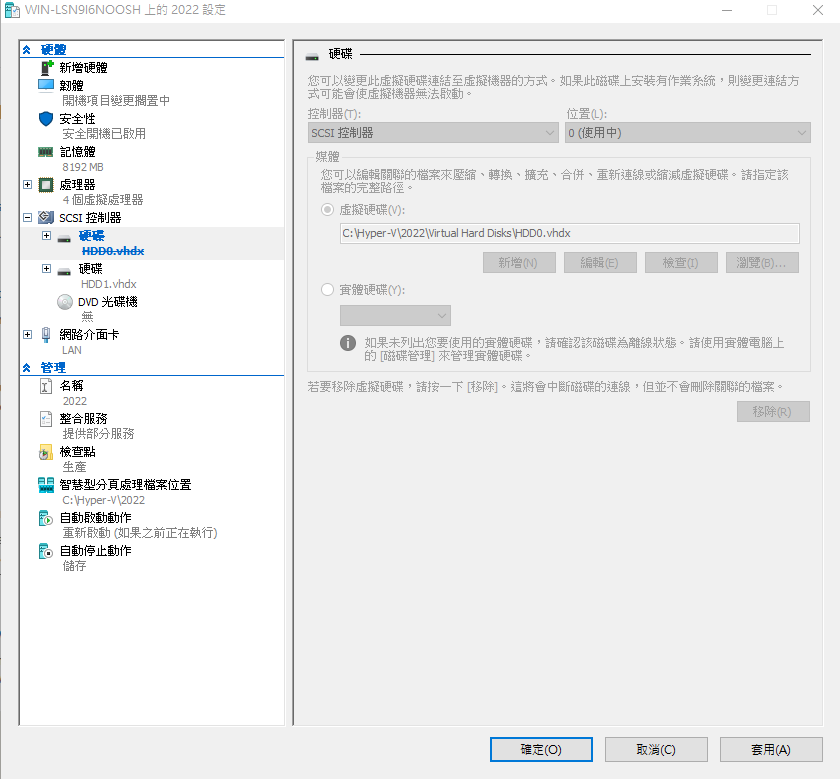 將Windows Boot Manager Cloned開機順序提高至1 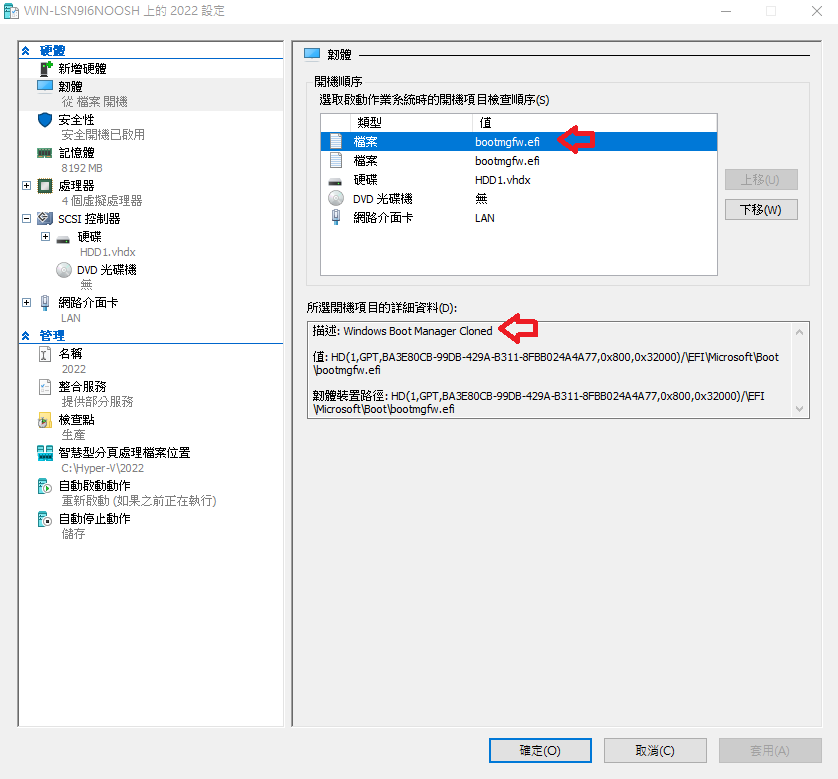 開機,使用第一個選項 HDD0 開機 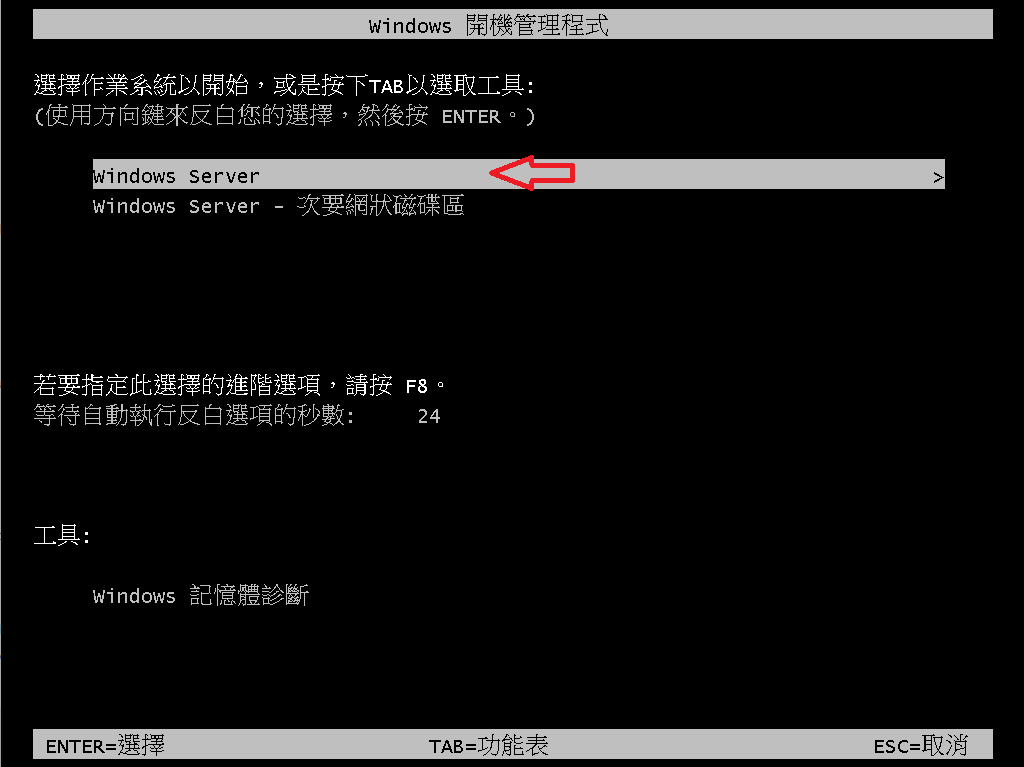 無法開機,正常 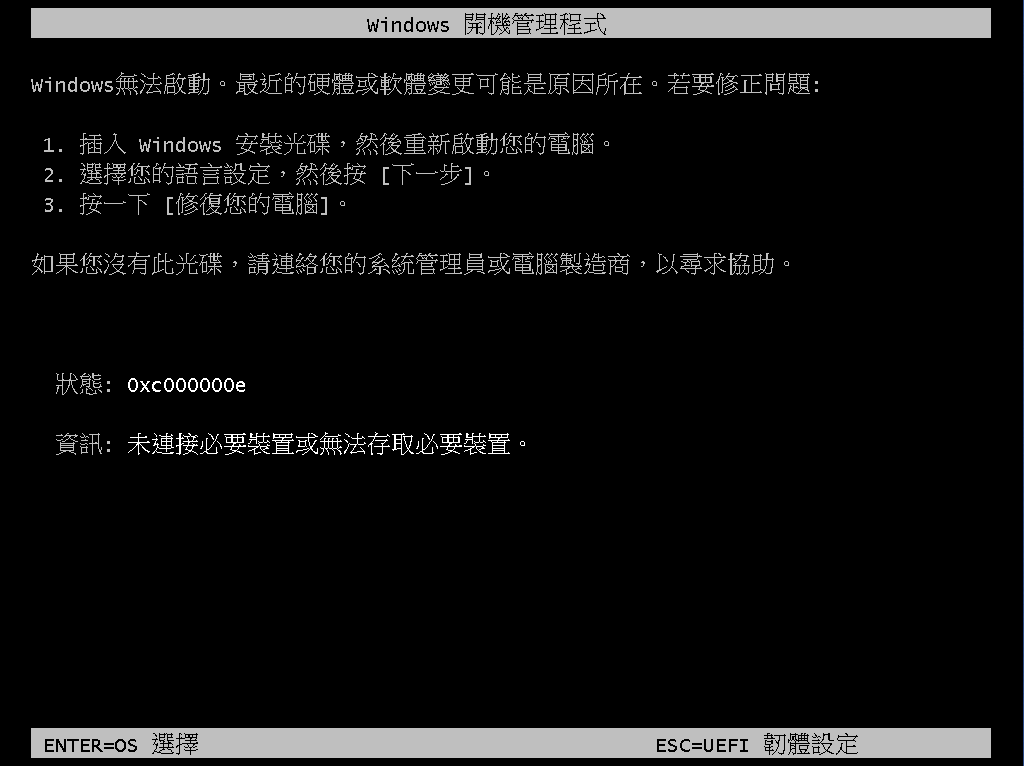 點選Enter,重新選擇HDD1開機 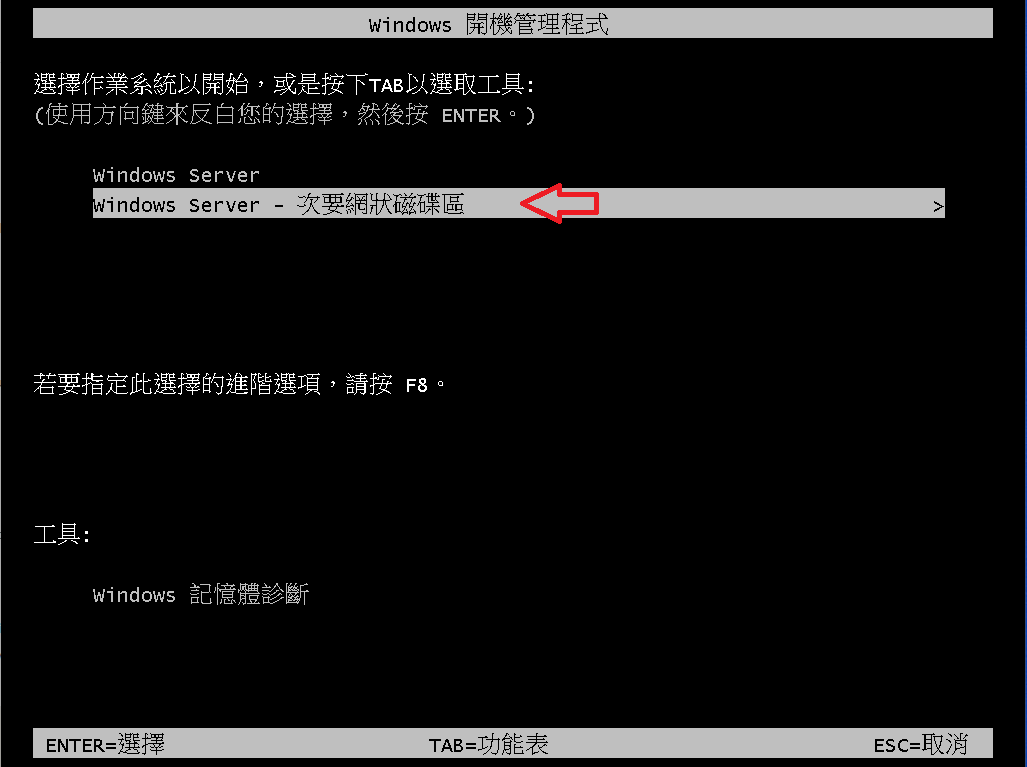 開機正常,磁碟管理顯示"備援失敗" 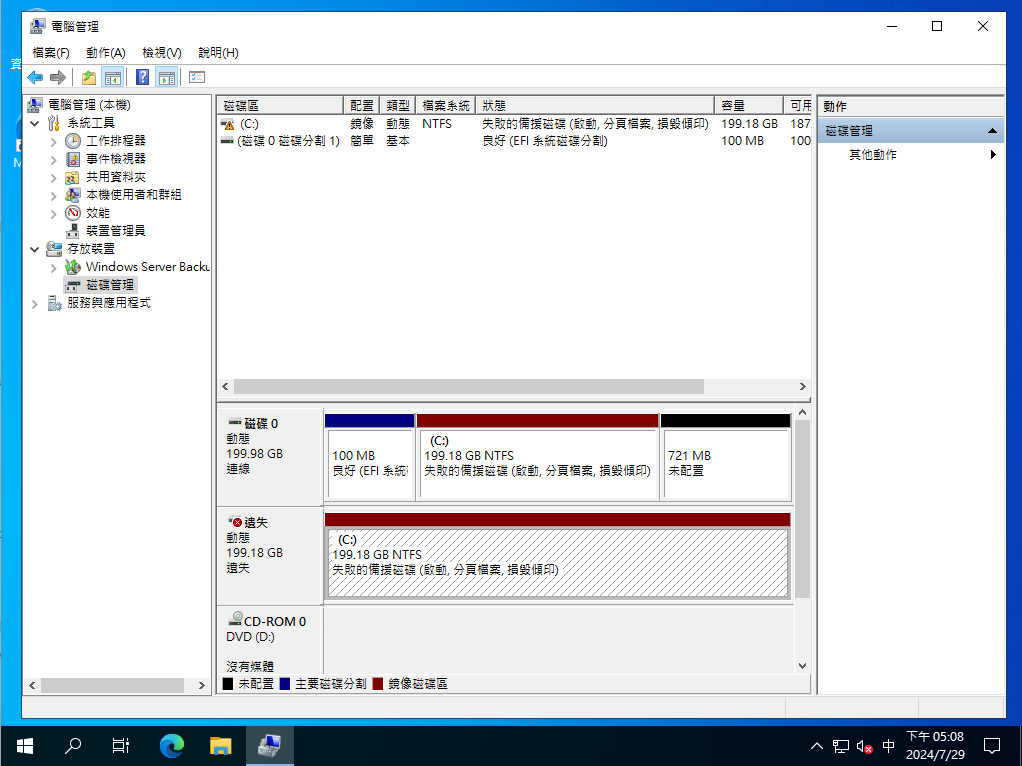 至此,磁碟故障測試完成,如此確認了就算失去任何一顆HDD都能夠正常開機 ### 重建Mirror 關機,我們將HDD0掛回來 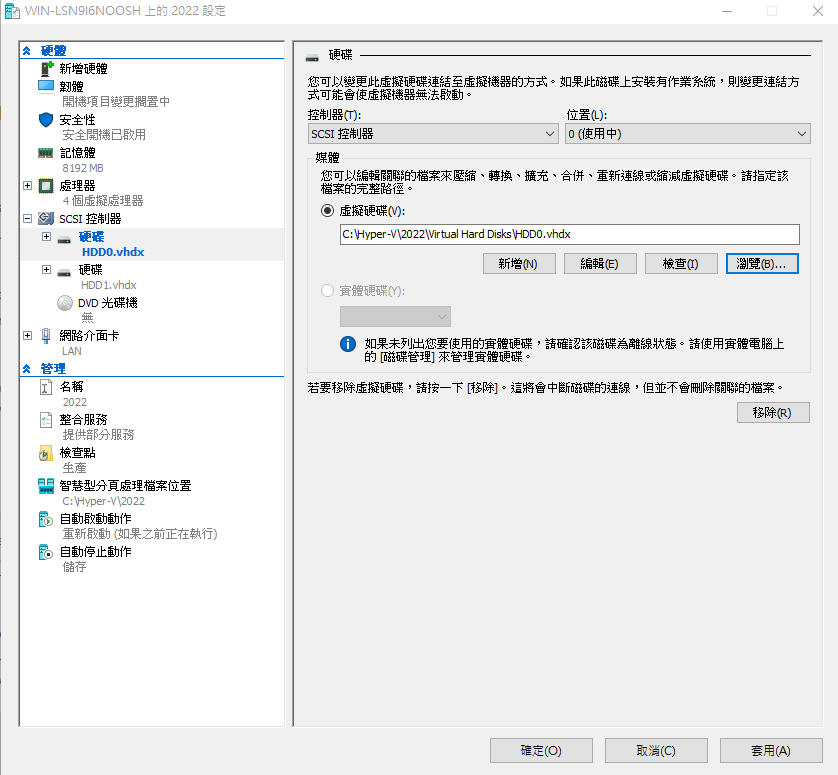 選擇HDD1開機  裝置管理員確認已認到2顆HDD 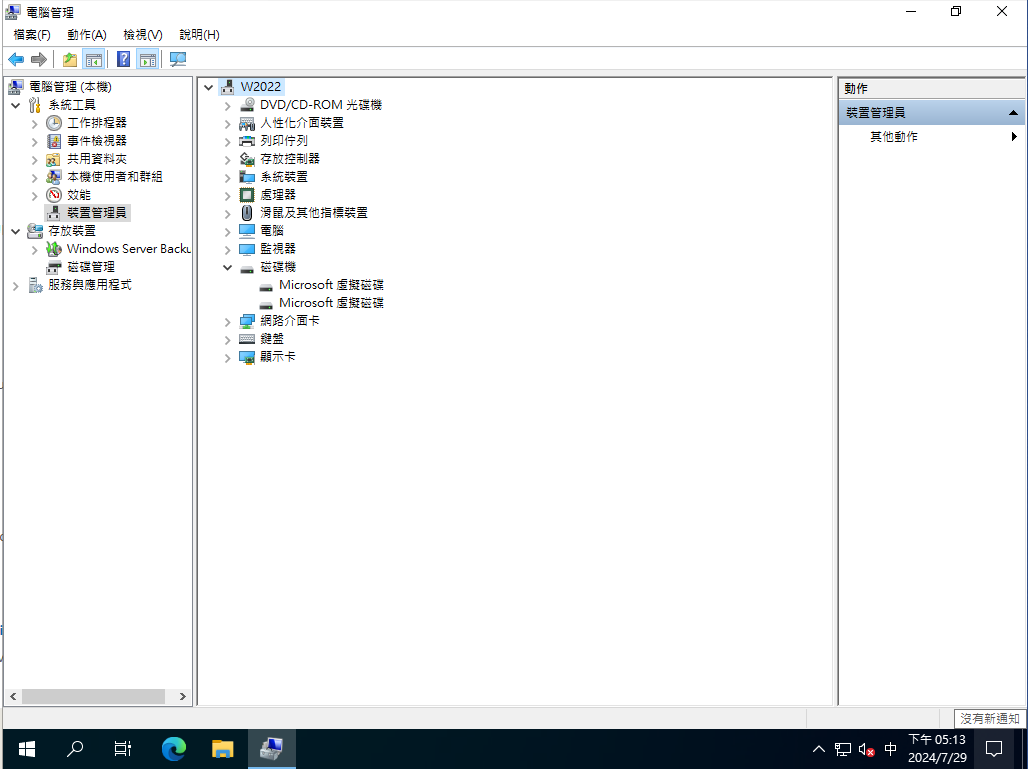 磁碟顯示Mirror Fail,來移除鏡像 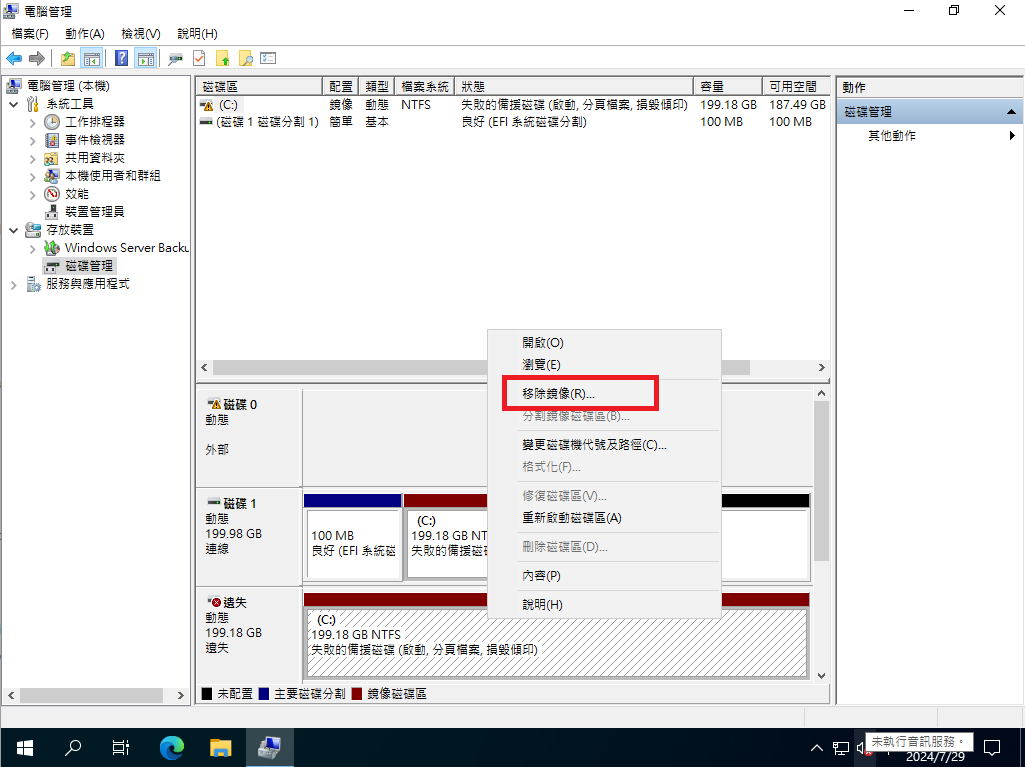 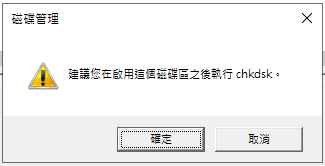 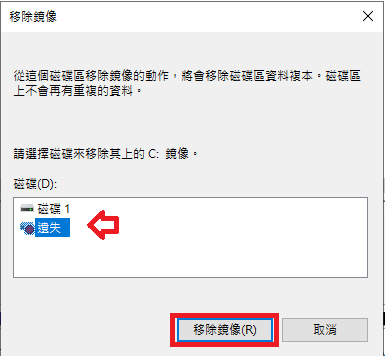 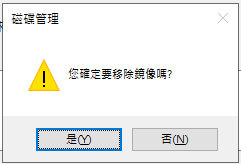 點選HDD0,匯入外部磁碟 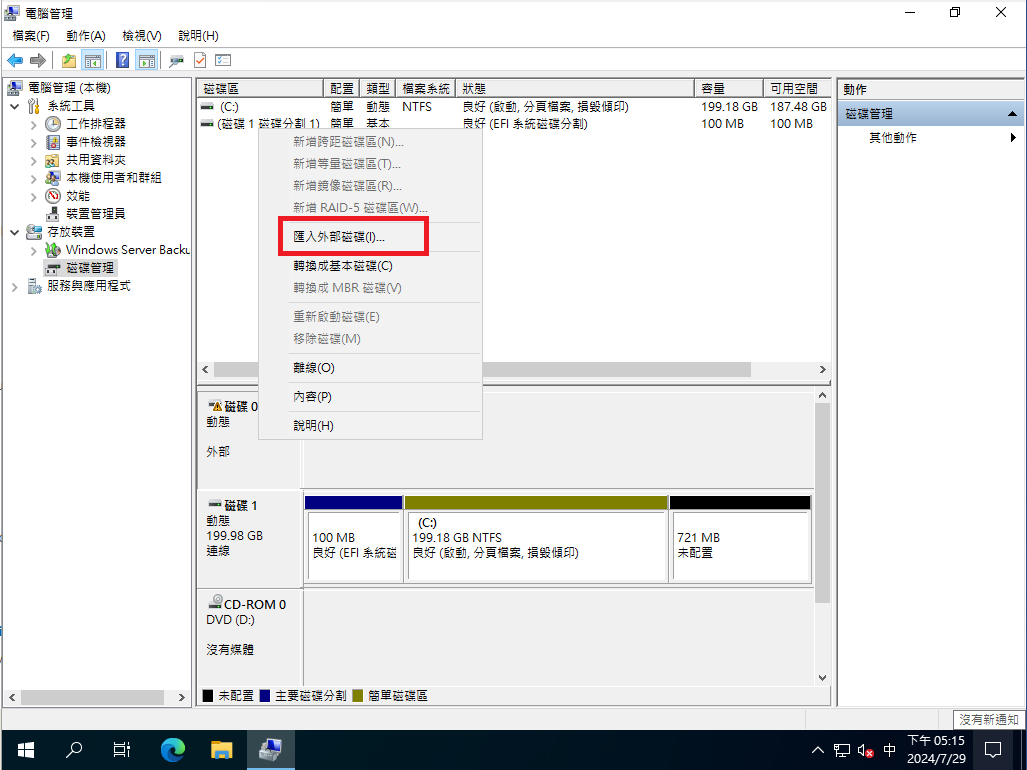 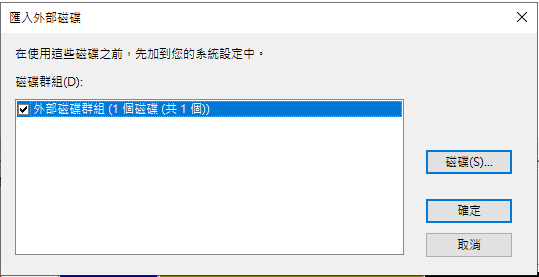 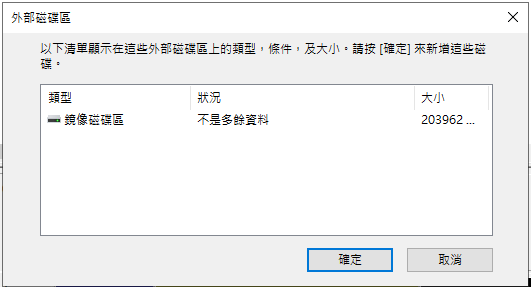 將HDD0的舊磁區刪除 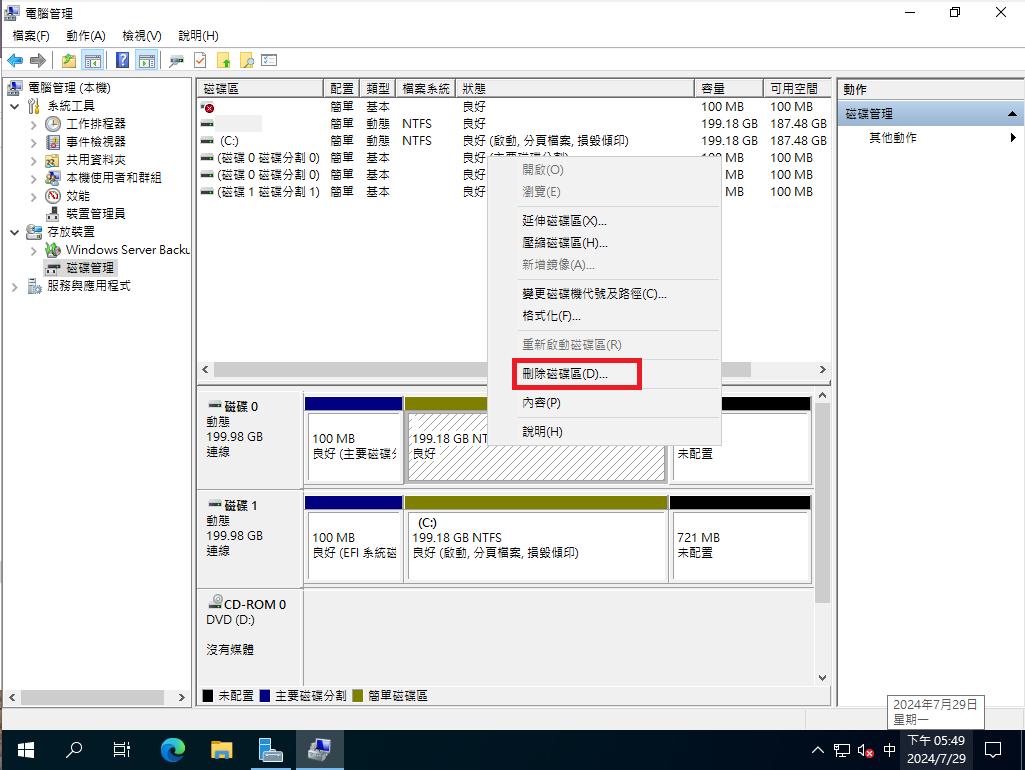 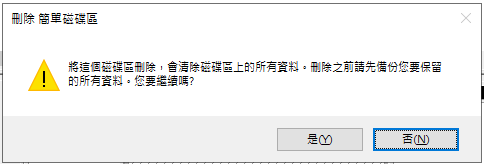 點選HDD1,重新建立Mirror 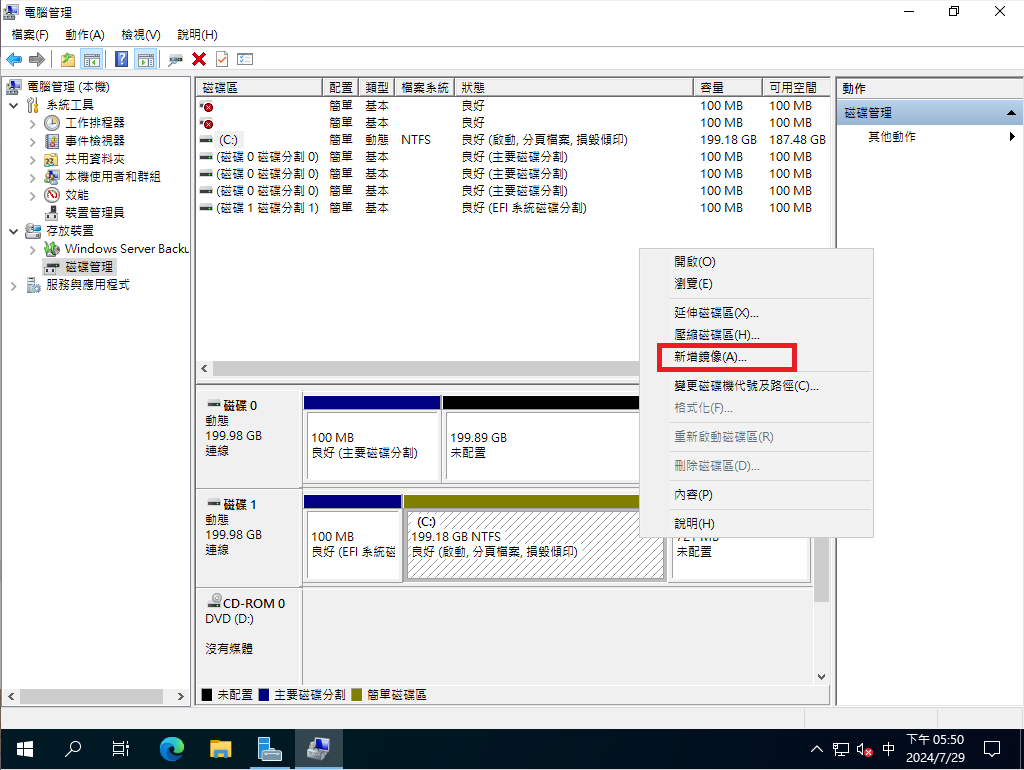  Mirror中 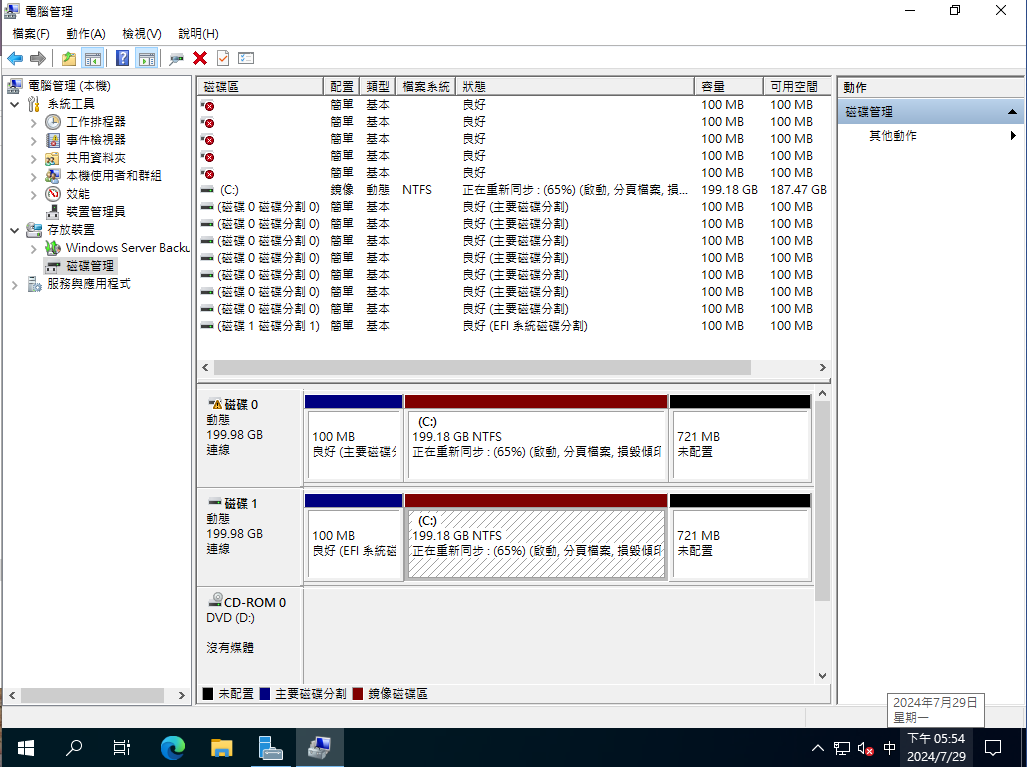 Mirror完成 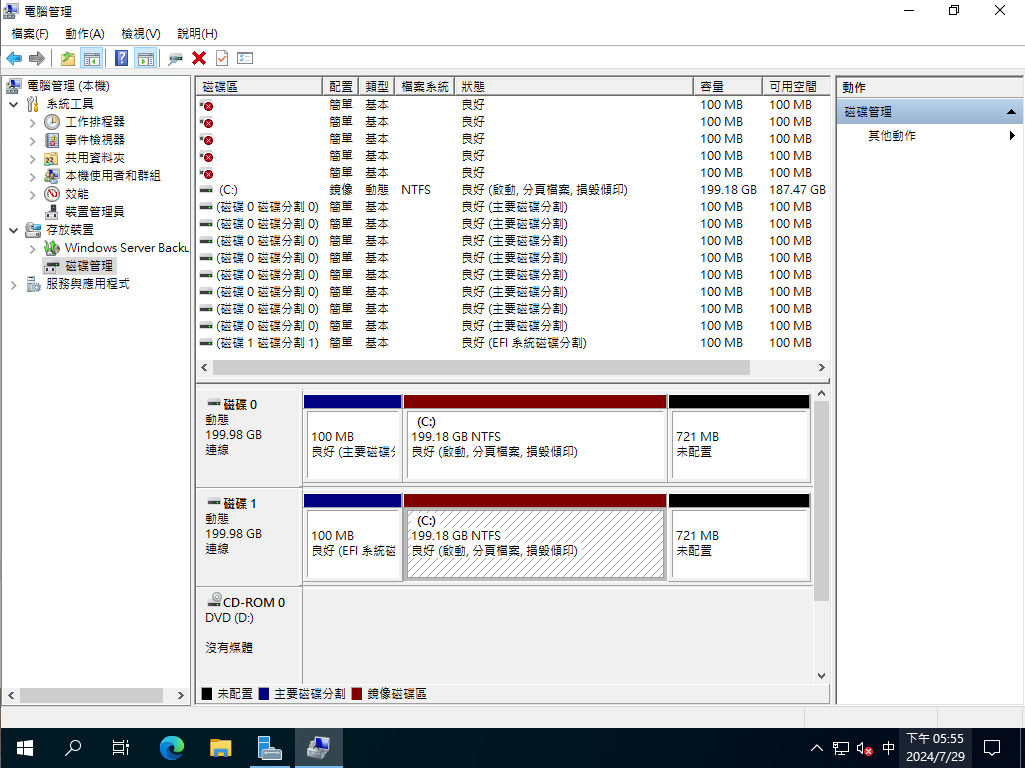 ### 後話 僅以此分享一下即使是現在 UEFI Bios 年代,Windows Software Raid 依然還能用 只是你這輩子應該都不會再去用他 …… **╮(╯_╰)╭** # Windows功能 # Windows Server Data Deduplication 檔案層級重複資料刪除 ### 前言  Windows Server 從 2012開始支援**檔案層級****重複資料刪除**,Windows 2012當年僅支援單線程處理所以其實不好用,Windows Server 2016之後開始支援多線程處理,Windows Server 2019開始支援ReFS的重複資料刪除,且現今大部分主流備份系統都支援Dedupe Volume的備份還原,讓整個Solution好用很多,但鍵人發現此功能仍鮮少人知故特別在此分享推廣一下。 ### 系統需求 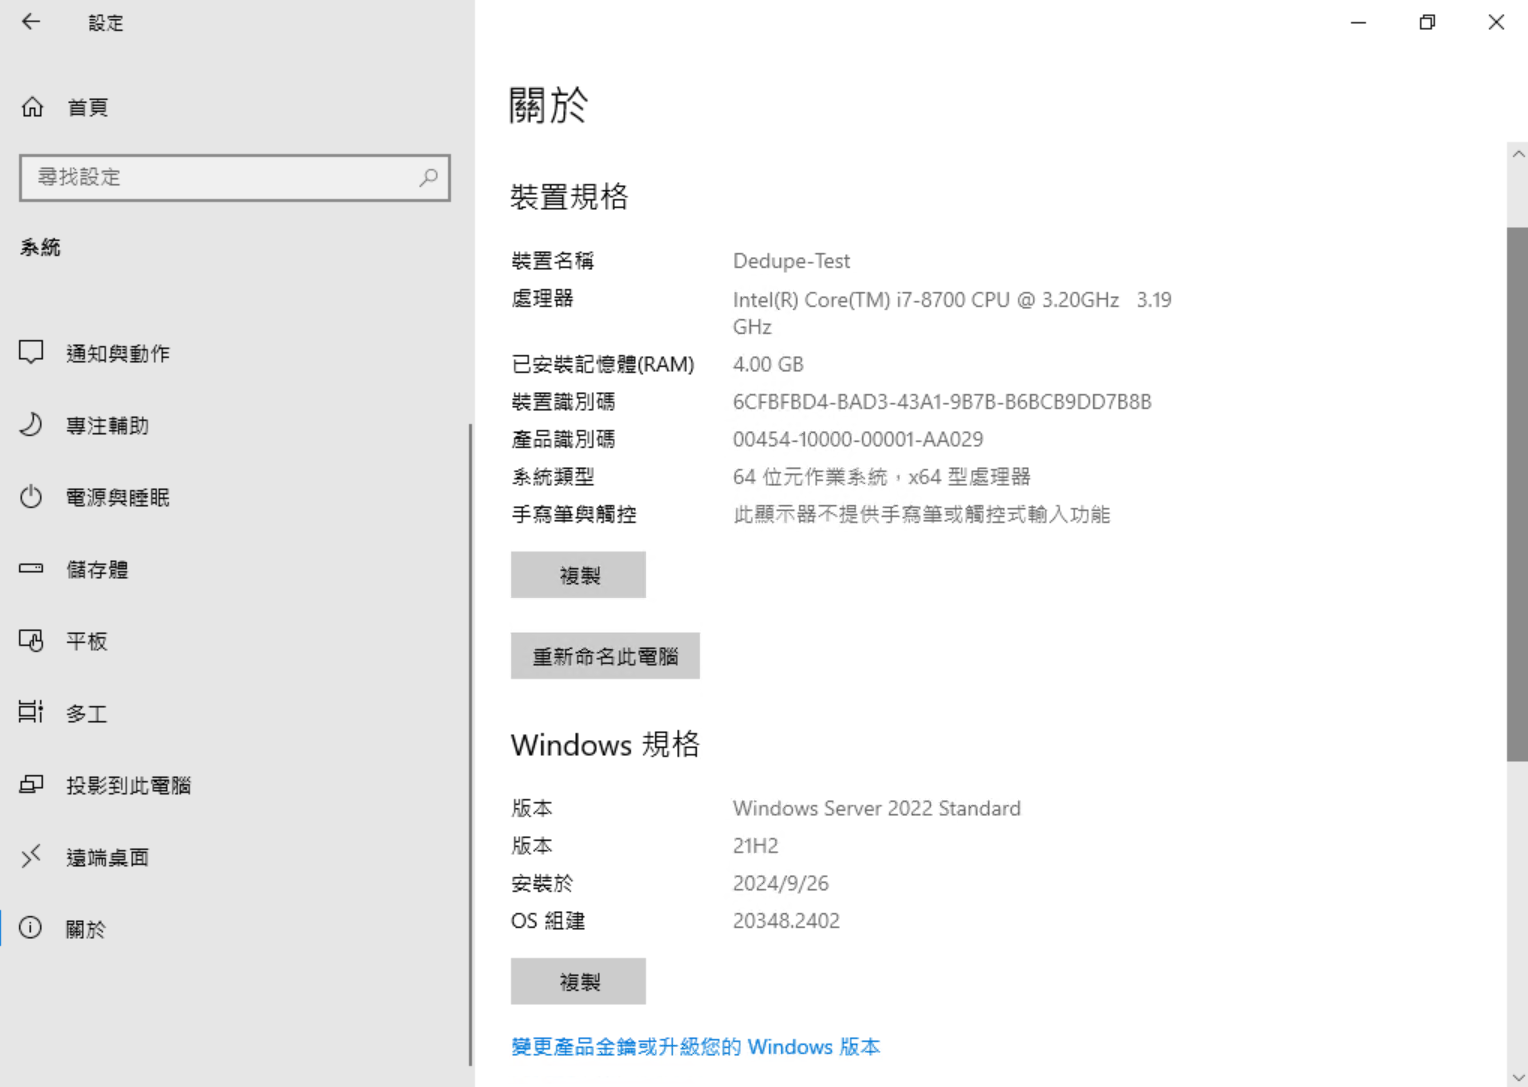 **OS:** Windows Server 2012 以上,但建議在Windows Server 2016 以上使用 **CPU:** 至少4 Core,但多一點比較好 **Memory:** 系統最少保留 4GB+ 且每 1TB 需要 1GB RAM,如果需要Dedupe的Volume 10TB,記憶體需要 14GB (4GB+10GB) **最小可Dedupe檔案大小:** 預設32KB,但可以透過Powershell變更檔案大小 **磁碟格式:** NTFS / ReFS (2019+) **磁碟大小支援:** Windows 2016後可支援最大 64TB的空間進行Dedupe,根據不同的 Cluster Size 可支援的大小不同,Windows預設Cluster Size為4KB下最大空間僅支援16TB。 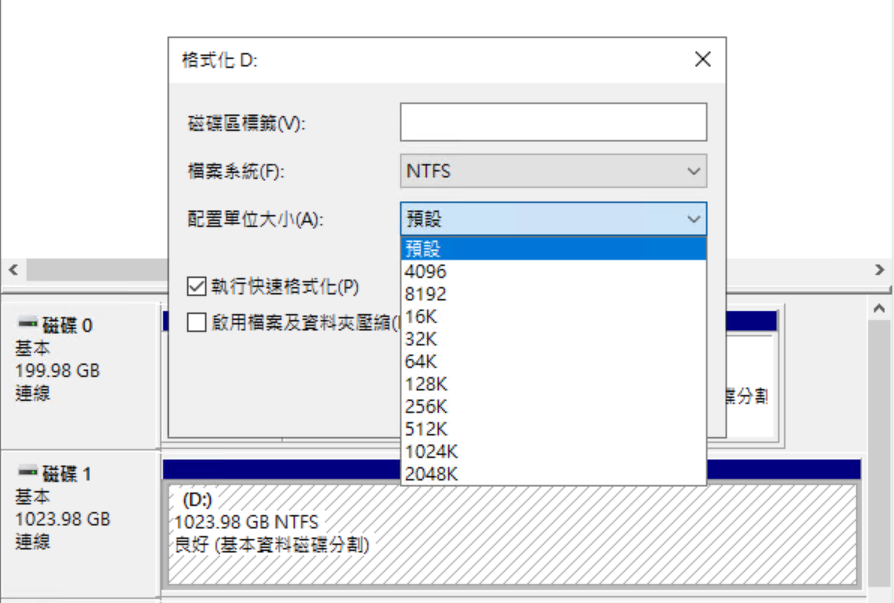 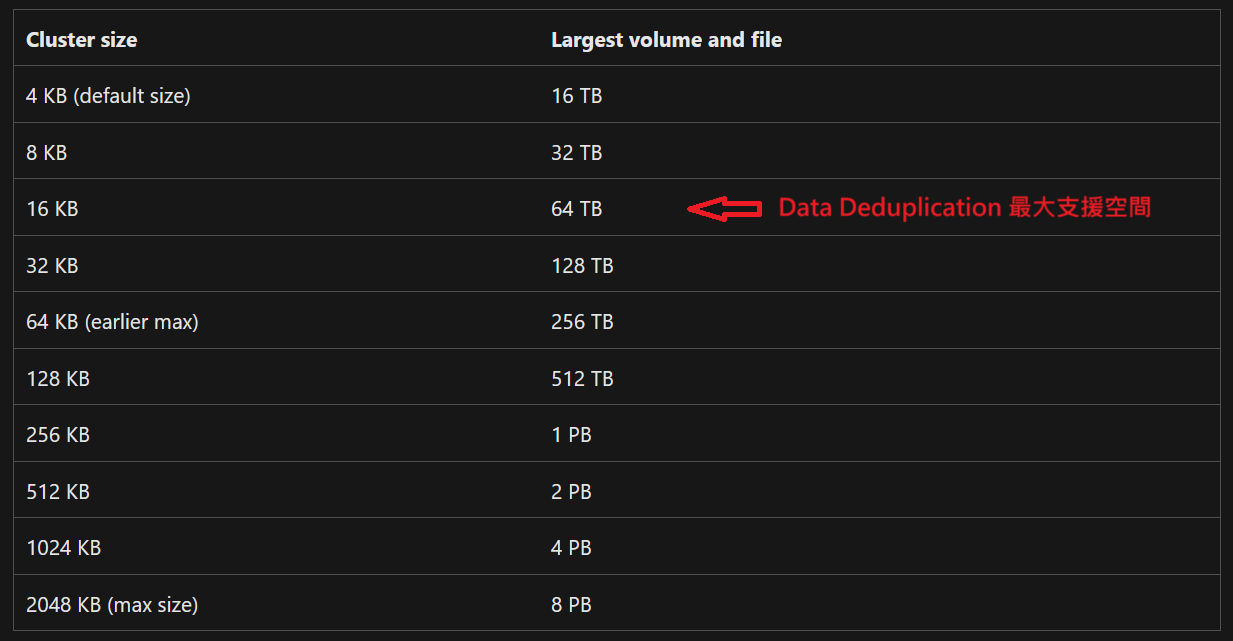 **適用情境:** File Server、HyperV、HyperV Cluster、Backup StorageHyperV 高IO Production 環境下不建議使用
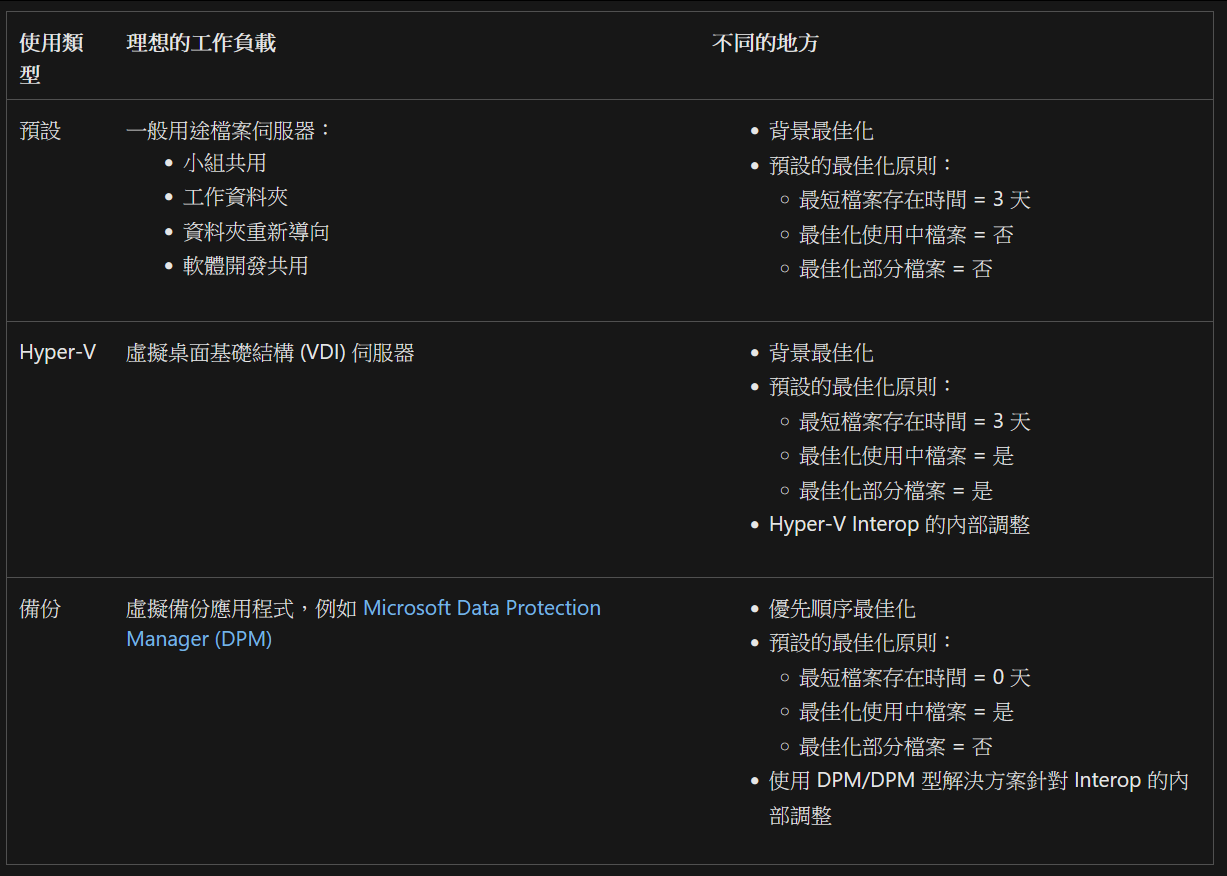
**預期Dedupe效率:** 根據Microsoft官方說法如下 [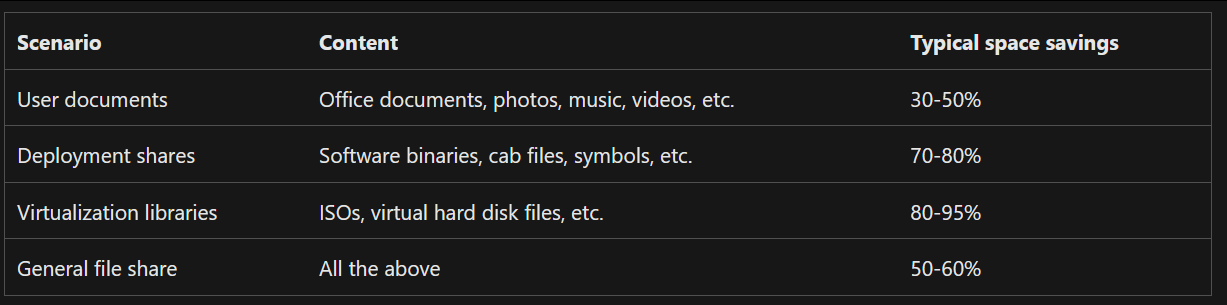](https://mdfk.goddamn.idv.tw/uploads/images/gallery/2024-09/UWb6w8Q5a6.png) ### 運作原理 1\. 掃描檔案系統以尋找符合最佳化原則的檔案。  2\. 將檔案分成可變更大小的區塊。  3\. 識別唯一的區塊。  4\. 將區塊放入區塊存放區,並選擇性壓縮。  5\. 使用重新分析點將區塊存放區中的原始檔案資料流取代為現在已最佳化的檔案。 詳細請參照 [https://learn.microsoft.com/zh-tw/windows-server/storage/data-deduplication/overview](https://learn.microsoft.com/zh-tw/windows-server/storage/data-deduplication/overview)
### 安裝設定過程 #### 安裝步驟 1\. 伺服器管理員 => 管理 => 新增角色及功能 。 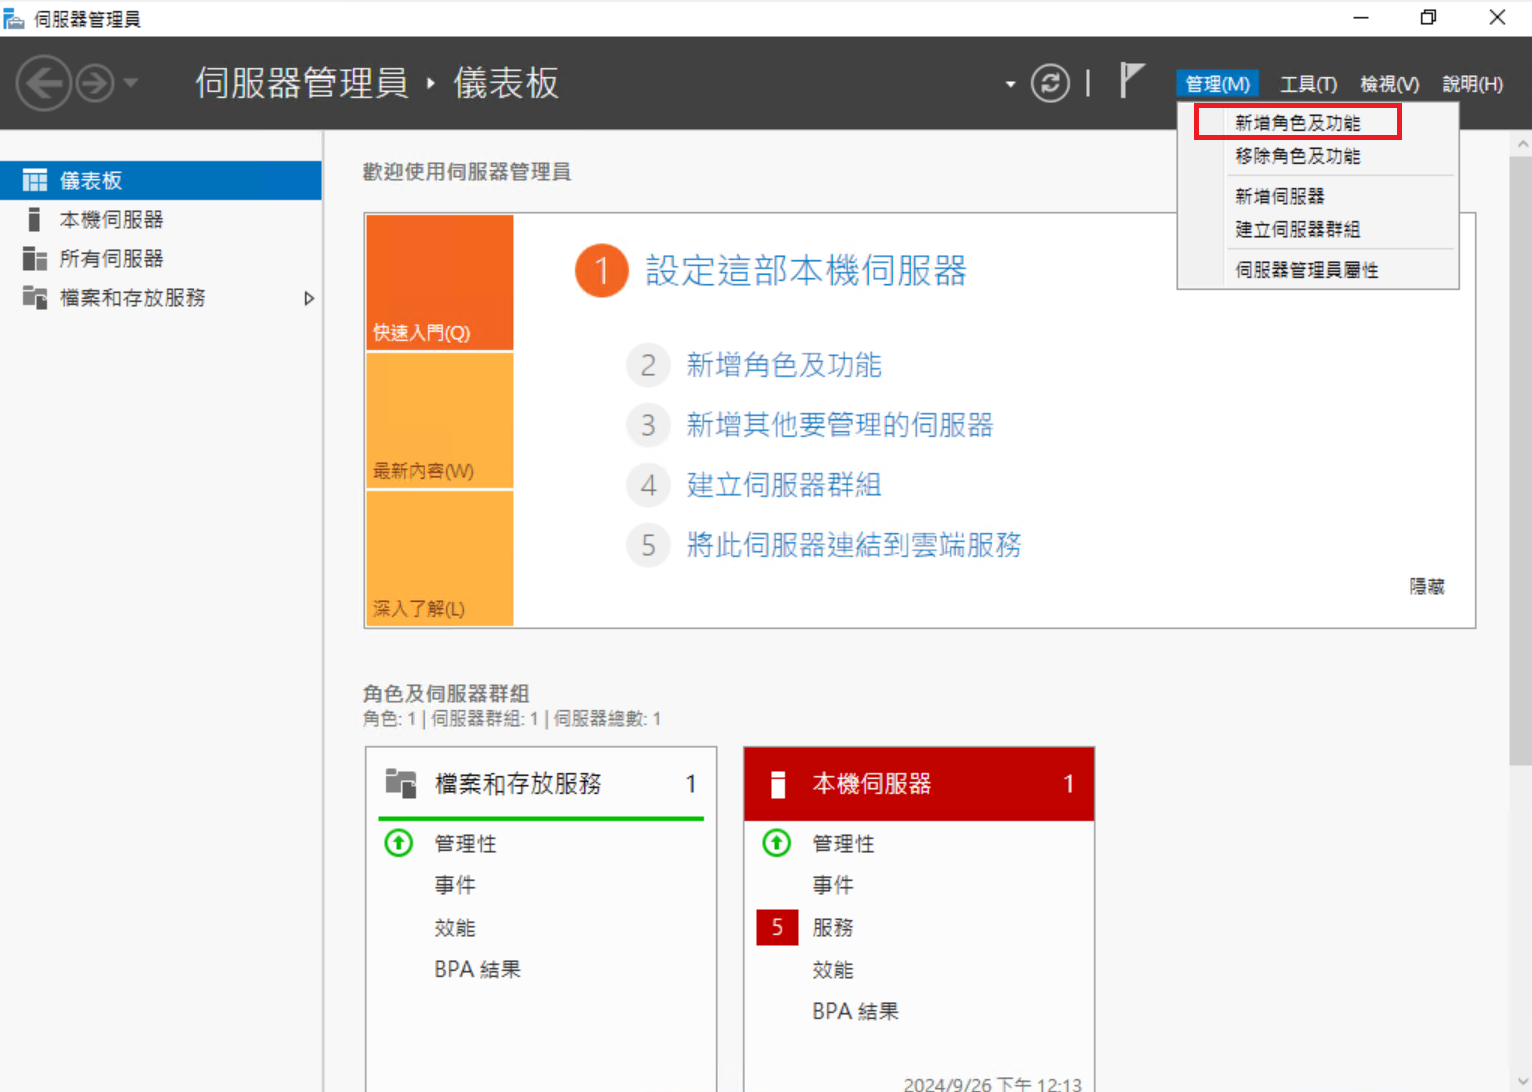 2\. 展開 檔案和存放服務,點選 重複資料刪除。 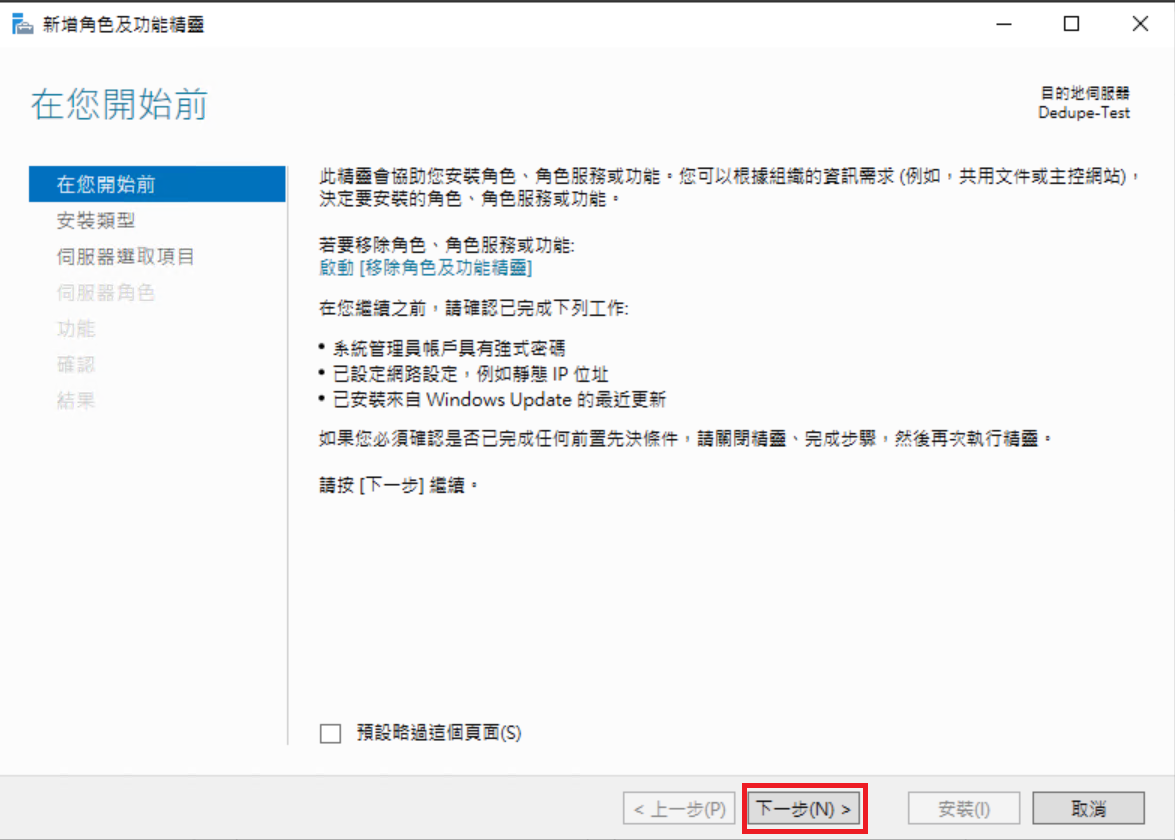 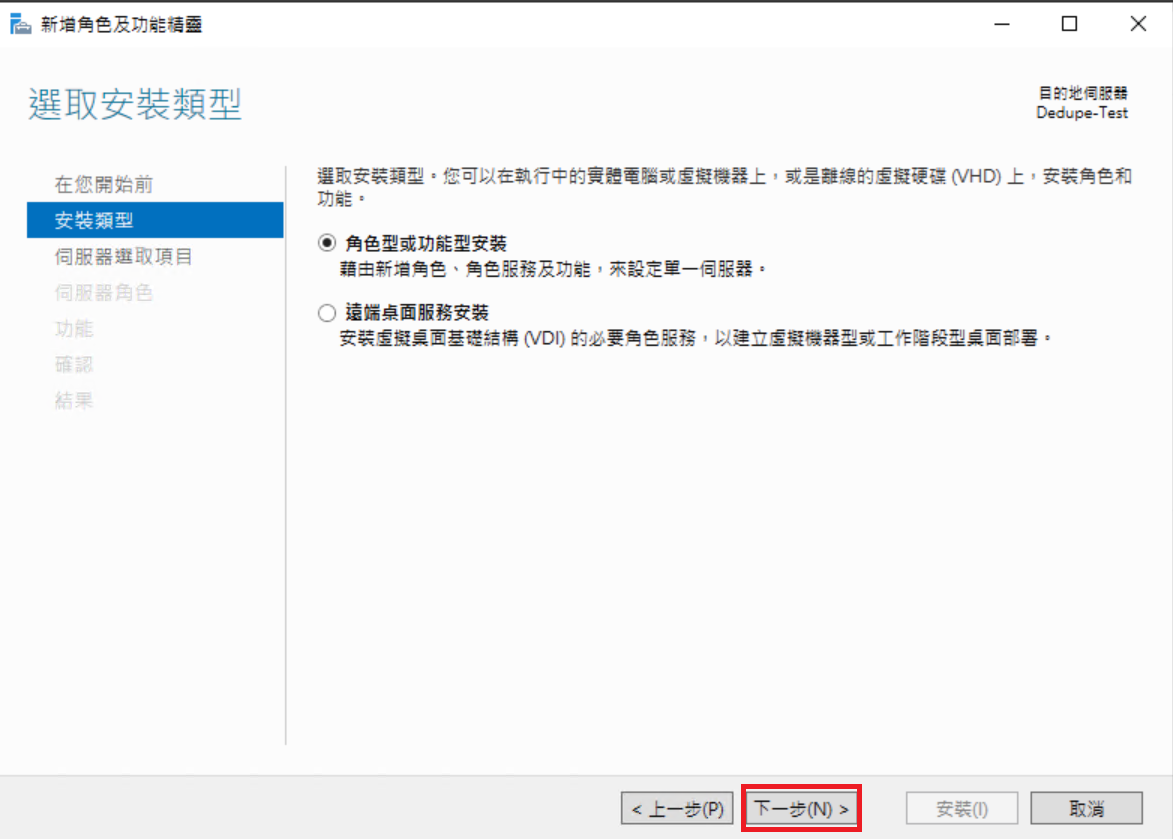 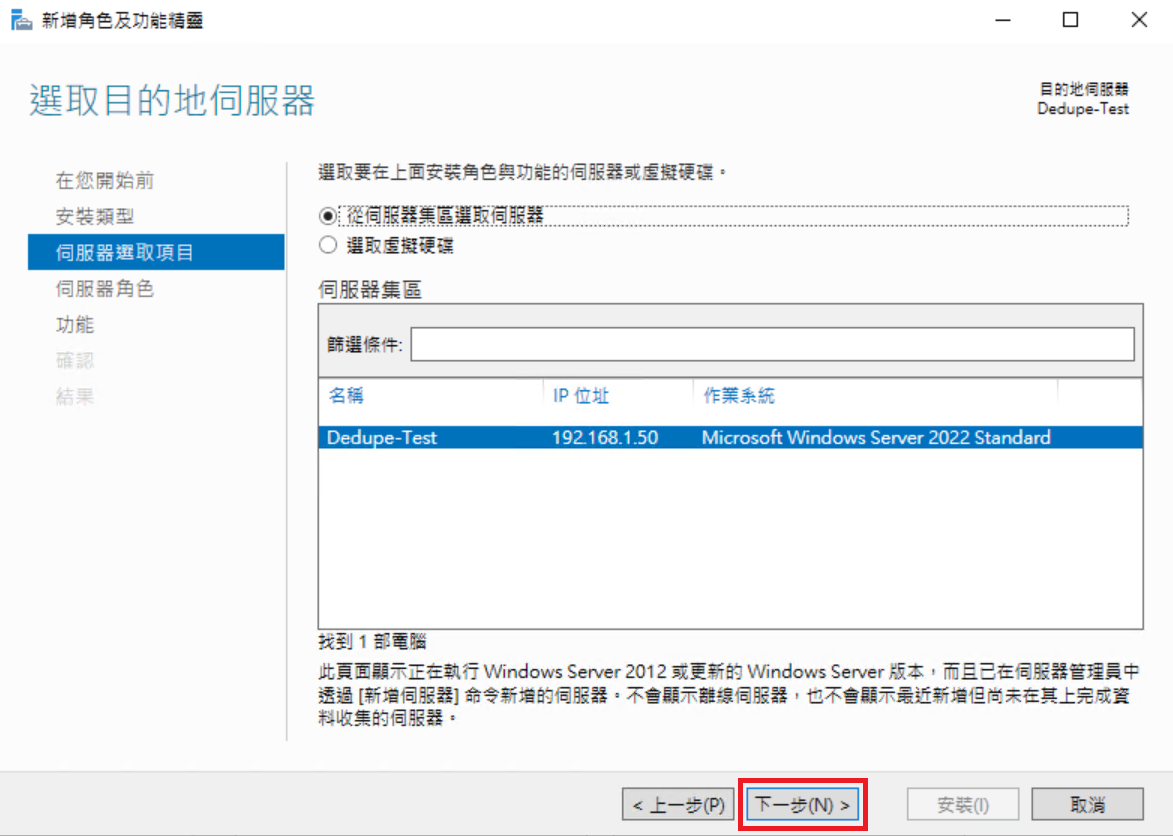 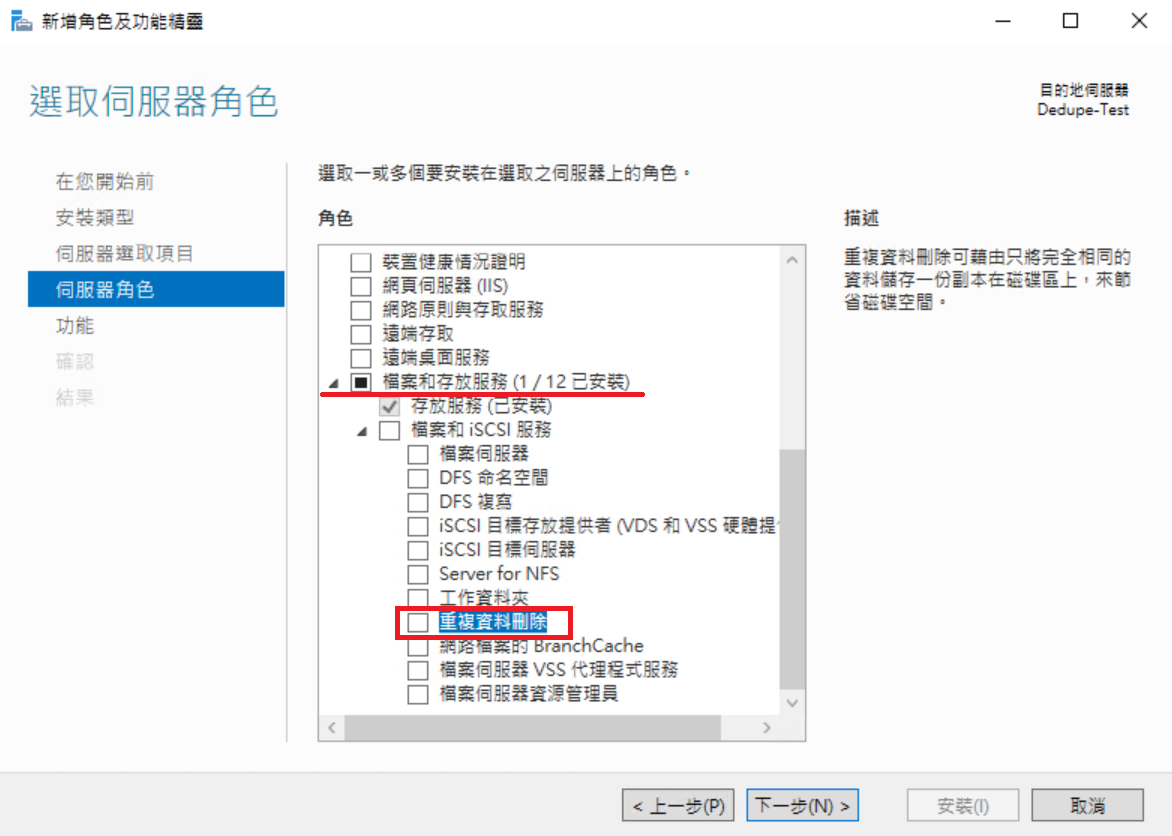 3\. 新增所需要的功能並安裝。 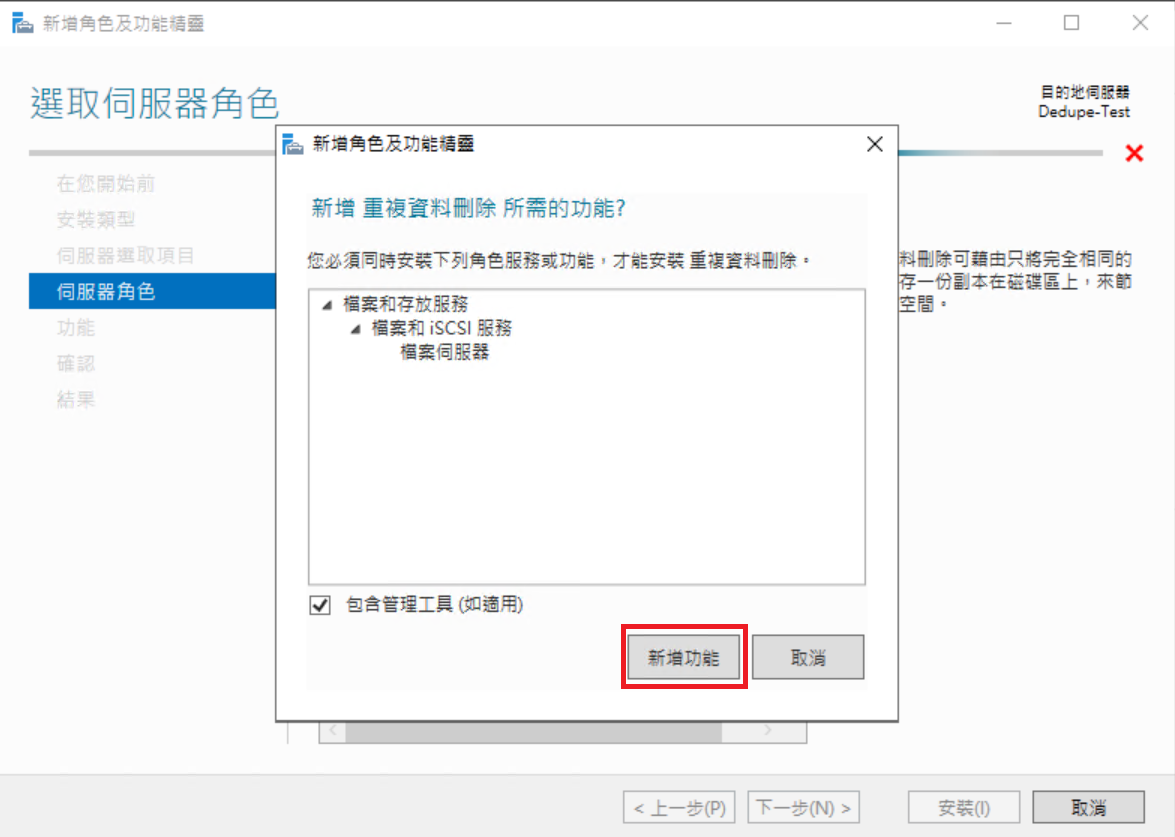 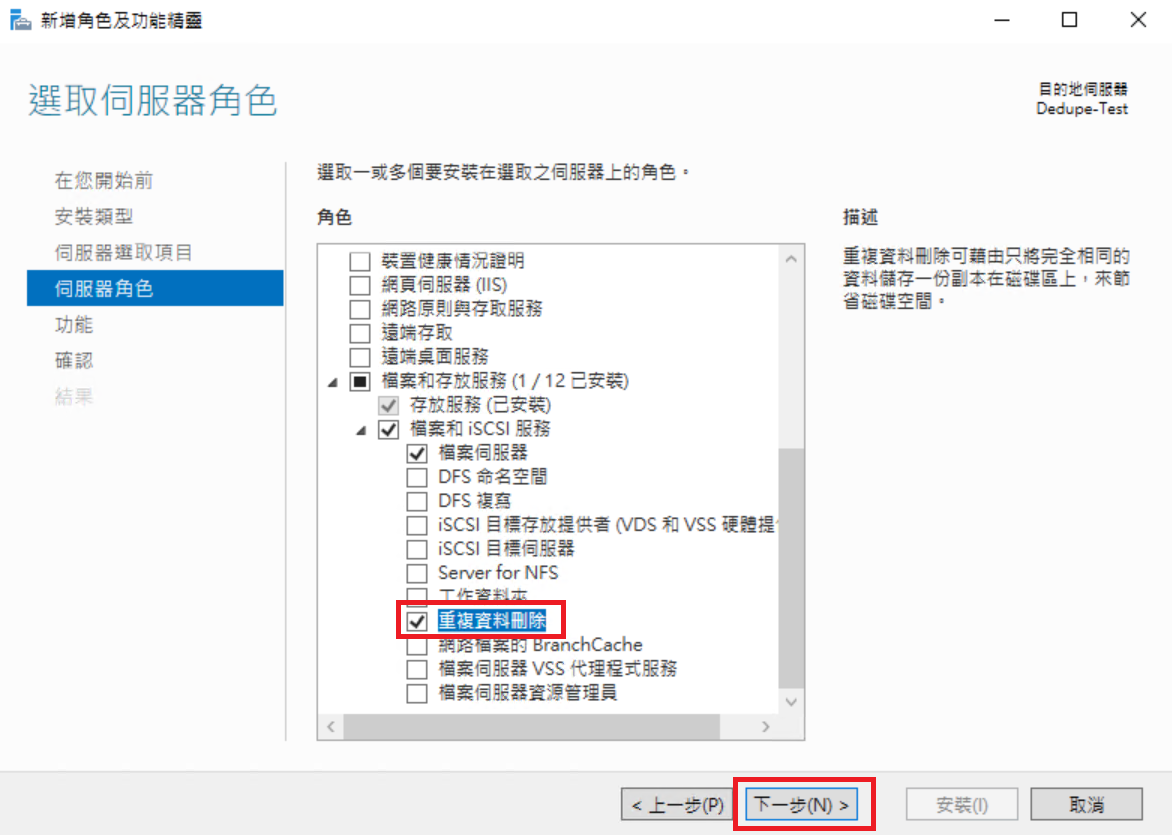 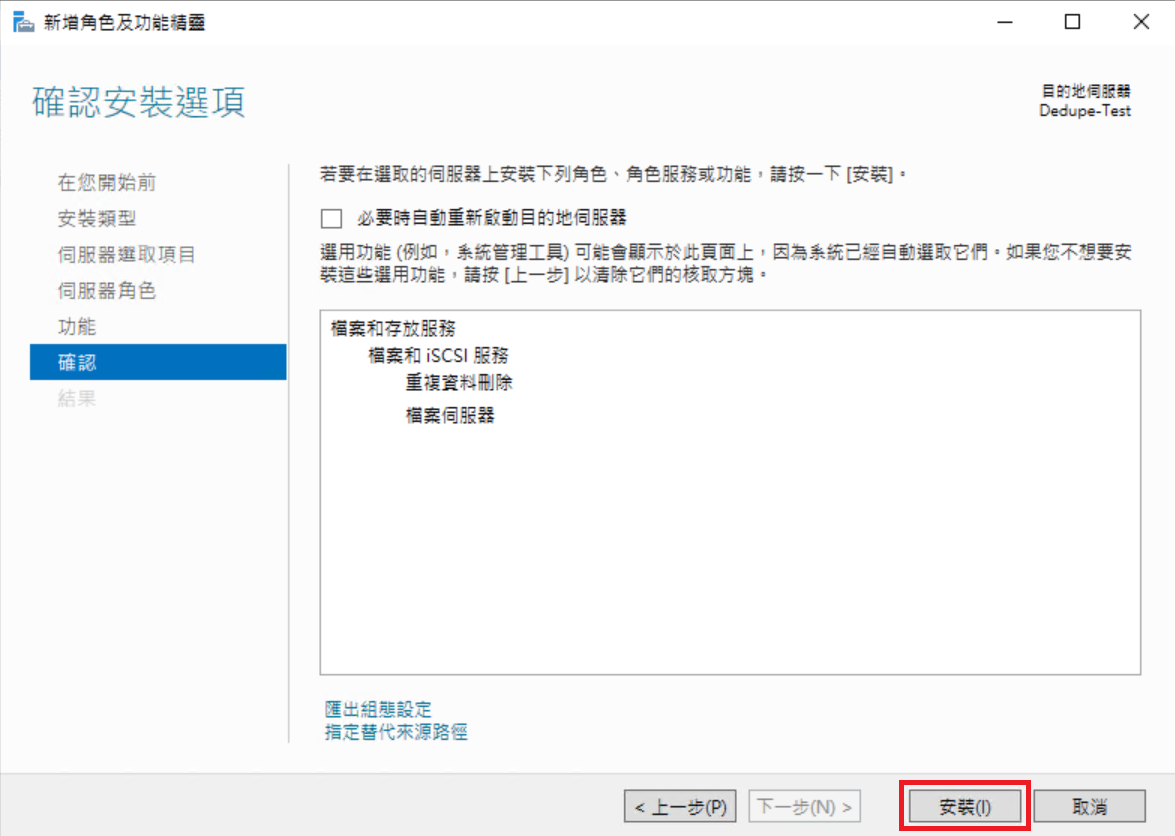 4\. 安裝完成 全文完 ...... 沒有開玩笑的啦 .o(≧∀≦)o 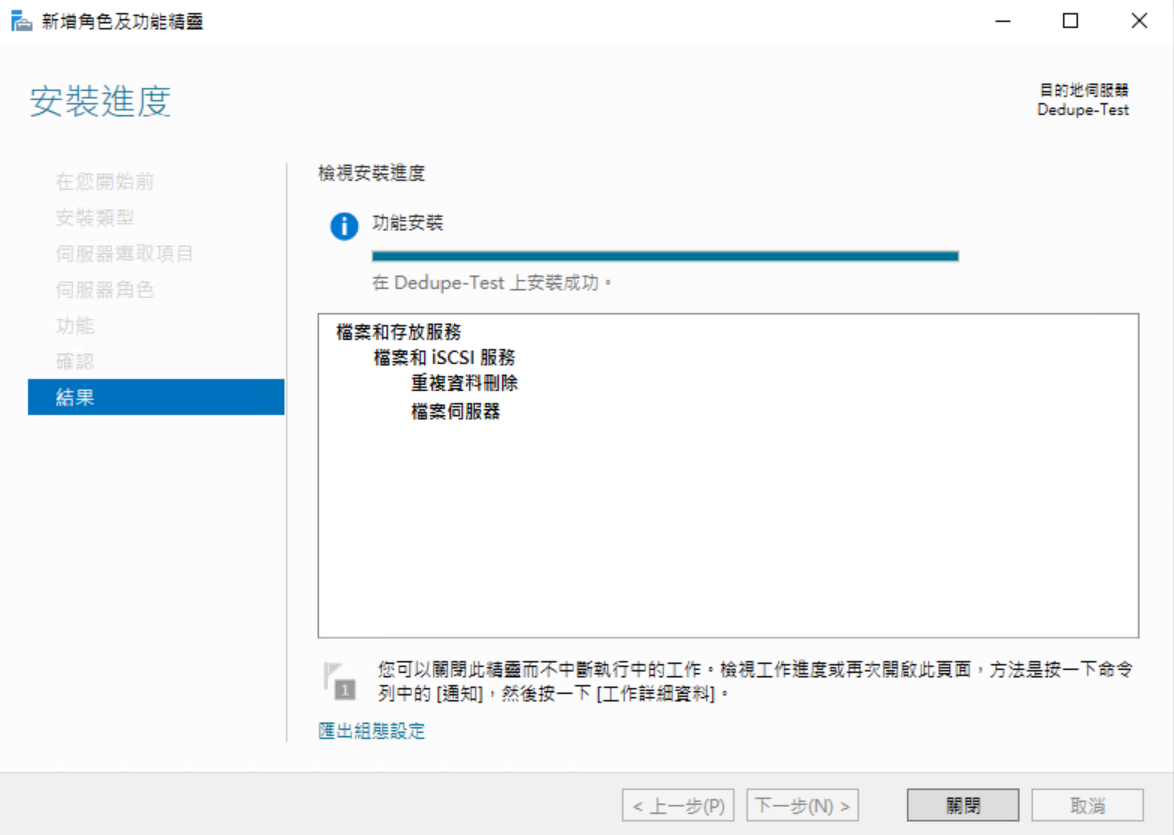 5\. 在Service中會出現兩個Dedupe的服務 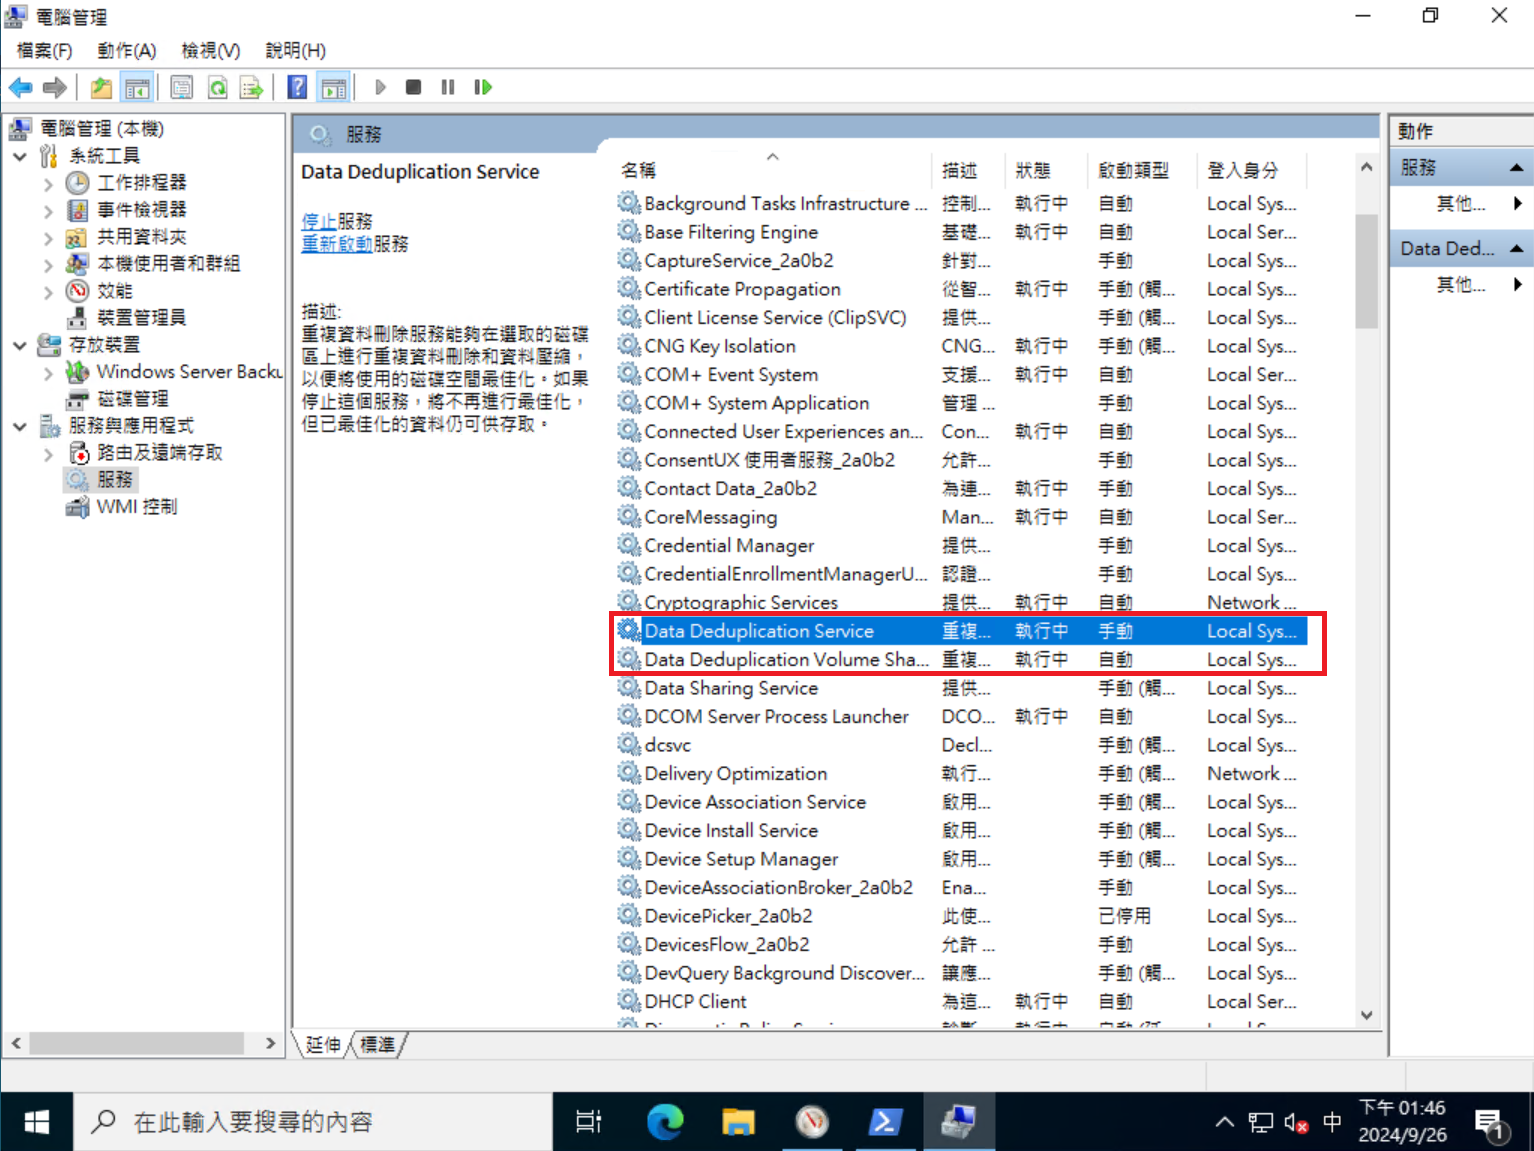 #### 評估Dedupe效益 Windows有提供預先評估工具來評估Dedupe是否有效益,如果效益不佳就不要使用將服務移除就好 首先我先將Windows Server 2022 ISO Copy 至 D:\\,並且再複製一份 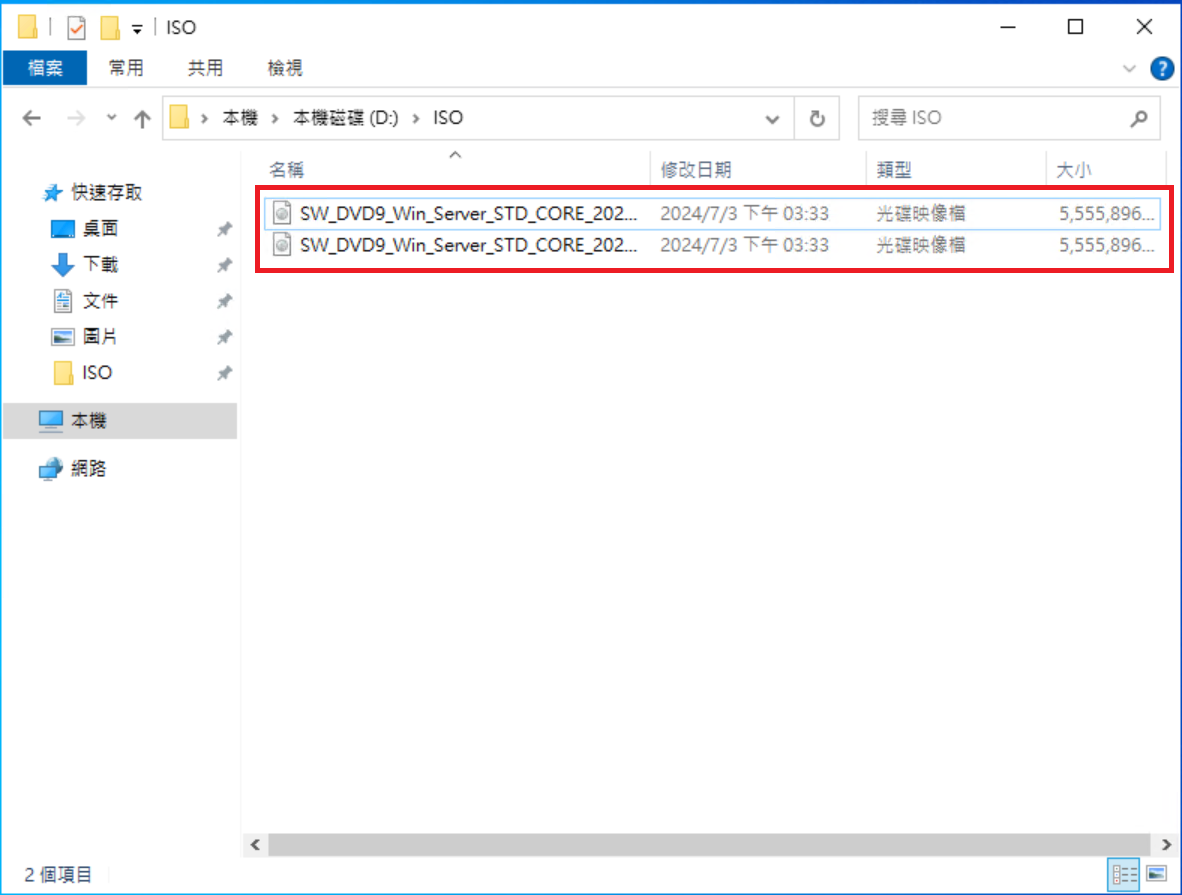 先看一下2022 ISO檔大小5.29GB 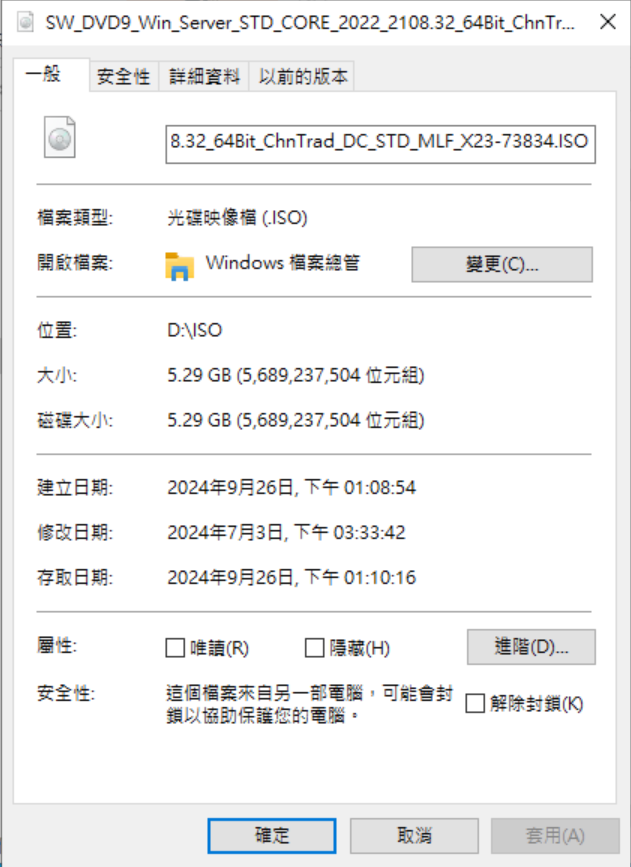 磁碟大小 10.7GB  執行Dedupe評估工具DDPEVAL.EXE ``` ddpeval "D:" /V ``` 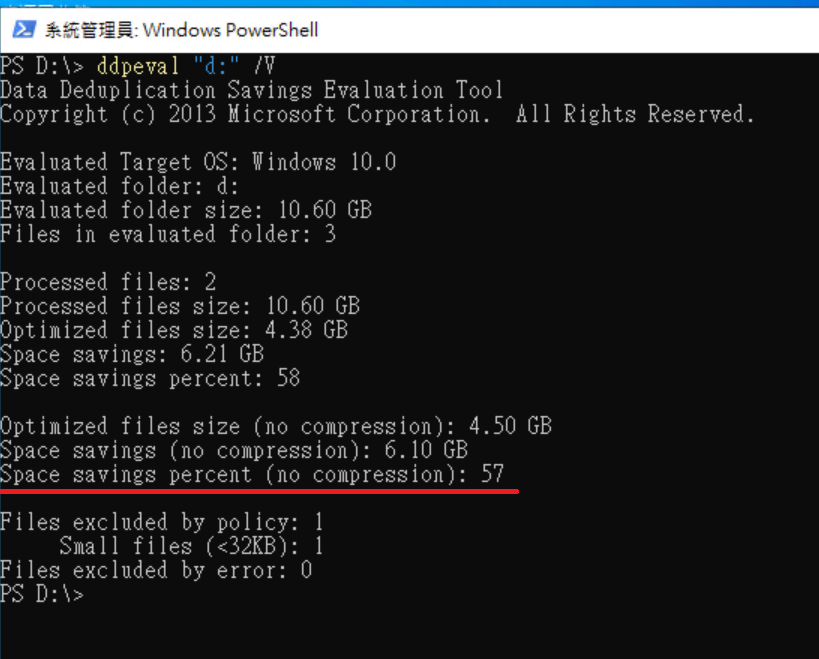 由上面結果看來可Dedupe 57%,再來複製第三份 2022 ISO 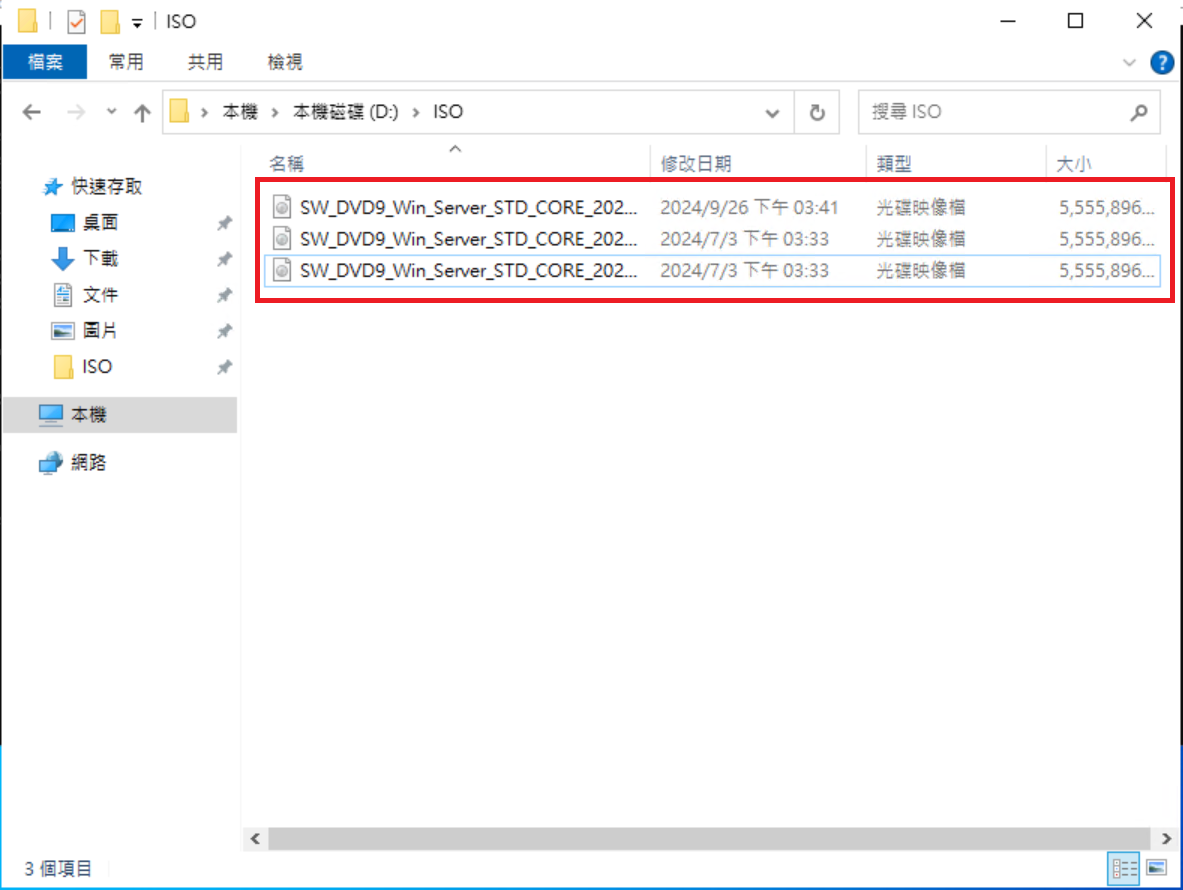 再跑一次評估工具,預估可以Dedupe 78% 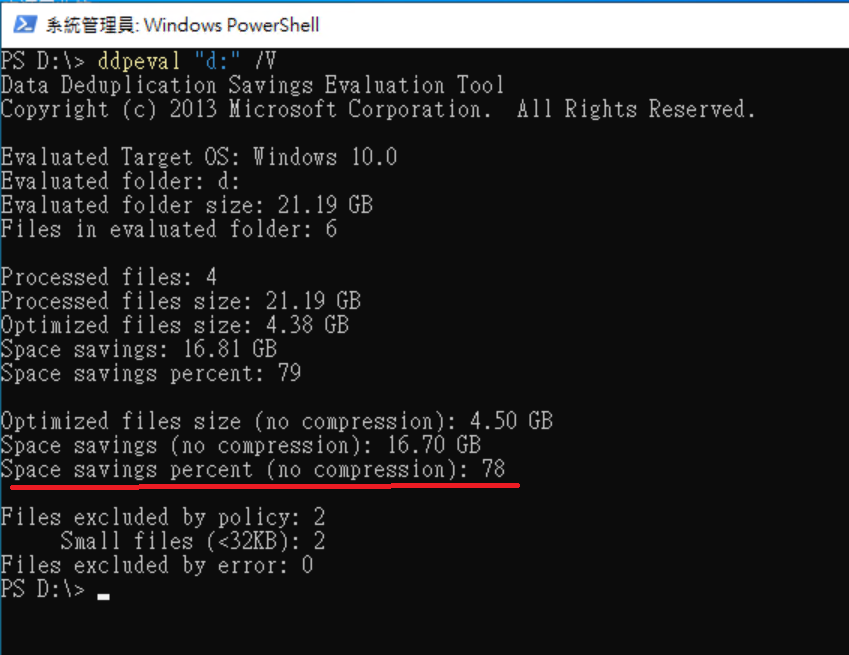 #### 設定Dedupe 至 伺服器管理員 => 檔案和存放服務 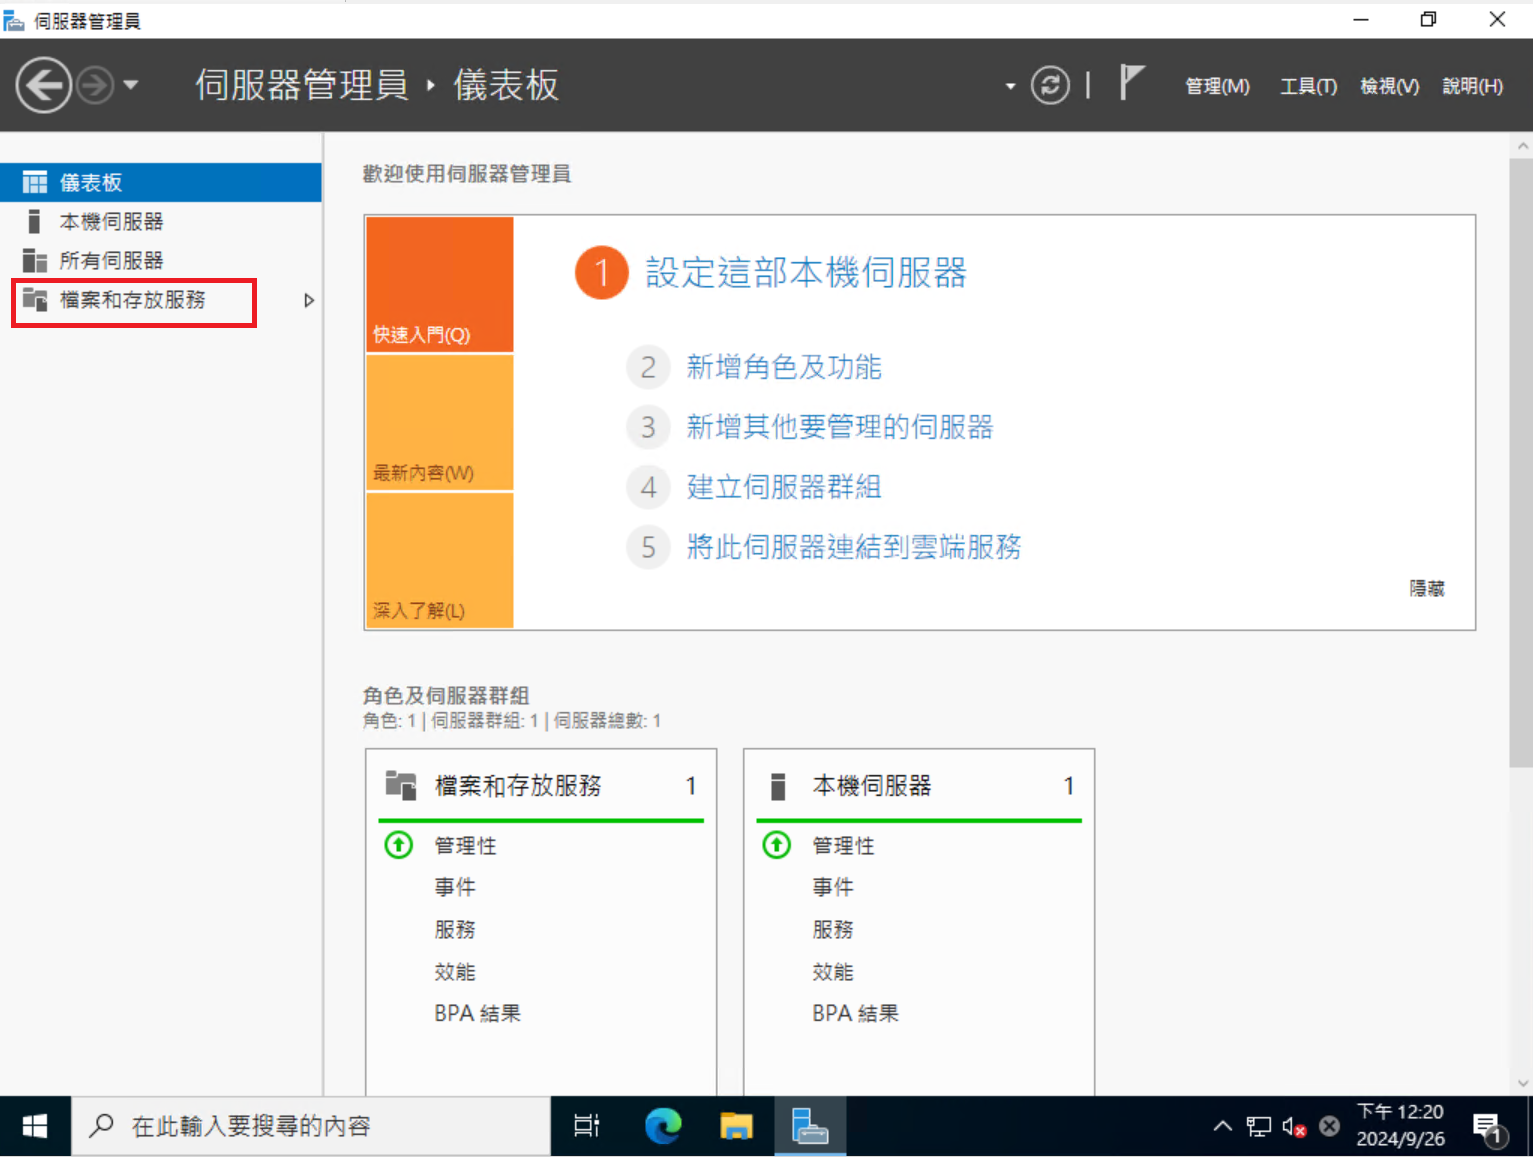 選取 磁碟 => 設定重複資料刪除 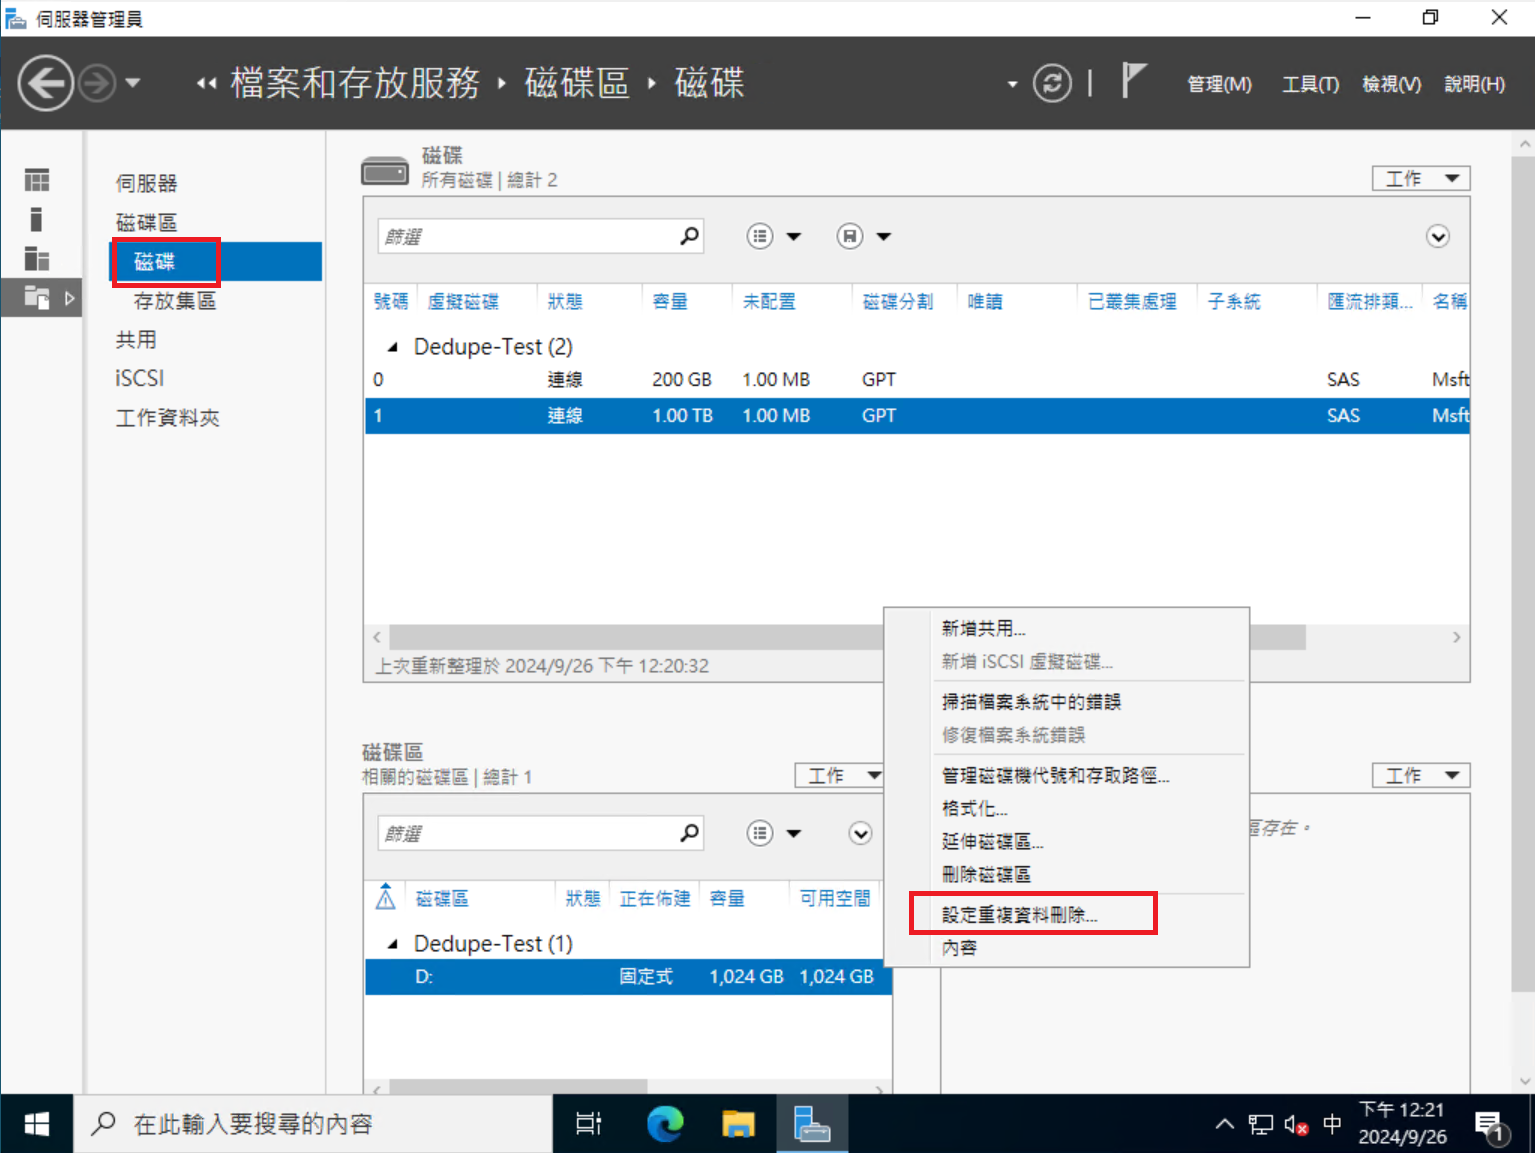 依據你的用途選擇對應的Dedupe政策  預設的政策內容差異請參照[https://learn.microsoft.com/zh-tw/windows-server/storage/data-deduplication/understand](https://learn.microsoft.com/zh-tw/windows-server/storage/data-deduplication/understand)
 在這邊我們選擇檔案伺服器,順便看一下預設的最佳化排程 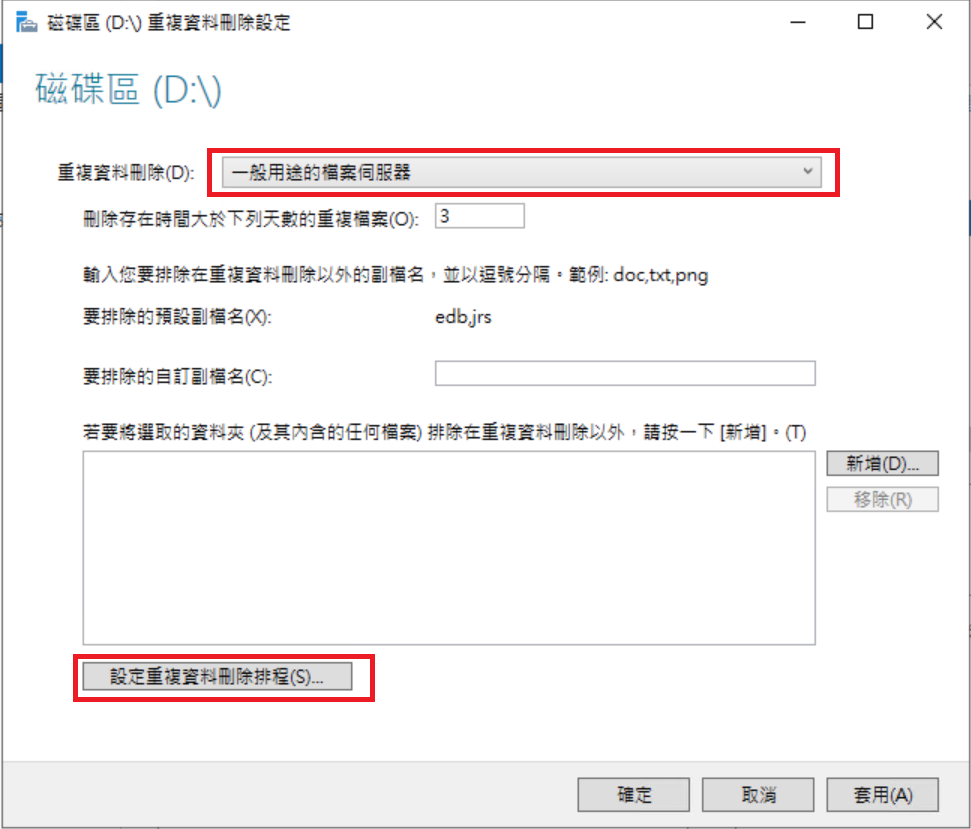 有啟用背景最佳化,這樣已足夠,確認後離開 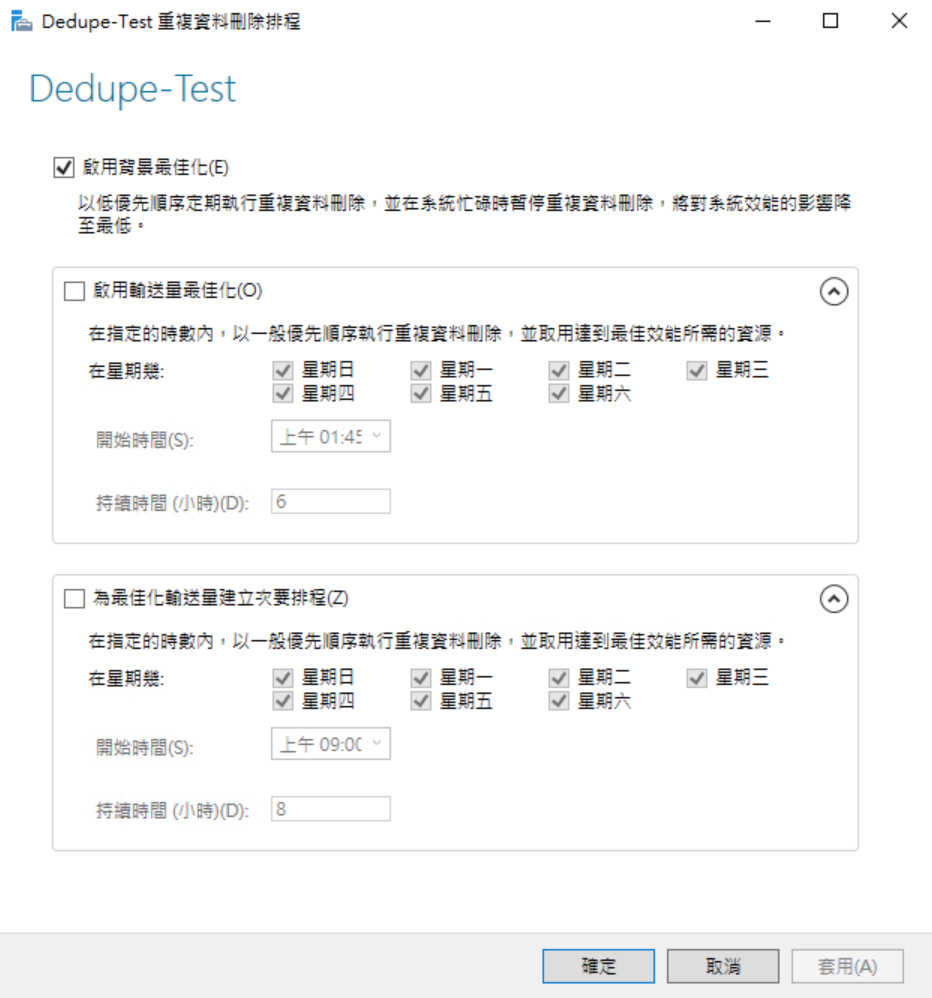 #### Dedupe常用指令 先來介紹一下一些Dedupe常用的指令,後面會用到,參考資料[https://learn.microsoft.com/en-us/powershell/module/deduplication/](https://learn.microsoft.com/en-us/powershell/module/deduplication/)
``` Get-DedupVolume Get-DedupStatus Get-DedupSchedule Get-DedupJob ``` #### 執行Dedupe最佳化 預設狀況,背景最佳化會每天自動進行數次,我們可以透過 Get-DedupSchedule 來看最佳化的排程 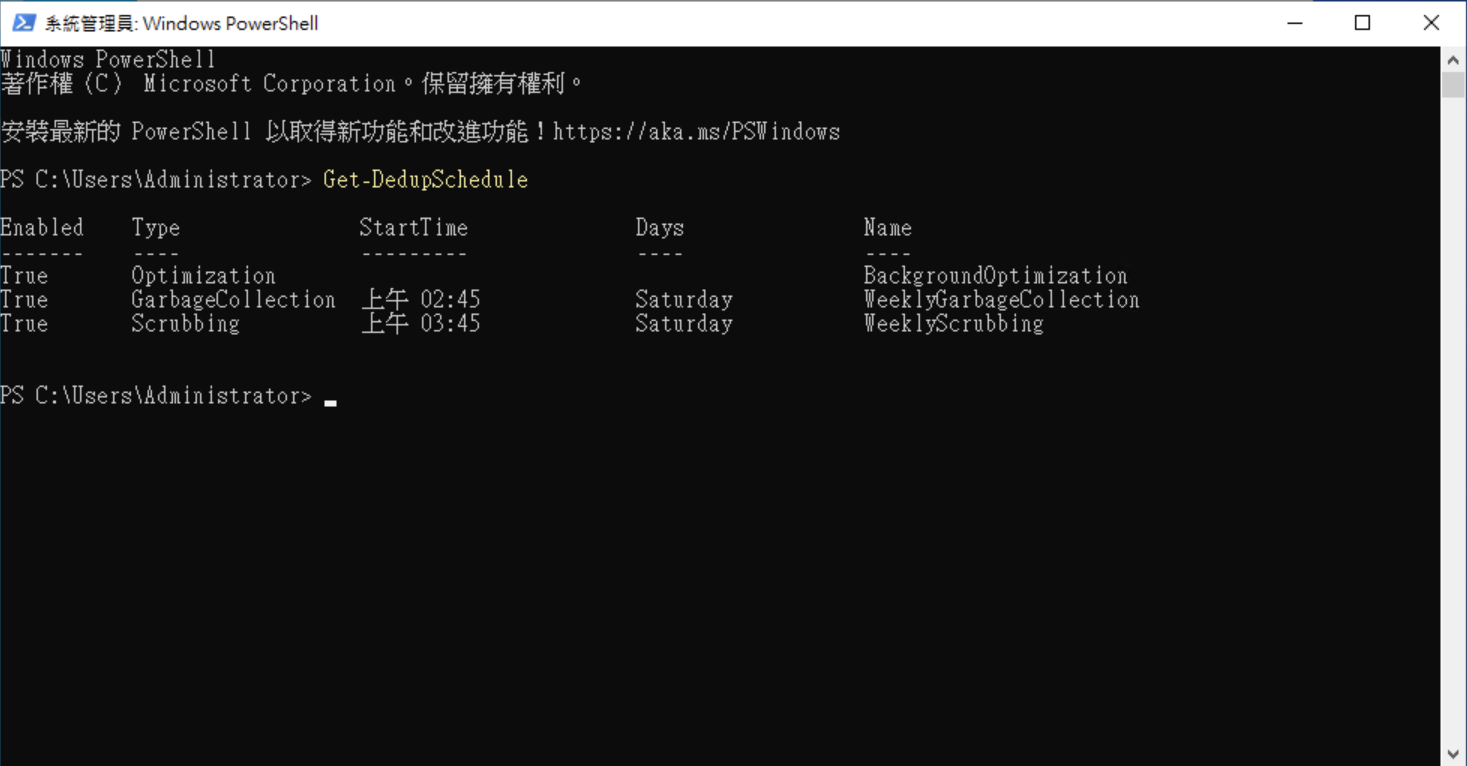 或者可以到工作排程器來查看執行狀況 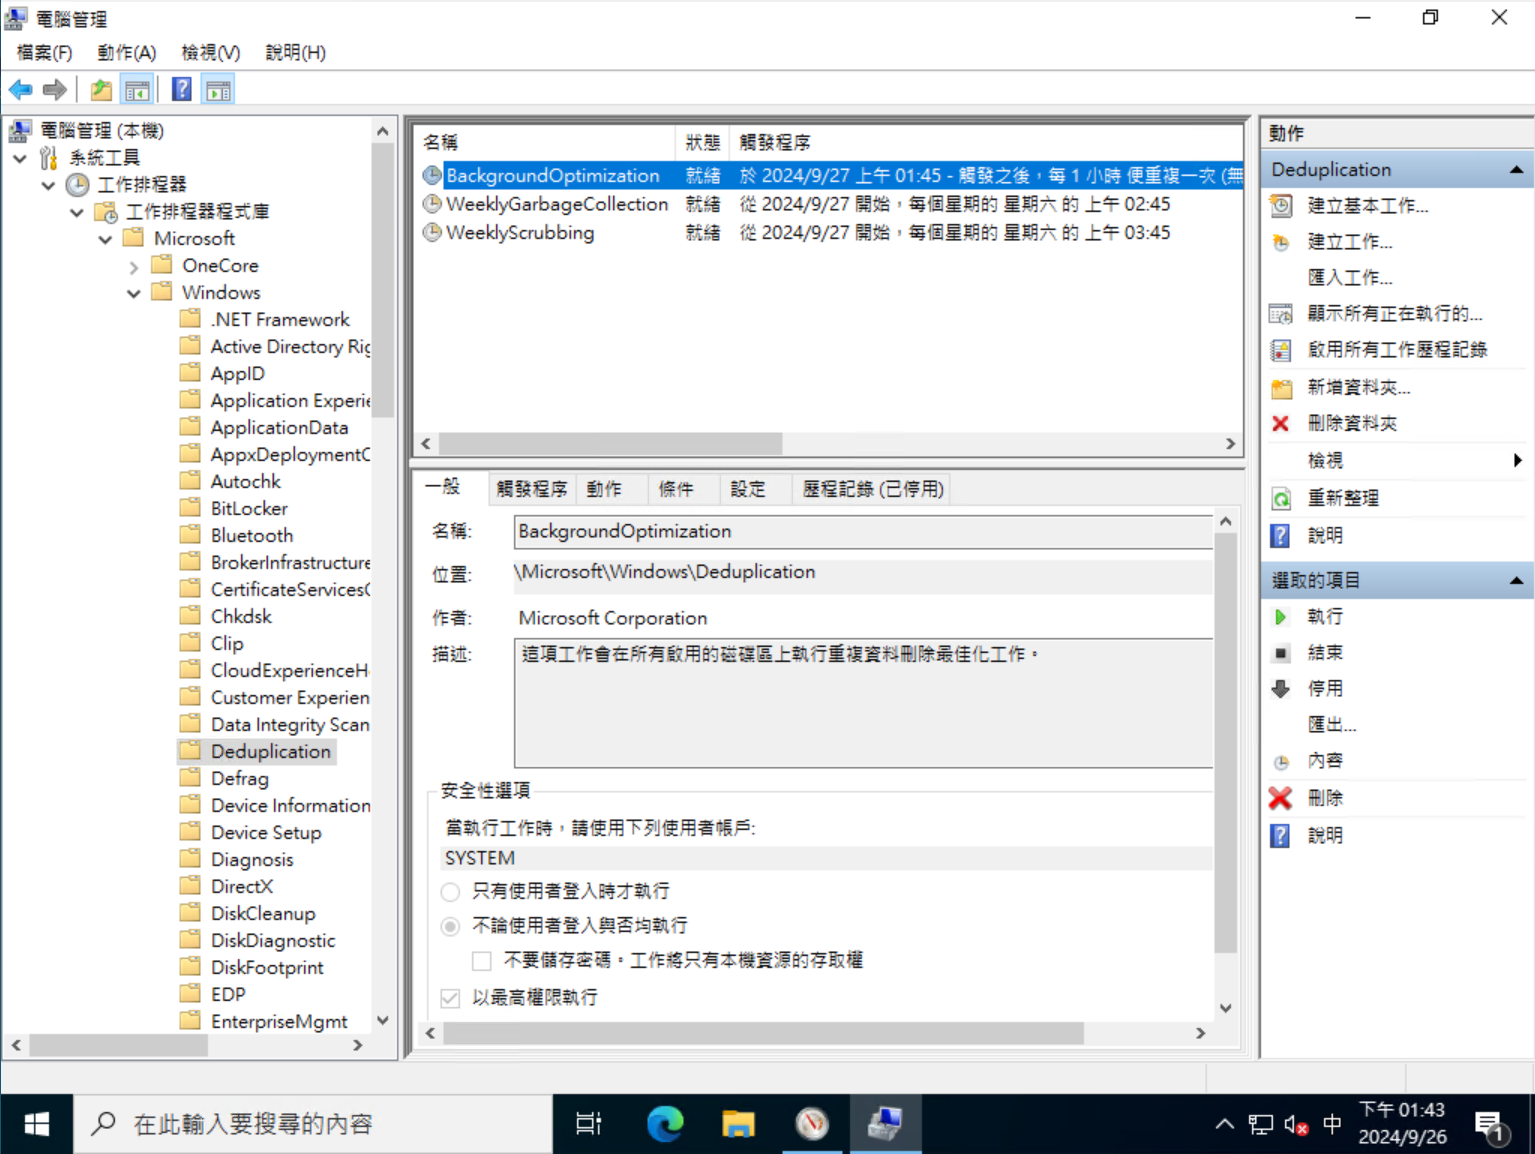 這裡我們可以利用Powershell手動進行最佳化,參考資料[https://learn.microsoft.com/en-us/previous-versions/windows/it-pro/windows-server-2012-r2-and-2012/hh831602(v=ws.11)](https://learn.microsoft.com/en-us/previous-versions/windows/it-pro/windows-server-2012-r2-and-2012/hh831602(v=ws.11))
``` Start-DedupJob -Volume "D:" -Type Optimization -Memory 50 ``` 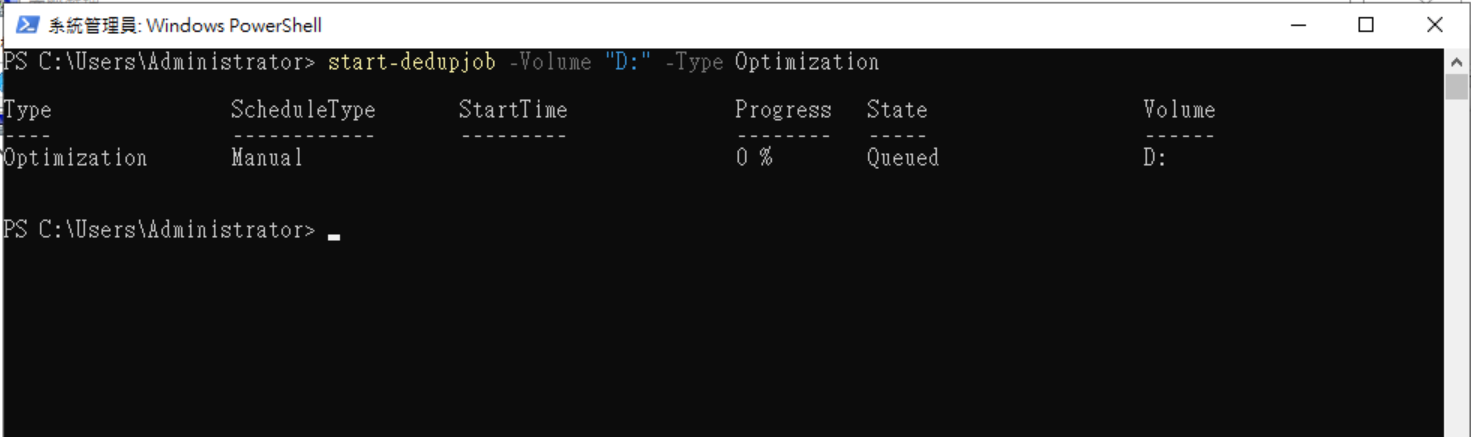 透過 Get-DedupJob 指令來觀察任務執行狀況 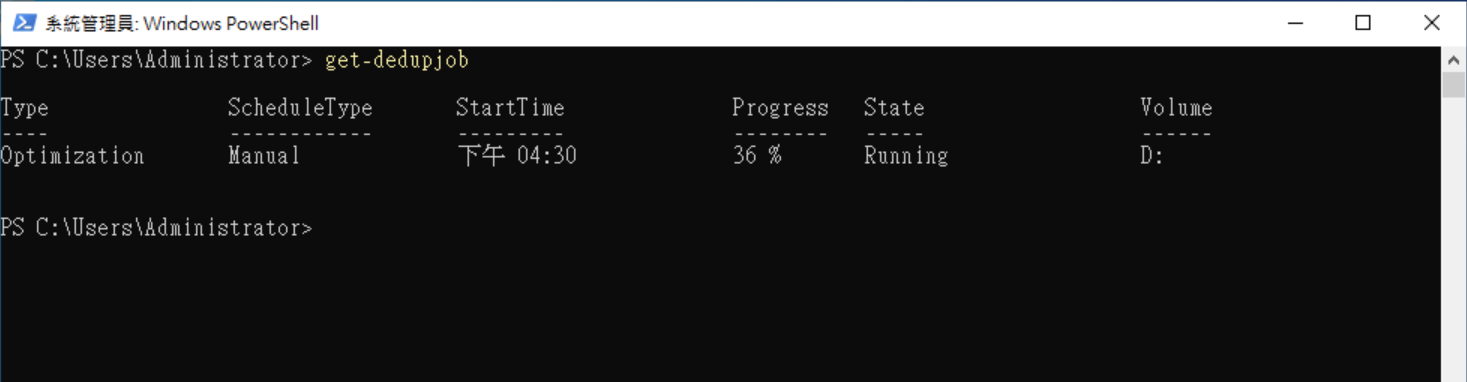 同時也可以透過資源監視器,看到Dedupe進行的狀態 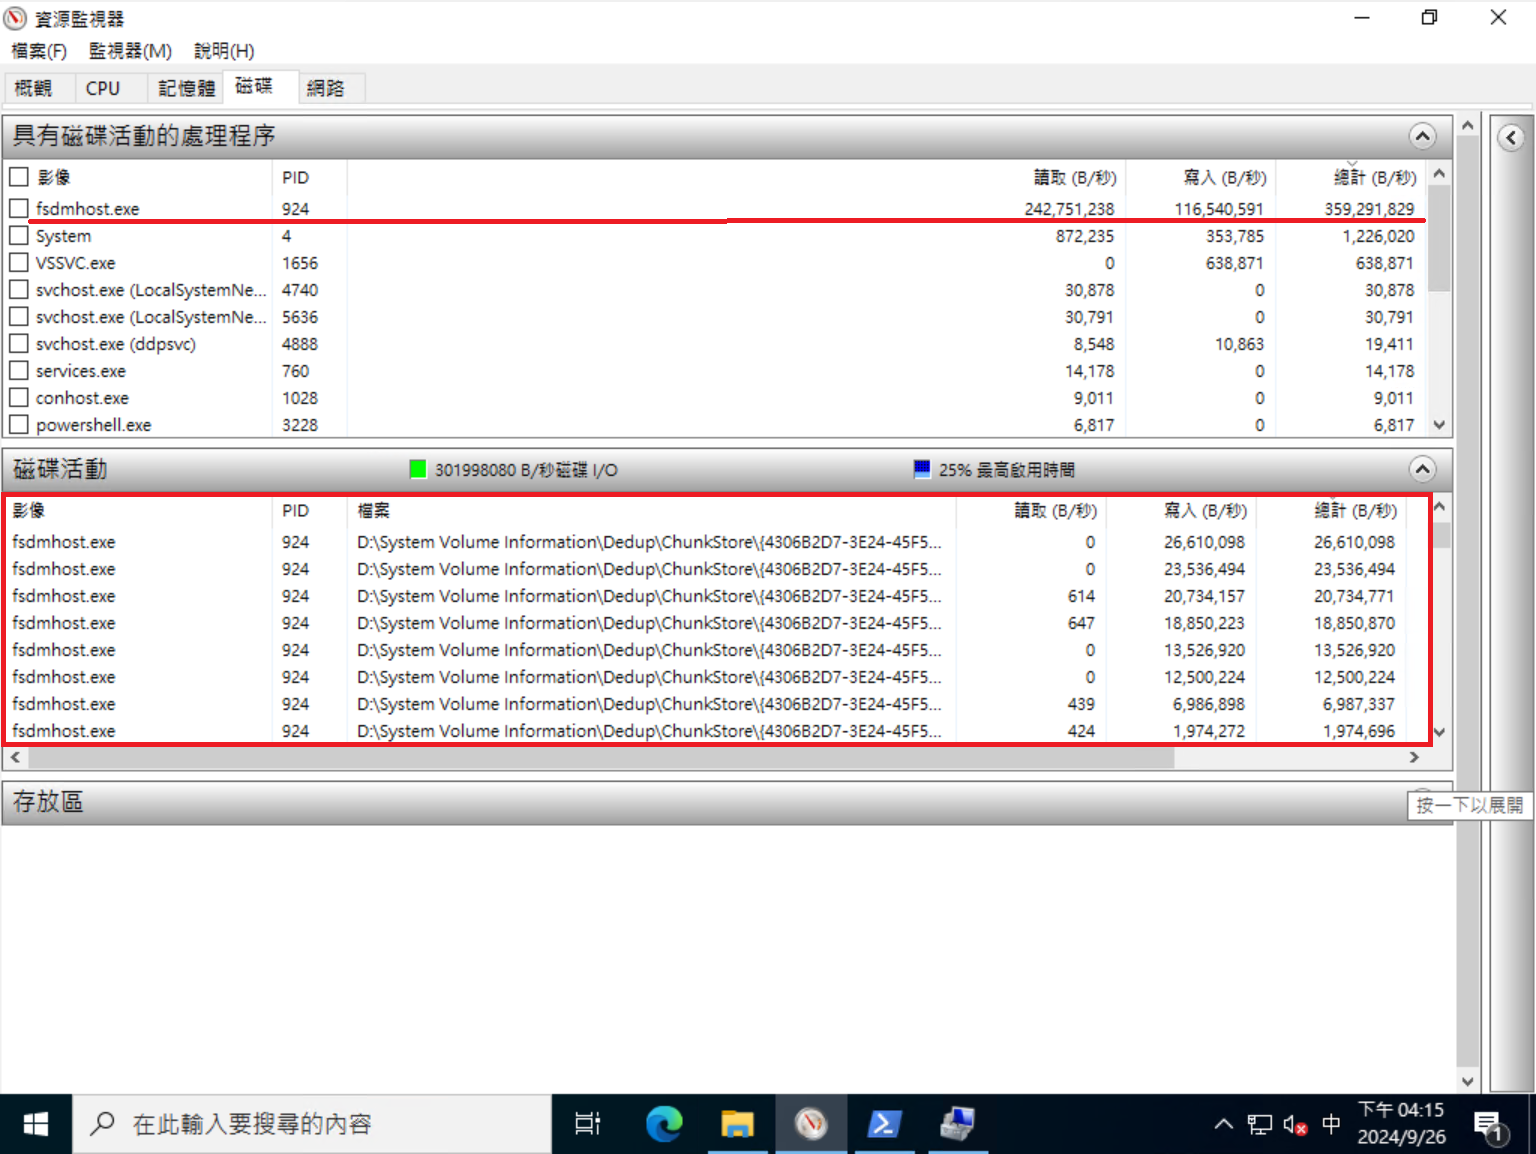 靜待 Get-dedupJob 沒有顯示任何Job時,最佳化完成  #### 確認Dedupe結果 透過 Get-DedupStatus、Get-DedupVolume 來確認 Dedupe 結果 ``` Get-DedupStatus Get-DedupVolume ``` 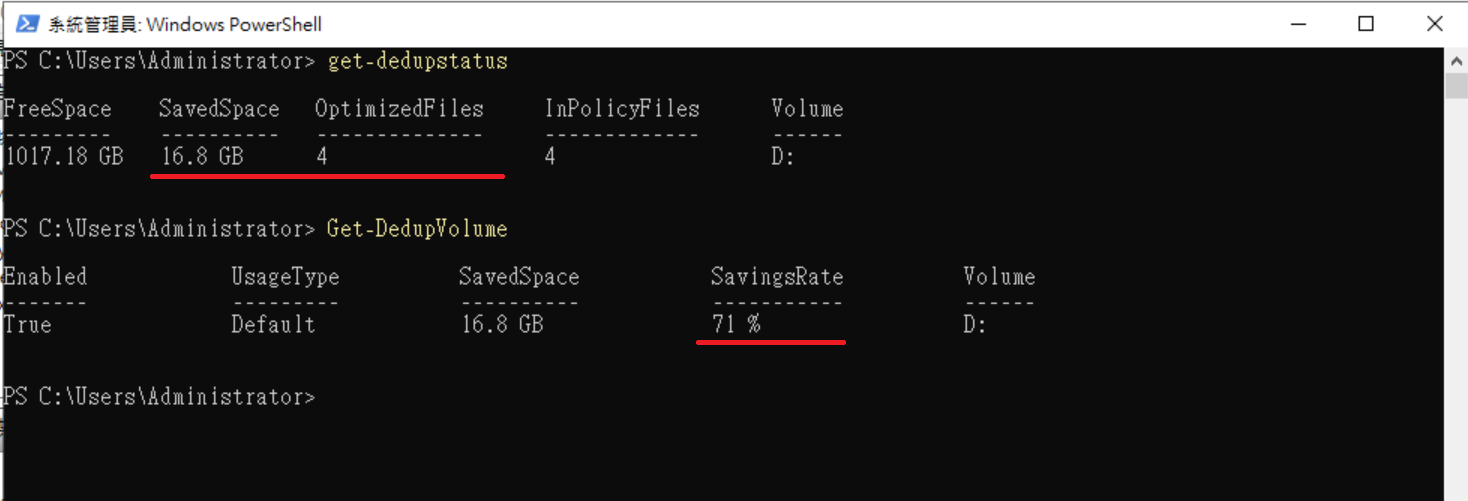 由上圖可知,總共4個檔案節省了16.8GB,Dedupe Rate 71% 可以看到磁碟已使用空間變大了 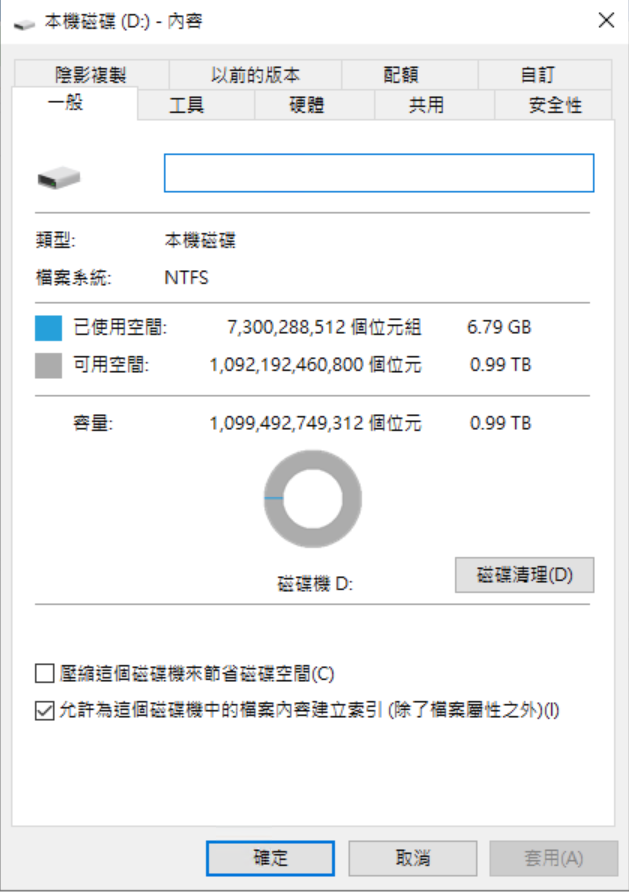 或者也可以透過 伺服器管理員 => 磁碟 => 內容 來確認 Dedupe 狀況 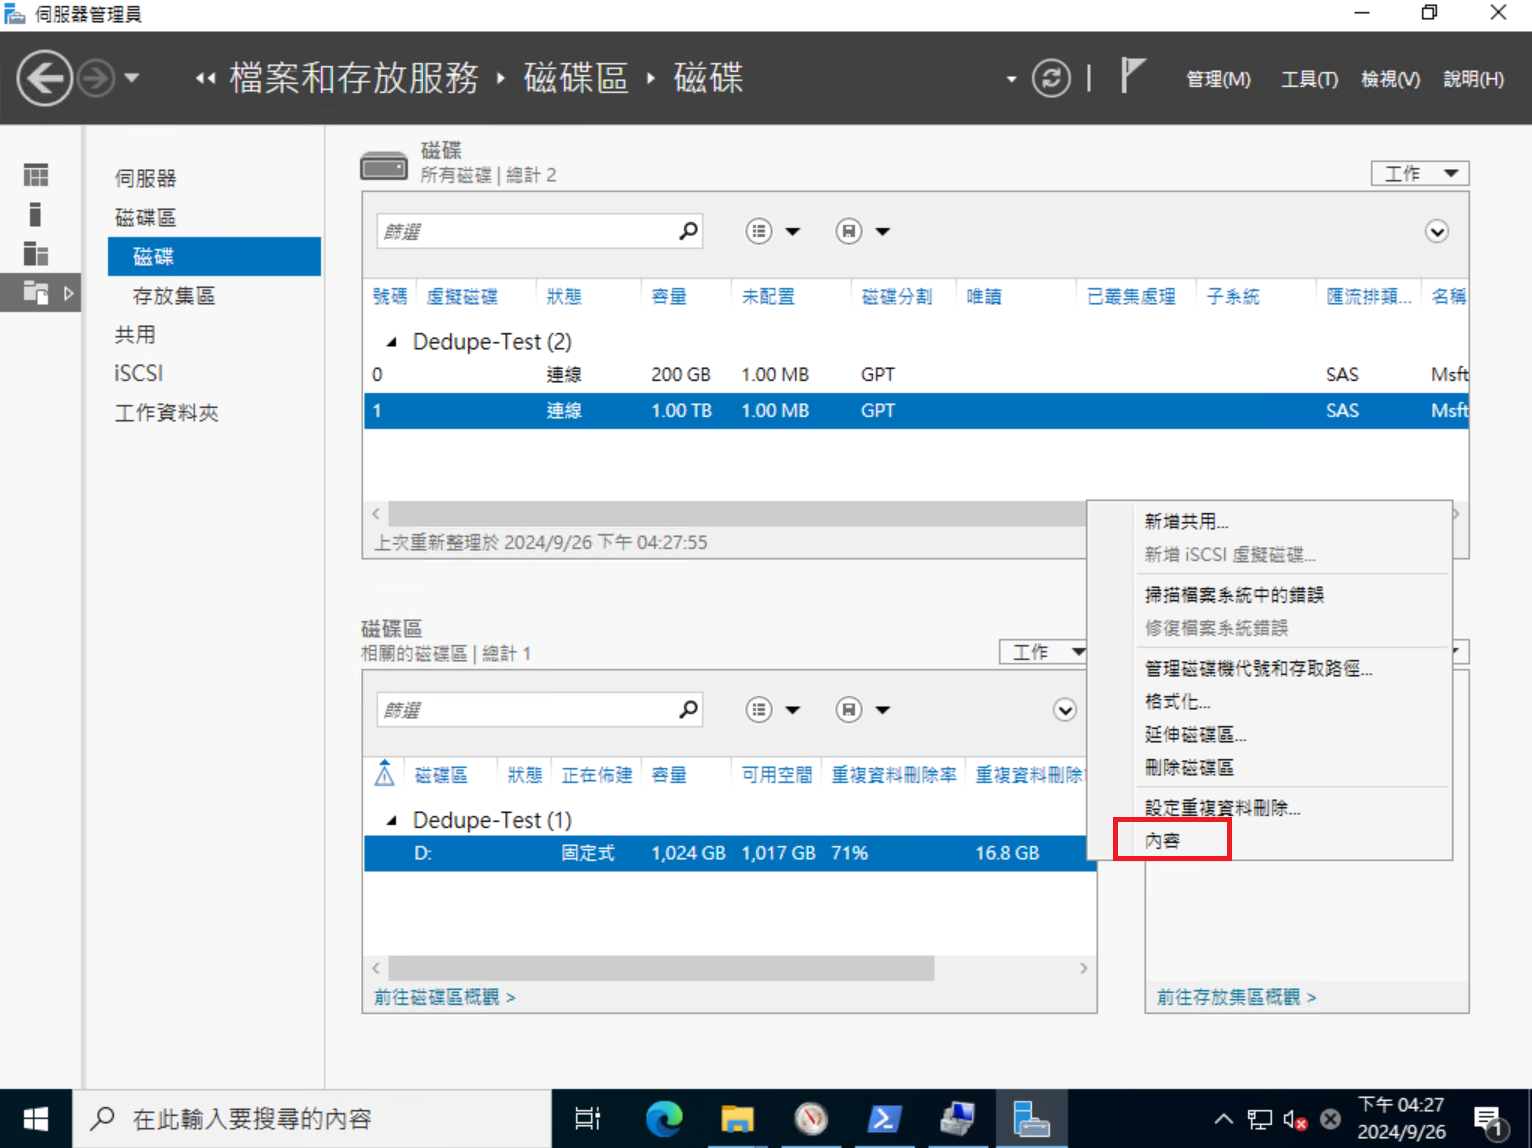 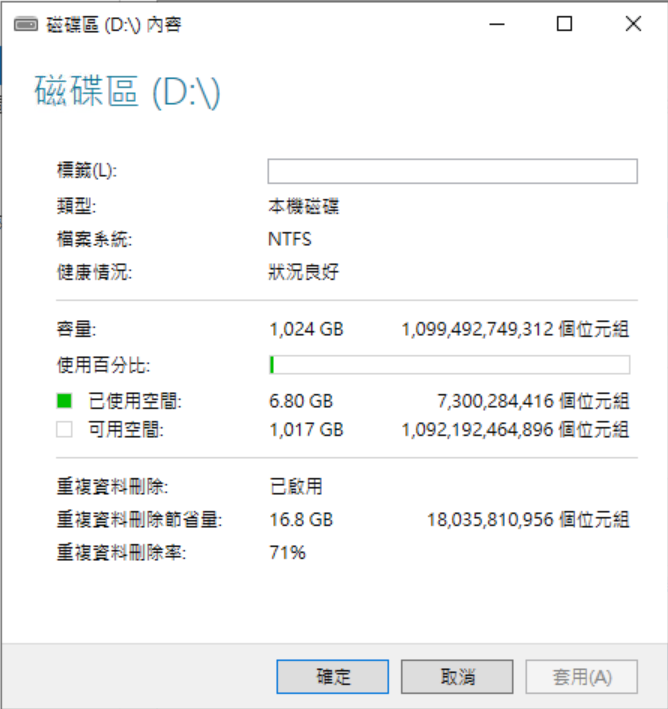 #### 檔案顯示差異 要如何知道哪個檔案有Dedupe過,那些沒有Dedupe過 ? 從檔案的磁碟大小即可分辨 [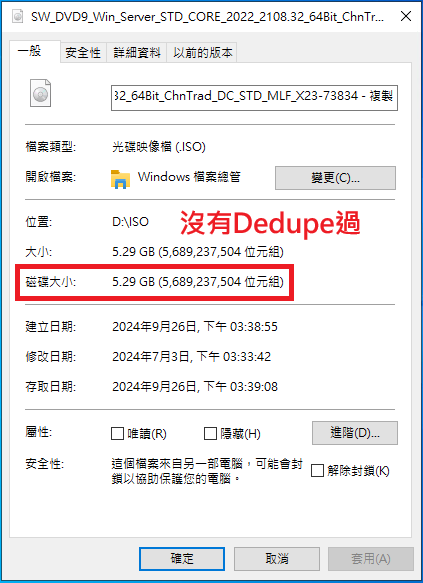](https://mdfk.goddamn.idv.tw/uploads/images/gallery/2024-09/PfjErzMV0g.png) [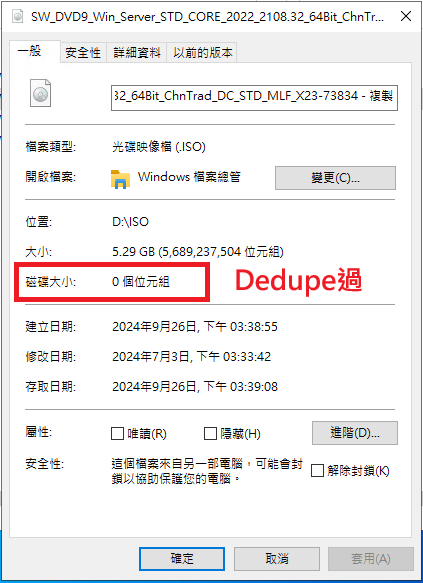](https://mdfk.goddamn.idv.tw/uploads/images/gallery/2024-09/pO8g41ris6.png) Dedupe過後,檔案的磁碟大小不見得會是0,但肯定很小 ### 實務案例 看Lab沒啥感覺,來看看天殺の鍵人我的實際專案建置狀況 #### 案例一:檔案伺服器 20TB 檔案伺服器,8,082,185個檔案與目錄僅占**5.23TB**,Dedupe Rate **72%**,節省了**13.75TB**,如果沒有Dedupe則需要 5.23+13.75=**18.98TB** 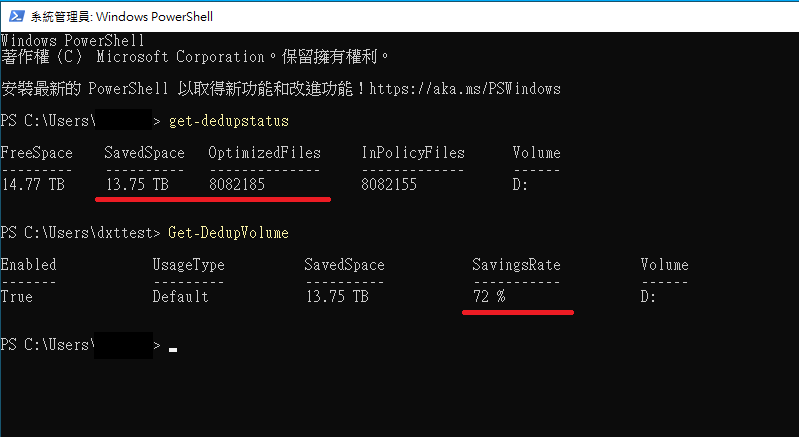 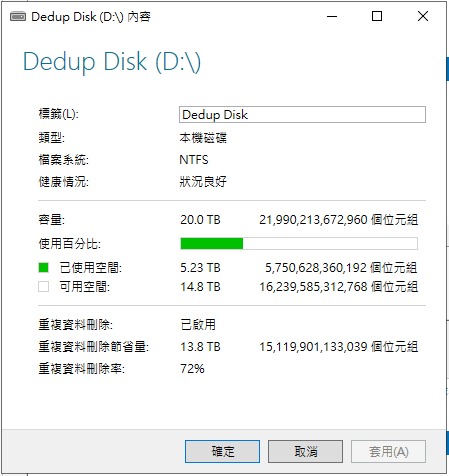 #### 案例二:HyperV Host(單台) 1.71TB HyperV Host,64個檔案與目錄僅占**484GB**,Dedupe Rate **73%**,節省了**1.34TB**,如果沒有Dedupe則需要 0.48+1.34=**1.82TB (根本超過本身的磁碟空間大小)** 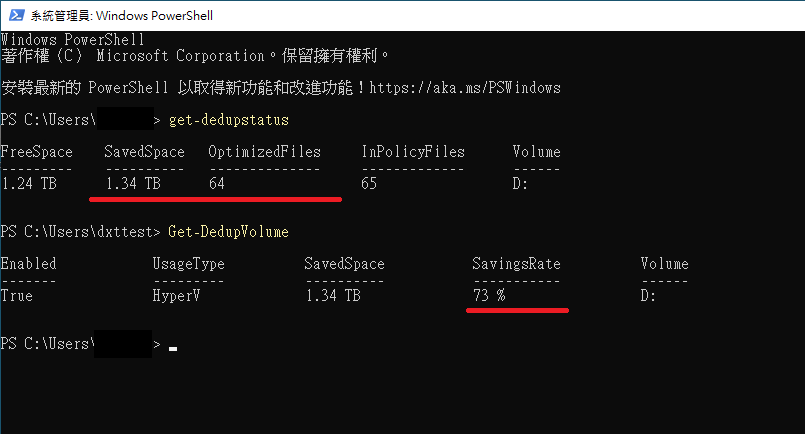  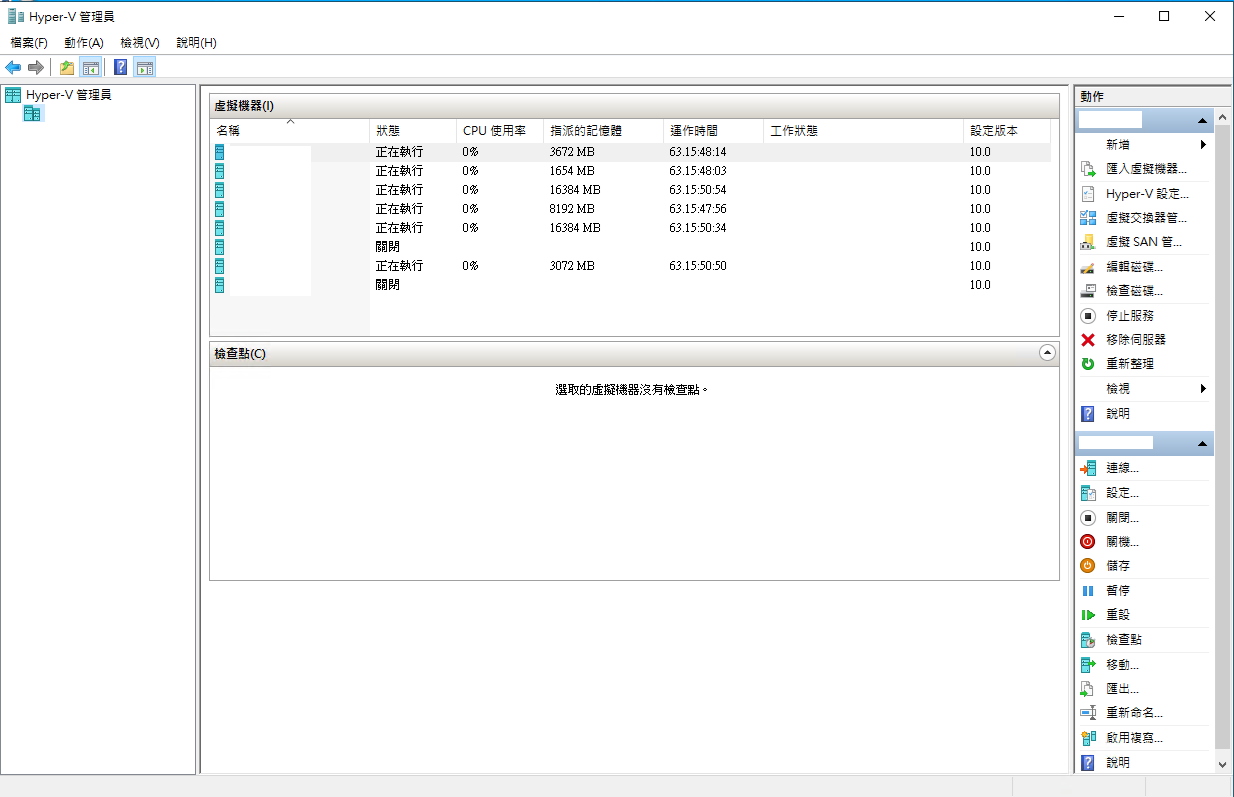 #### 案例三:HyperV Cluster 7TB HyperV Cluster,185個檔案與目錄僅占**4.16TB**,Dedupe Rate **59%**,節省了**6.17TB**,如果沒有Dedupe則需要 4.16+6.17=**10.33TB (根本超過本身的磁碟空間大小)** 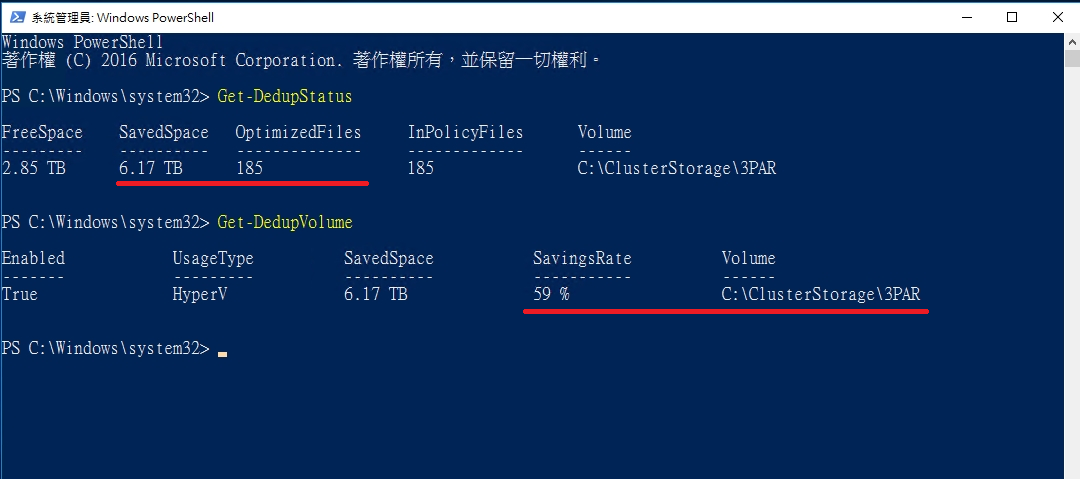 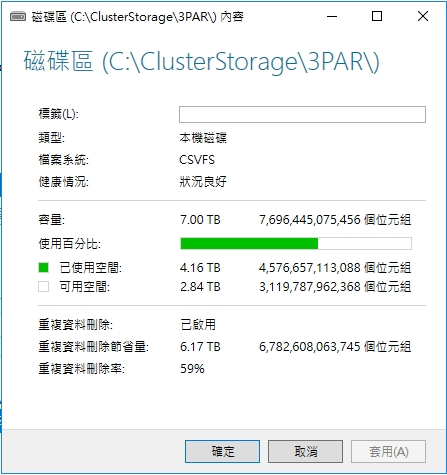  ### 優化校調 由於Windows Server Data Deduplication會去定期將所有檔案作Optimize最佳化運算,但由於Optimize不外乎就是大量的IO讀寫,有些時候有可能會影響Service Performance,比方說User可能會跟你說有時候會很慢,此時可以透過下面兩個方式調整優化。 #### 排除不需要Optimize的物件 在Dedupe設定中,可以排除副檔名與目錄,以下圖為例,我將D:\\temp排除不作Dedupe,以此來加速Optimize最佳化運算,以降低高IO讀寫對系統的Impact 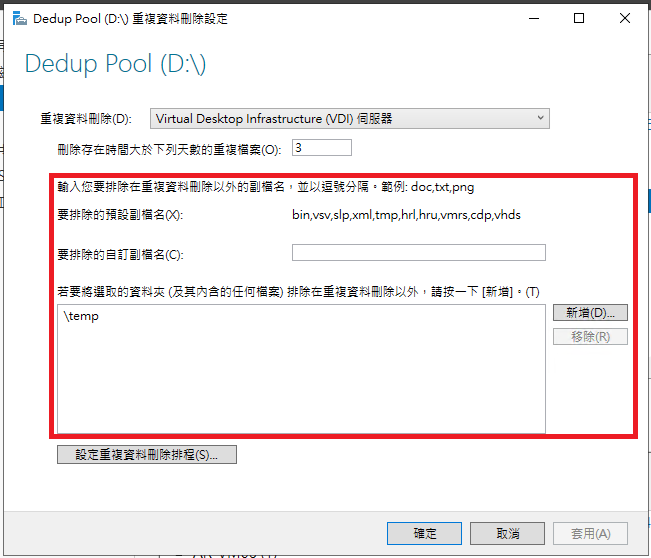 #### 最佳化排程調整 由於Default Optimize最佳化運算排程一天會跑個3次左右,你發現會影響Service Performance,尤其是Hyperv的環境下,User跟你說裡面的虛擬機有時候正常但有時候回應很慢,你可能會發現慢的時候Guest OS的 IO Latency很高,同時以 Get-DedupJob 確認Hyperv Host是正在進行Optimize最佳化運算導致,此時就建議自行更改Optimize最佳化運算的排程,更改Optimize最佳化運算排程方式有二。 ##### 第一種方式 透過剛剛Dedupe GUI設定,設定Dedupe排程  取消 背景最佳化,排除User會使用、備份系統運作、內部Guest OS排程,自行評估使用時段設定一個時間。 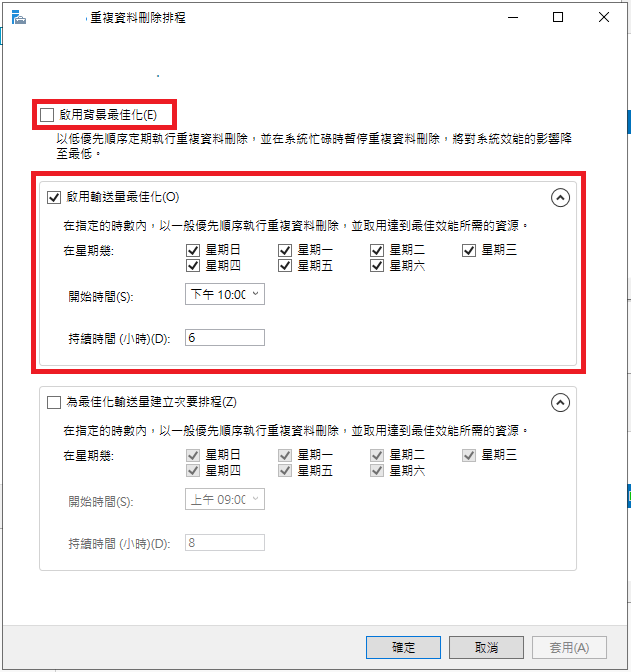 設定完成後可透過 Get-DedupSchedule 指令或工作排程器來確認排程是否正確 ``` Get-DedupSchedule ``` 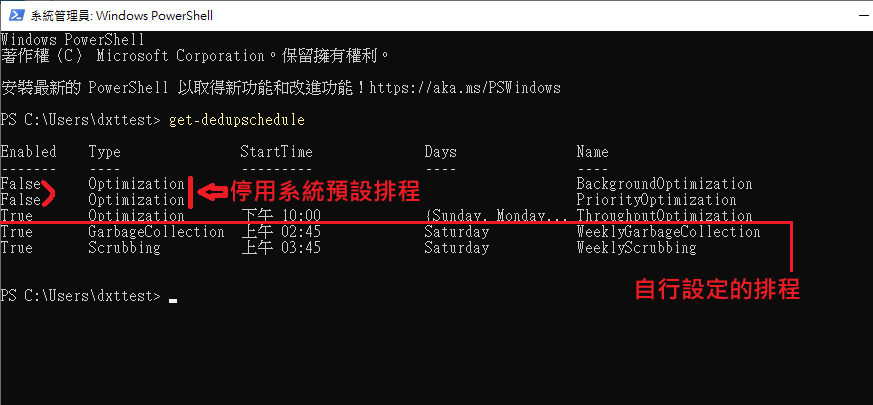 [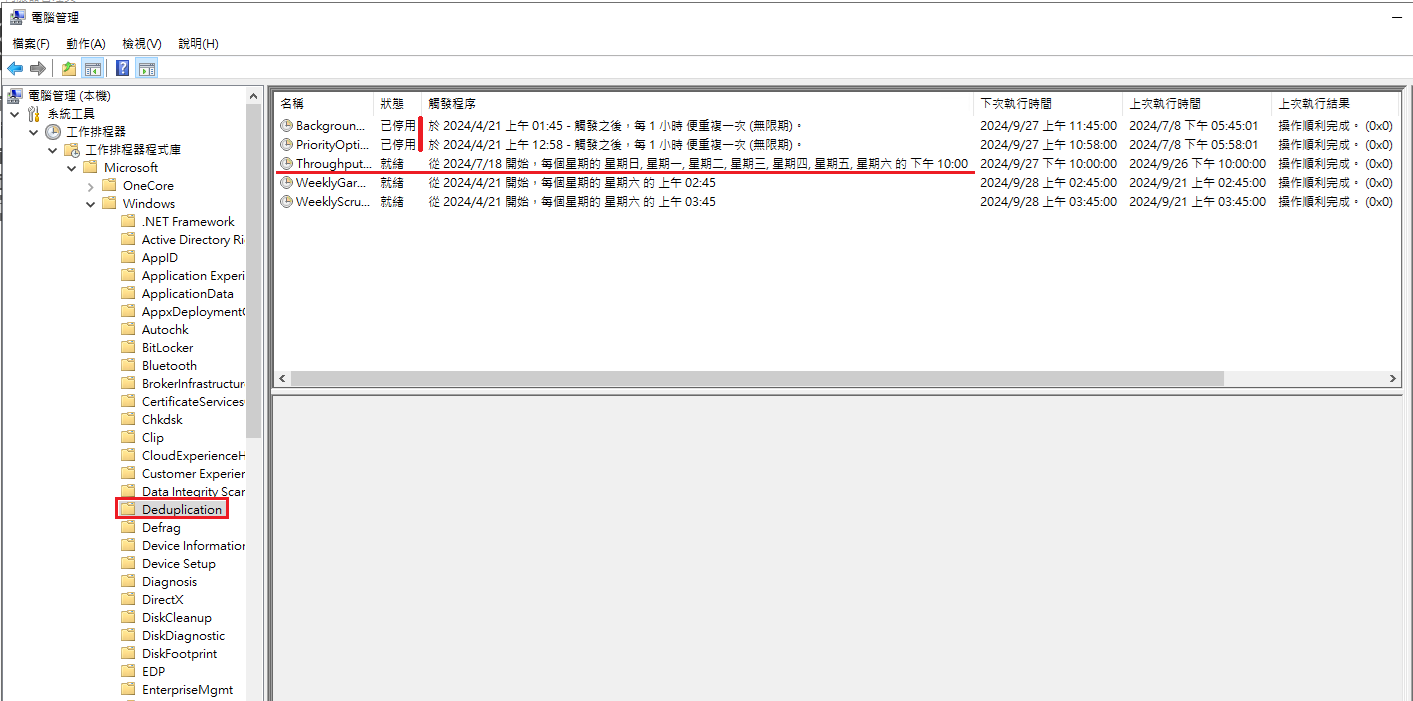](https://mdfk.goddamn.idv.tw/uploads/images/gallery/2024-09/vB6S6qorxM.png) ##### 第二種方式 透過Powershell設定,停用預設排程並設定新排程,範例如下請參照[https://learn.microsoft.com/zh-tw/windows-server/storage/data-deduplication/advanced-settings](https://learn.microsoft.com/zh-tw/windows-server/storage/data-deduplication/advanced-settings)
``` Set-DedupSchedule -Name BackgroundOptimization -Enabled $false Set-DedupSchedule -Name PriorityOptimization -Enabled $false New-DedupSchedule -Name "NightlyOptimization" -Type Optimization -DurationHours 11 -Memory 50 -Cores 80 -Priority High -Days @(1,2,3,4,5) -Start (Get-Date "2016-08-08 19:00:00") ``` 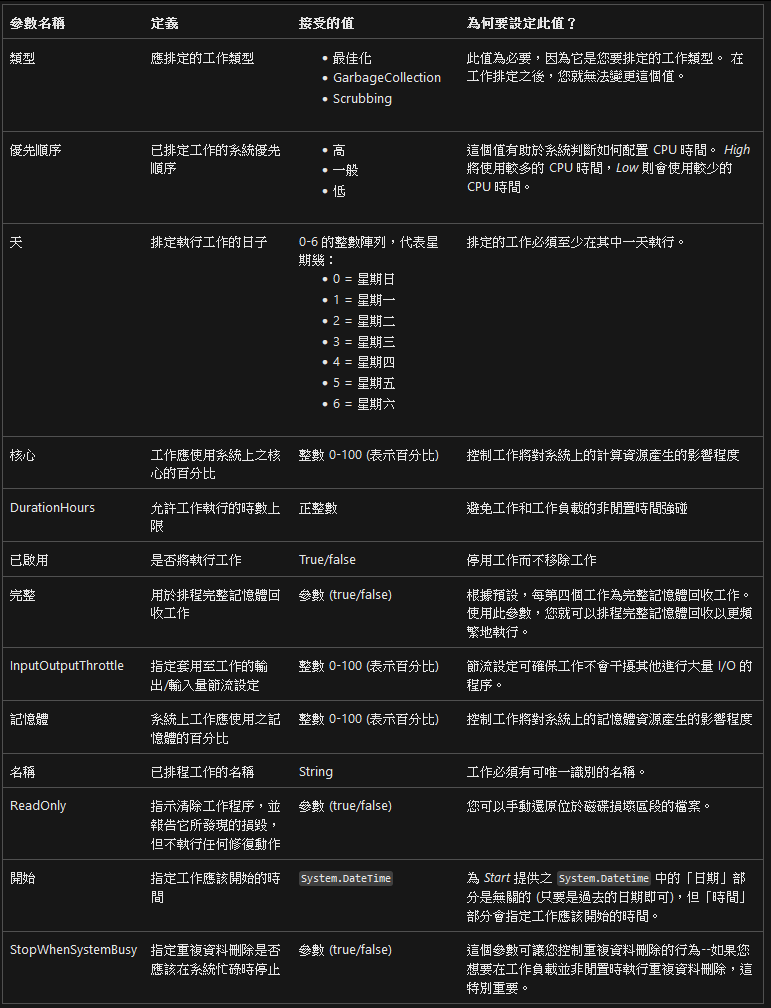 ### Un-Dedupe Powershell請參照[https://learn.microsoft.com/en-us/powershell/module/deduplication/expand-dedupfile?view=windowsserver2022-ps](https://learn.microsoft.com/en-us/powershell/module/deduplication/expand-dedupfile?view=windowsserver2022-ps)
``` Expand-DedupFile -Path "D:\Share\" ``` ### Pros & Cons 說到這邊,相信大家都已經開始深深愛上Windows Server Data Deduplication 了,但在此還是要提一下Dedupe的優缺點。 #### 缺點 1. 系統資源需求較高,Storage越大所需要的記憶體越多。 2. 讀取一般檔案時是去讀取分散的Chunk,連續讀取速度相較於沒有Dedupe時慢。 3. 會需要定時進行Optimize、Garbage Collect、Scrubbing,此時磁碟的高IO可能會導致IO Latency明顯增加,進而造成服務回應變慢。 4. 影像、音樂、串流 檔案無任何Dedupe效果,如果仍然想確認可執行DDPEVAL.EXE進行評估。 5. 如果有長官詢問檔案有多大你可以回答這個問題,但你無法回答把這個檔案放到File Server上會額外使用多少空間,你也無法回答刪除這些檔案後能夠釋放多少空間。 6. **由於Chunk的唯一性,請好好的作好Raid與Backup,一旦磁碟壞軌資料損毀你無法預期會有多大的影響。** 7. **使用Robocopy可能會出問題,不是不能用但請先搞清楚那些參數不能用,請參照下方。**[https://learn.microsoft.com/zh-tw/windows-server/storage/data-deduplication/interop#robocopy](https://learn.microsoft.com/zh-tw/windows-server/storage/data-deduplication/interop)
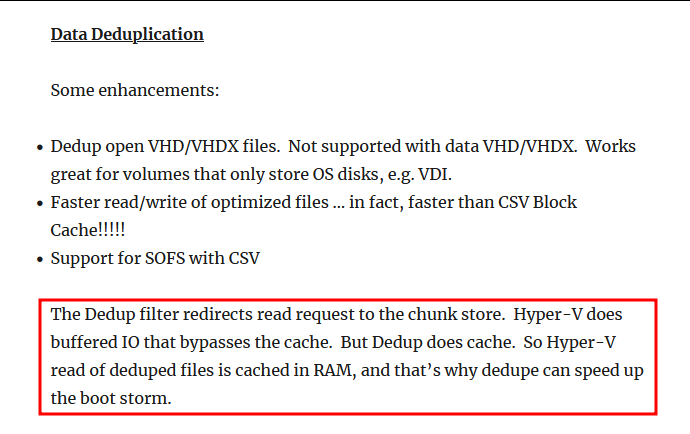
 #### 優點 1. 大幅降低 File Server、Hyperv、Backup 所需要的磁碟空間。 2. 當作File Server使用時,完全可以依照原來Windows權限設定方式設定。 3. **儘管讀取一般檔案時是去讀取分散的Chunk,連續讀取速度相較於沒有Dedupe時慢,某些文獻上有提到由於Hyperv在讀取一般磁碟時會Bypass Cache,但是由於Chunk可以透過記憶體快取,所以做了 Data Deduplication 反而有助於改善Hyperv BootStorm(開機風暴)問題。**參考資料:[https://aidanfinn.com/?p=14863](https://aidanfinn.com/?p=14863)
 ### 結語 Windows Server Data Deduplication 此功能有著大幅降低所需要的磁碟空間顯著的優點,但同時也有一些不能忽視的缺點,審慎妥善的評估情境是否適用、作好萬全的防護措施,Windows Server Data Deduplication 絕對能帶給你前所未有的絕妙體驗。 ### 參考資料[https://learn.microsoft.com/zh-tw/windows-server/storage/data-deduplication/overview](https://learn.microsoft.com/zh-tw/windows-server/storage/data-deduplication/overview)
[https://learn.microsoft.com/zh-tw/windows-server/storage/data-deduplication/understand](https://learn.microsoft.com/zh-tw/windows-server/storage/data-deduplication/understand)
[https://learn.microsoft.com/zh-tw/windows-server/storage/data-deduplication/install-enable](https://learn.microsoft.com/zh-tw/windows-server/storage/data-deduplication/install-enable)
[https://learn.microsoft.com/zh-tw/windows-server/storage/data-deduplication/interop](https://learn.microsoft.com/zh-tw/windows-server/storage/data-deduplication/interop)
[https://learn.microsoft.com/en-us/previous-versions/windows/it-pro/windows-server-2012-r2-and-2012/hh831700(v=ws.11)](https://learn.microsoft.com/en-us/previous-versions/windows/it-pro/windows-server-2012-r2-and-2012/hh831700(v=ws.11))
[https://learn.microsoft.com/en-us/powershell/module/deduplication/](https://learn.microsoft.com/en-us/powershell/module/deduplication/)
[https://learn.microsoft.com/en-us/windows-server/storage/file-server/ntfs-overview](https://learn.microsoft.com/en-us/windows-server/storage/file-server/ntfs-overview)
# Windows Server LACP 設定  ### 前言 Windows在2008 R2以前並沒有OS內建的LACP可以設定,所以2003當年像是HP就有提供Network Configuration Utility程式來做NIC Teaming,直到2012之後才內建了LACP設定,此篇帶大家看看怎麼設定Windows Server LACP。 \#Windows Server 2003 年代 HP Network Configuration Utility 畫面 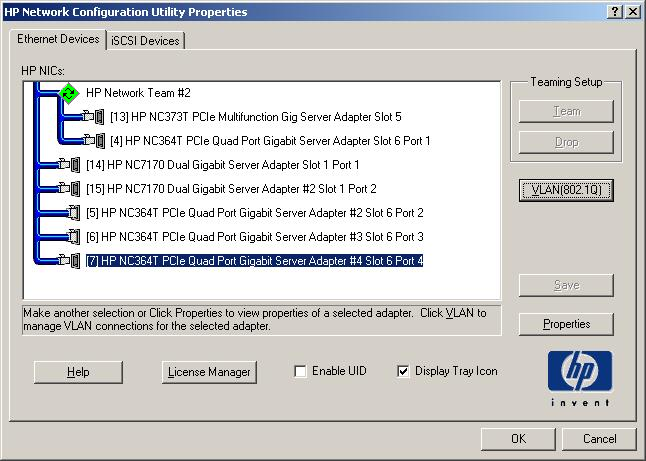 ### 環境說明 **OS:**Windows Server 2022 **Switch****:**找台可以做LACP的Switch > 鍵人我在這裡是用 Cisco 2960G、QNAP Switch M3224-24T MC-LAG 來進行 LACP 測試 > Qnap Switch 詳細介紹請參照:[https://mdfk.goddamn.idv.tw/books/qnap/page/qnap-switch-m3224-24t-mc-lag-multi-chassis-link-aggregation](https://mdfk.goddamn.idv.tw/books/qnap/page/qnap-switch-m3224-24t-mc-lag-multi-chassis-link-aggregation) ### Windows Server LACP 設定 至 伺服器管理員 => 本機伺服器 => NIC Teaming 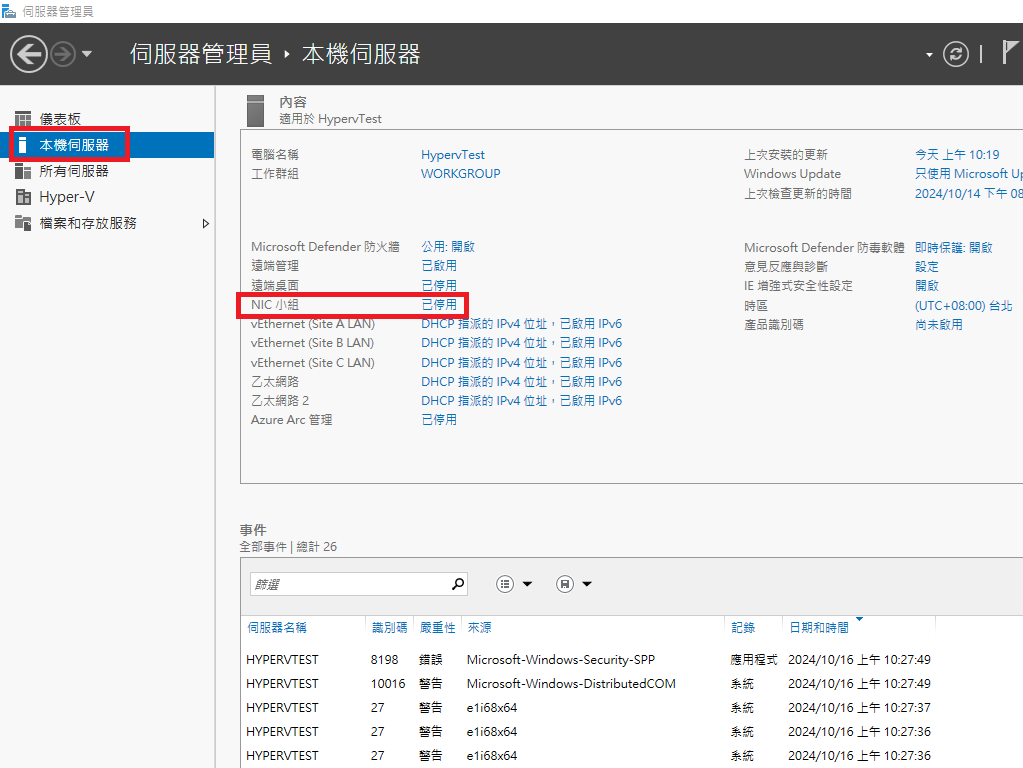 點選 工作 => 新增小組 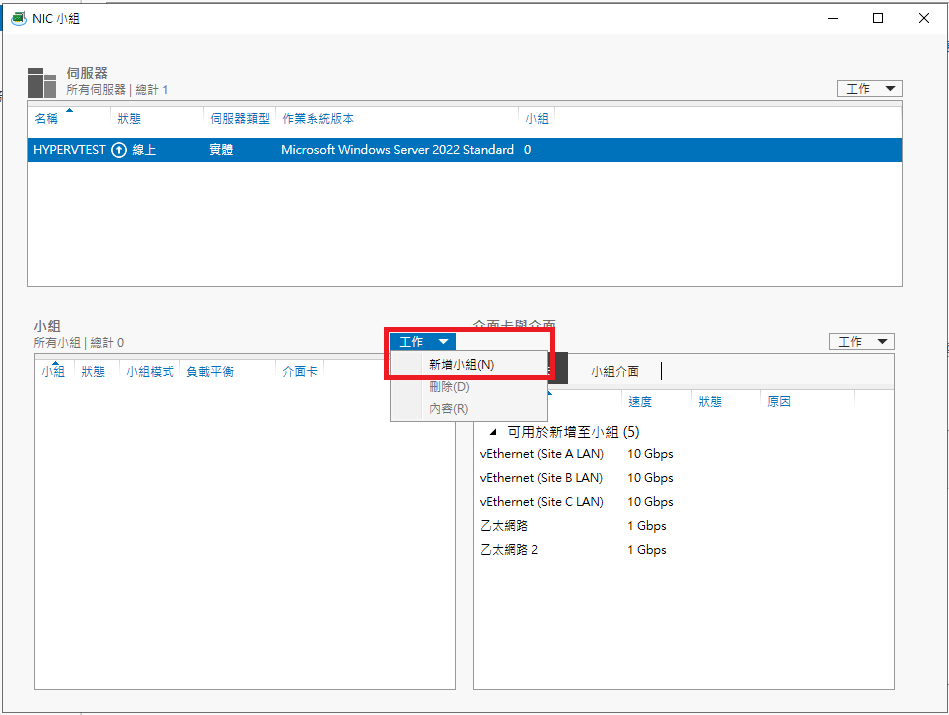 將Server的兩張網卡選起來,模式選擇LACP動態  建立完成 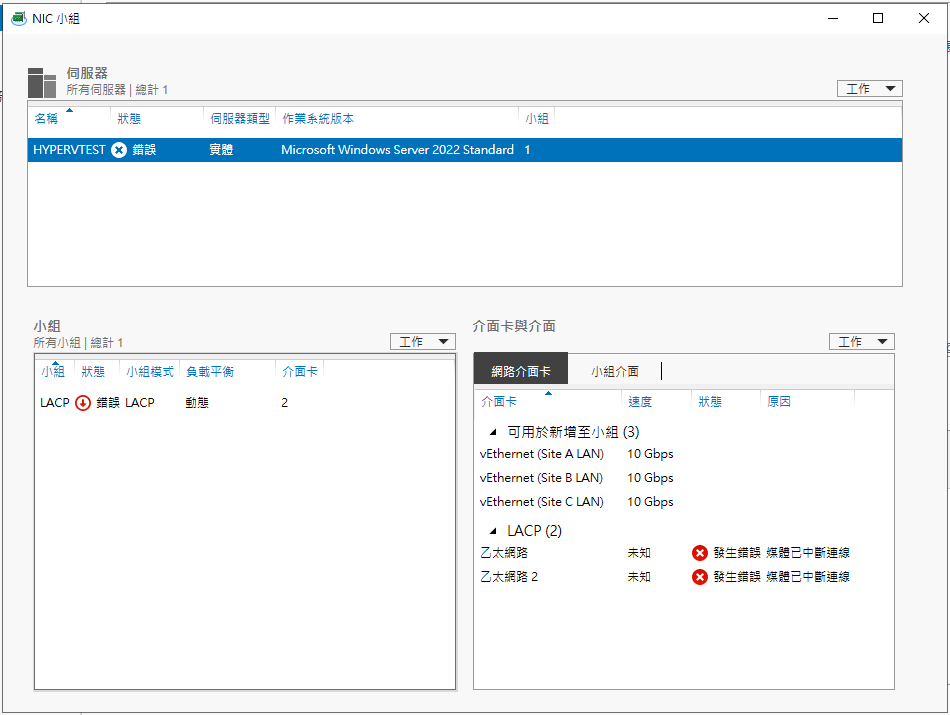 此時,將 Switch 的 LACP Port 接到 Server的NIC1、NIC2,如果一切都ok,LACP應該就起來了 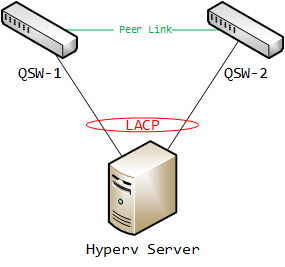 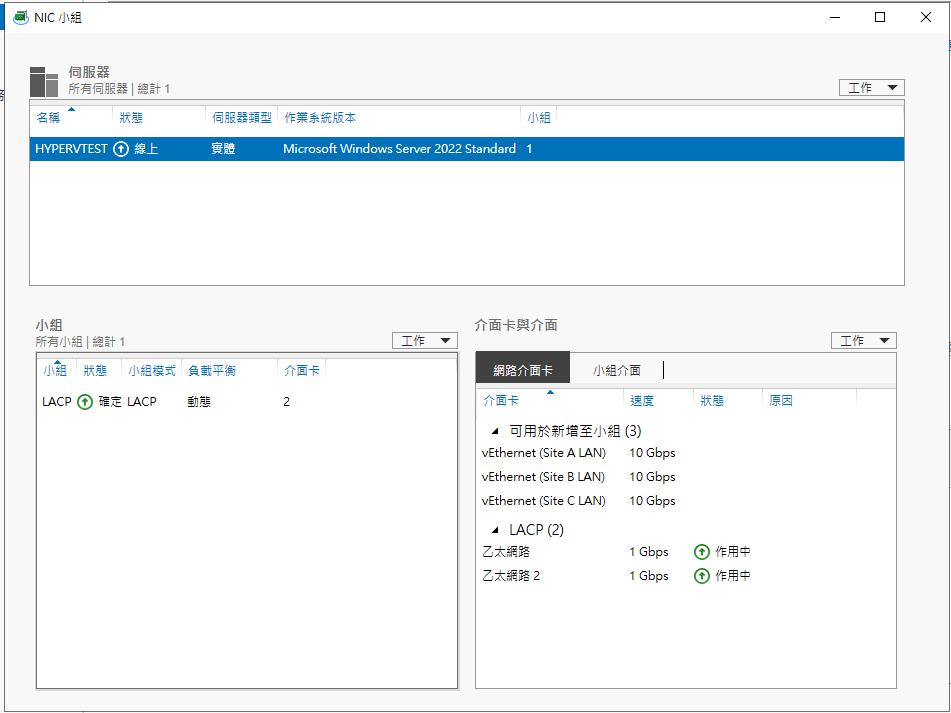 用Cisco 2960G來測試,可透過指令來確認LACP狀態 ``` show etherchannel summary show etherchannel port-channel ``` 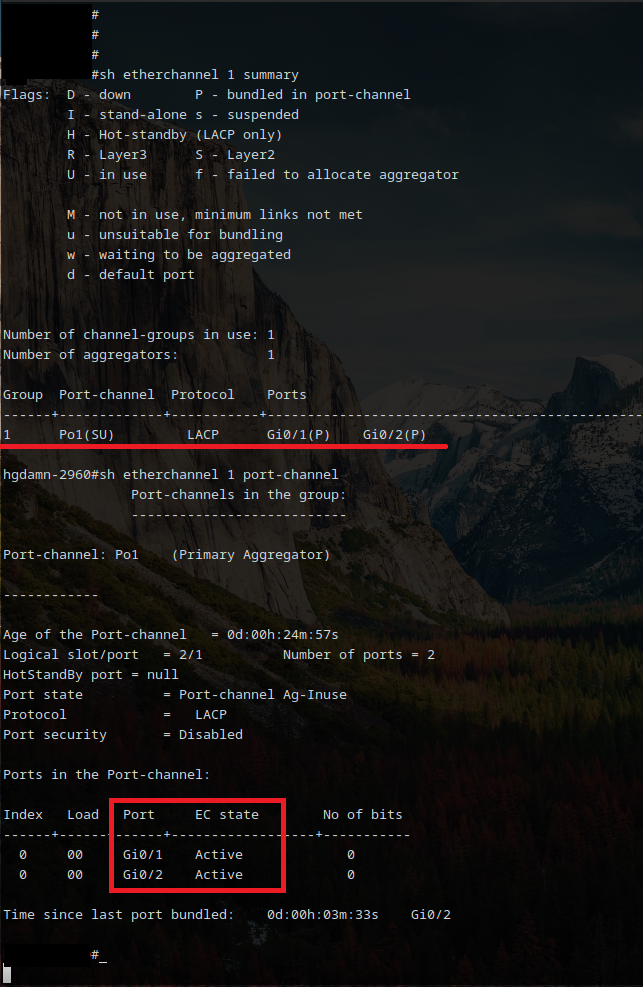 **全文完,就這麼簡單 ......**