
Fortigate IPSEC + iBGP實作
參考資料
https://docs.fortinet.com/document/fortigate/7.4.4/administration-guide/763341/basic-bgp-example
環境說明
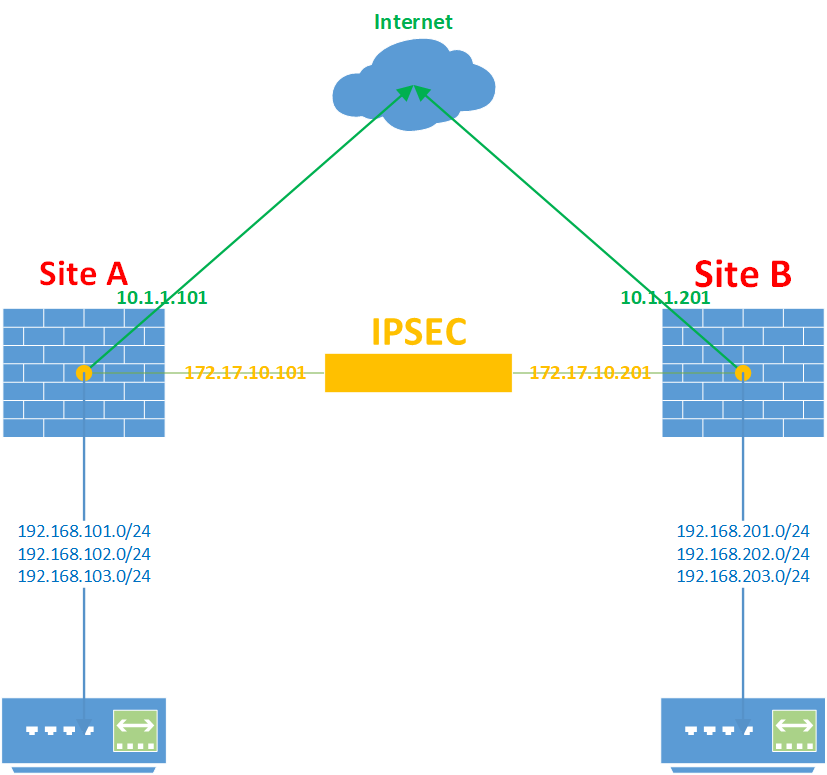
Site A : Fortigate 60D Firmware v6.0.17
WAN IP : 10.1.1.101
LAN IP : 192.168.101.0/24、192.168.102.0/24、192.168.103.0/24
IPSEC IP : 172.17.10.101
Site B : Fortigate 60D Firmware v6.0.17
WAN IP : 10.1.1.201
LAN IP : 192.168.201.0/24、192.168.202.0/24、192.168.203.0/24
IPSEC IP : 172.17.10.101
設定步驟
預先設定
首先先將Site A、Site B的WAN、LAN Interface IP設定好,為了後面Policy設定方便我將LAN綁成一個Zone


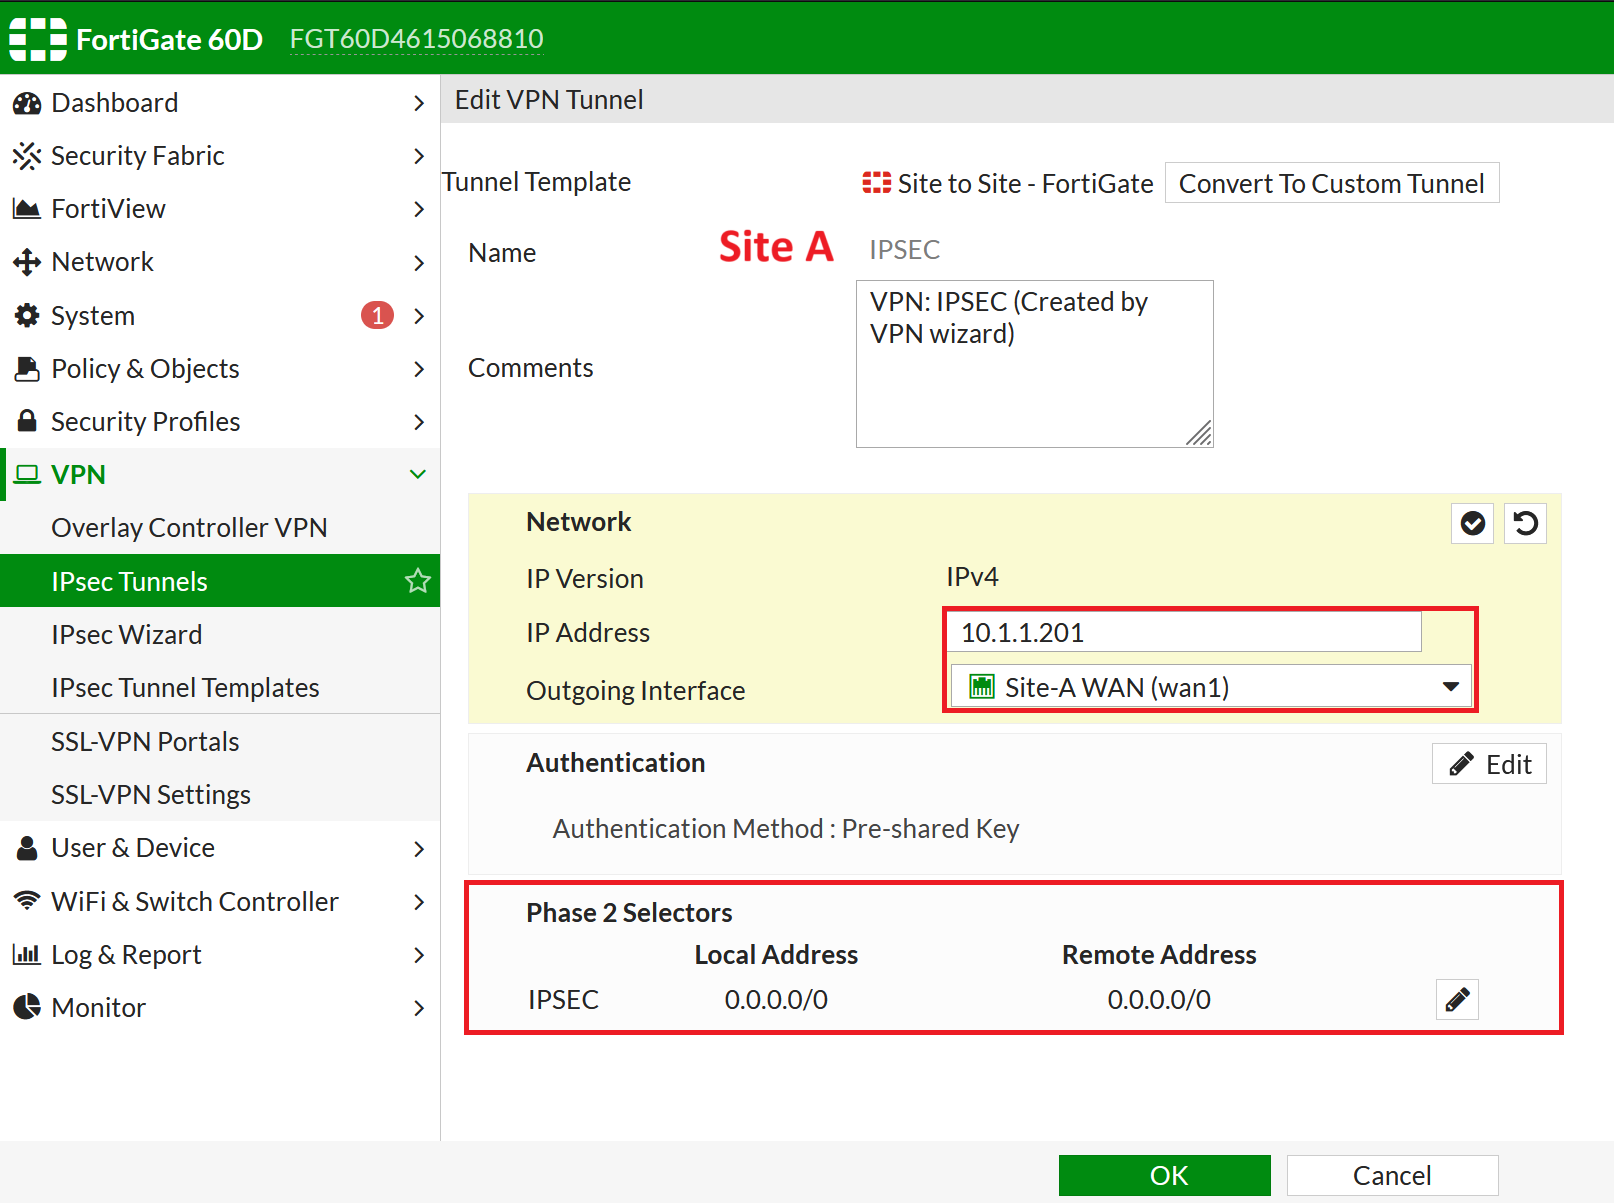
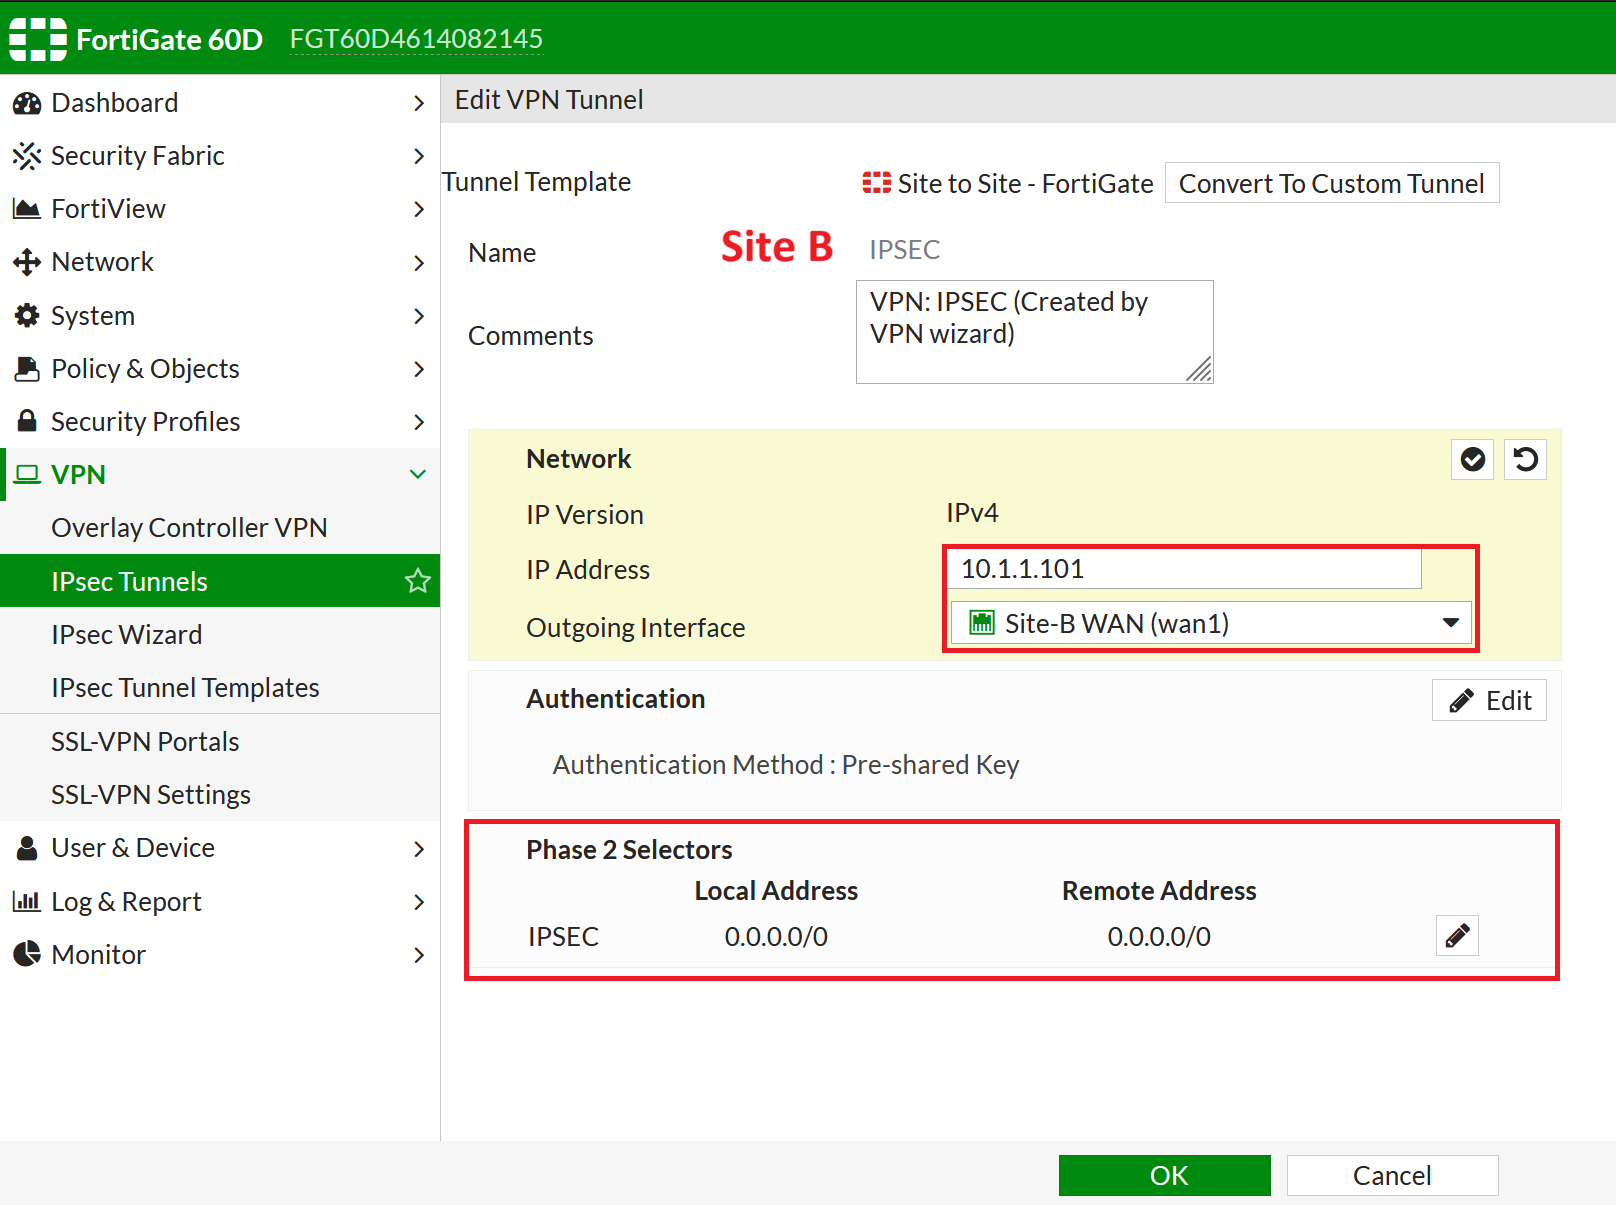
建立IPSEC VPN
IP指向對方的WAN IP、Local & Remote Address 設定為 0.0.0.0/0
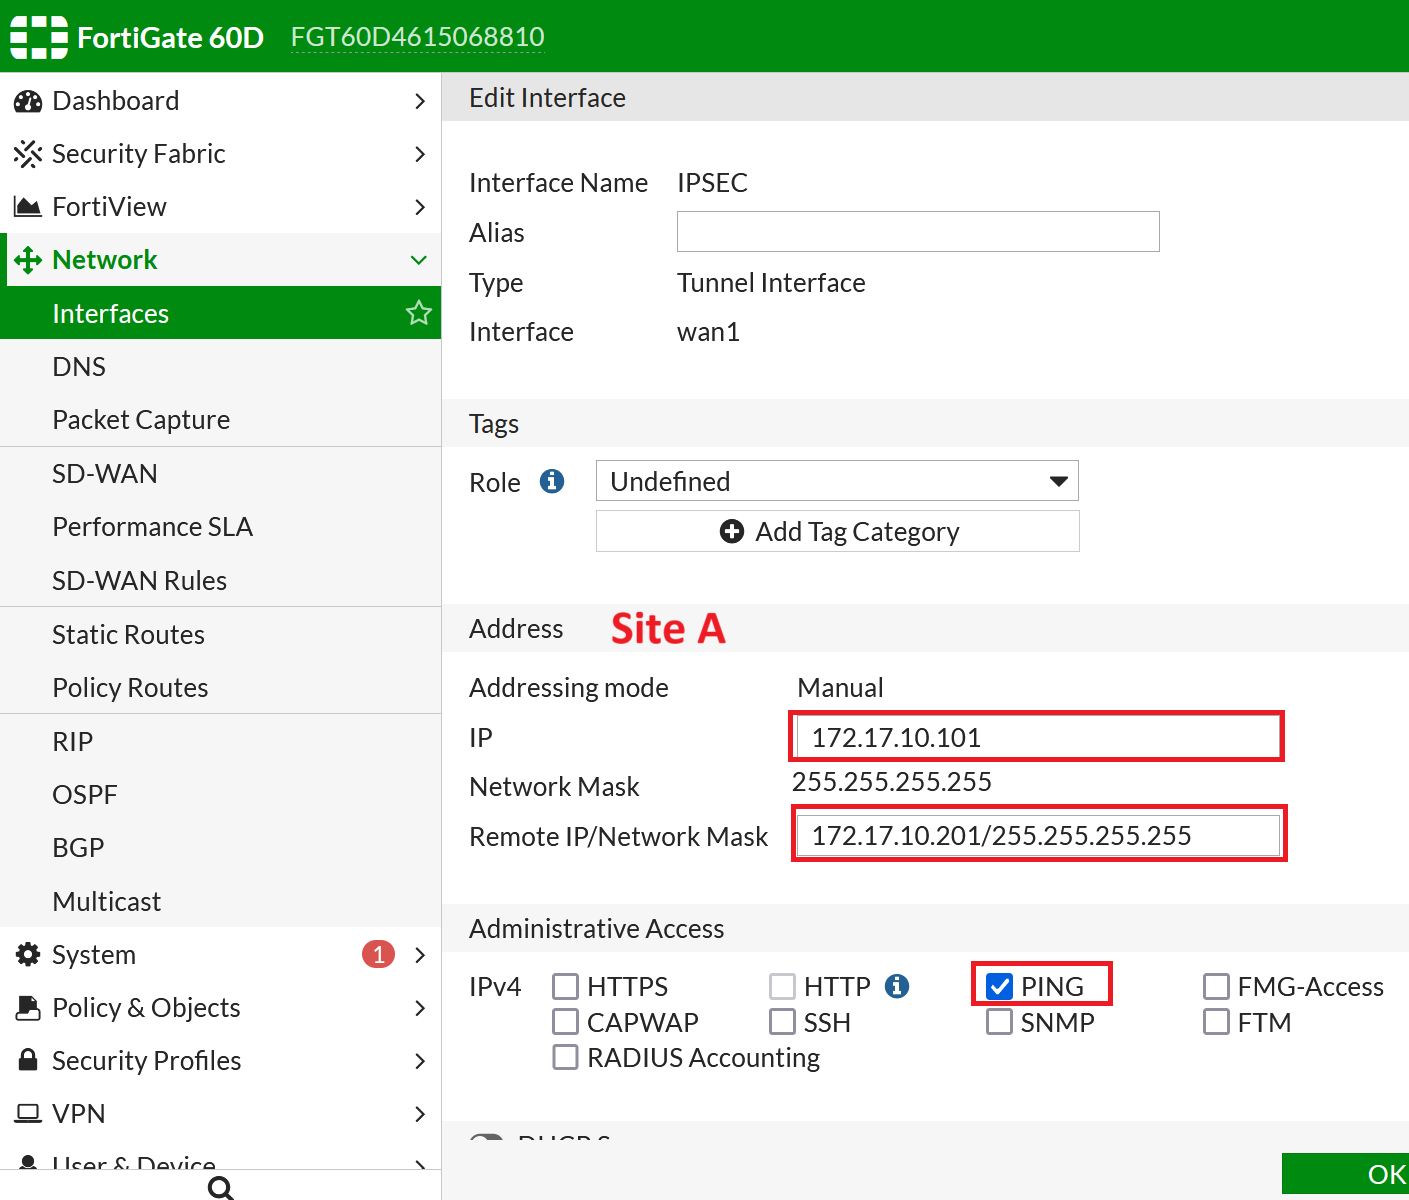
設定IPSEC介面IP
對應Site A、Site B的設定,設定其Interface IP Address、Remote IP,並允許Ping (方便偵錯)

順便檢查一下上一動建立IPSEC的Static Route與 Policy


檢查都ok的話,IPSEC應該就已經起來了
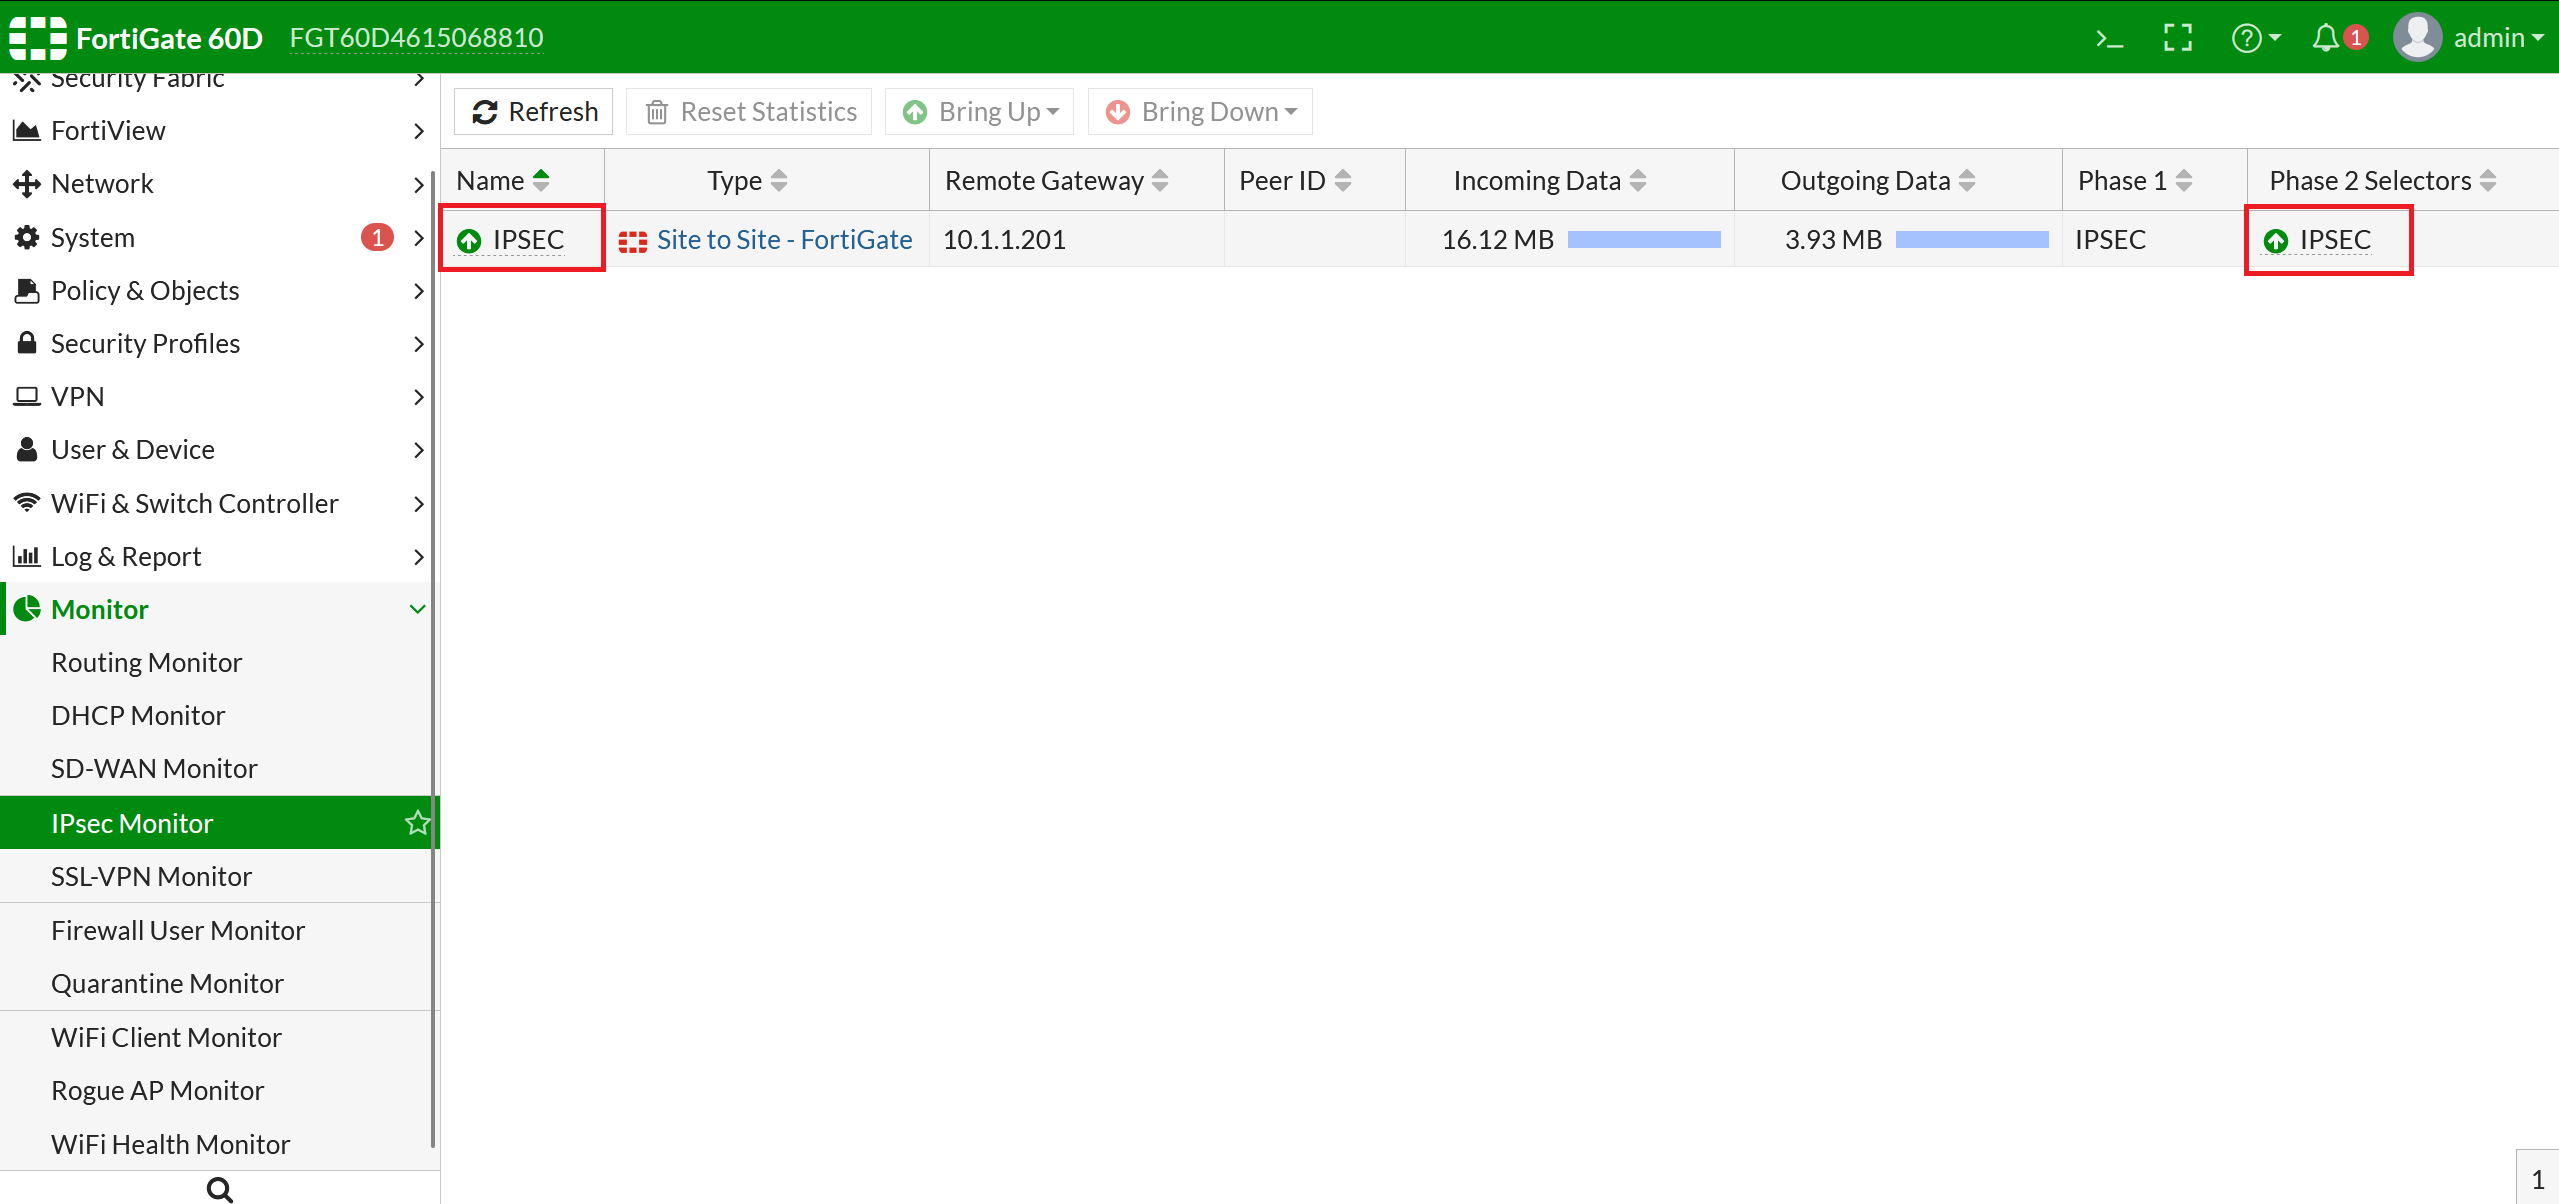
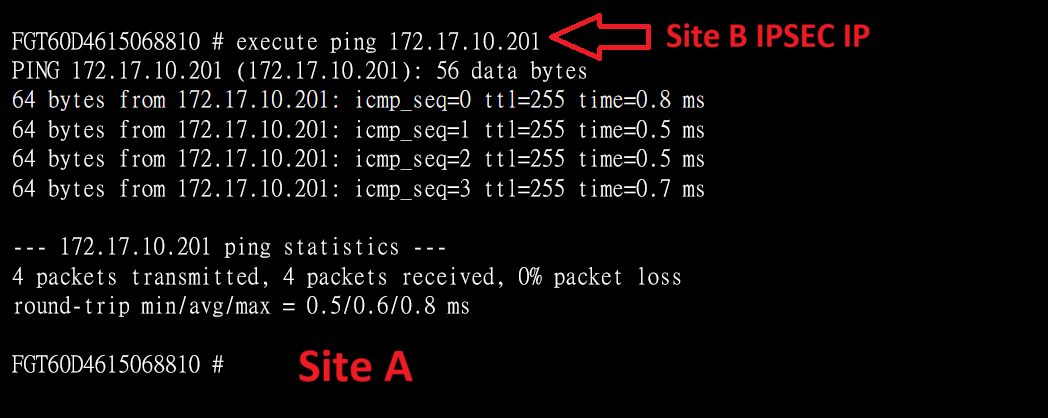
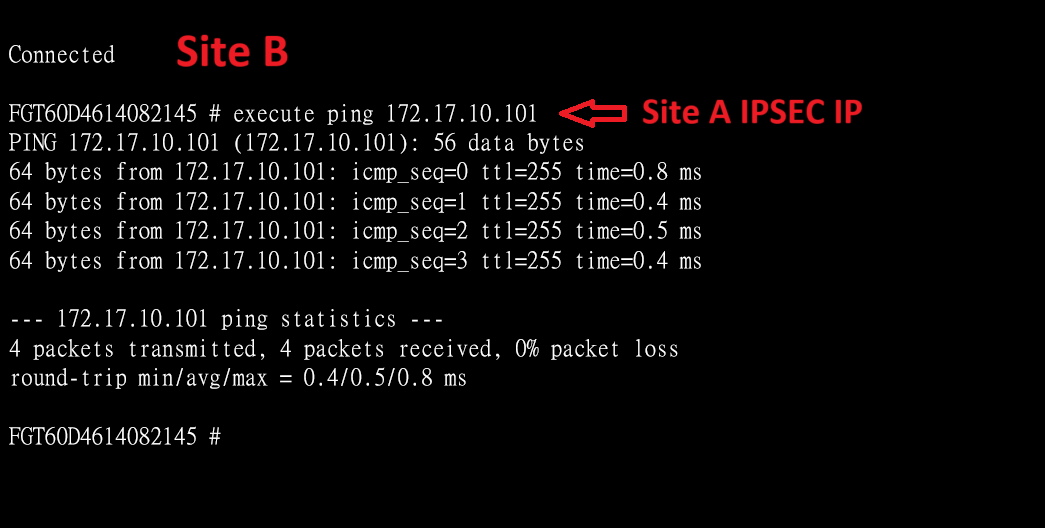
此時互相Ping對方的IPSEC Interface IP應該就會通了
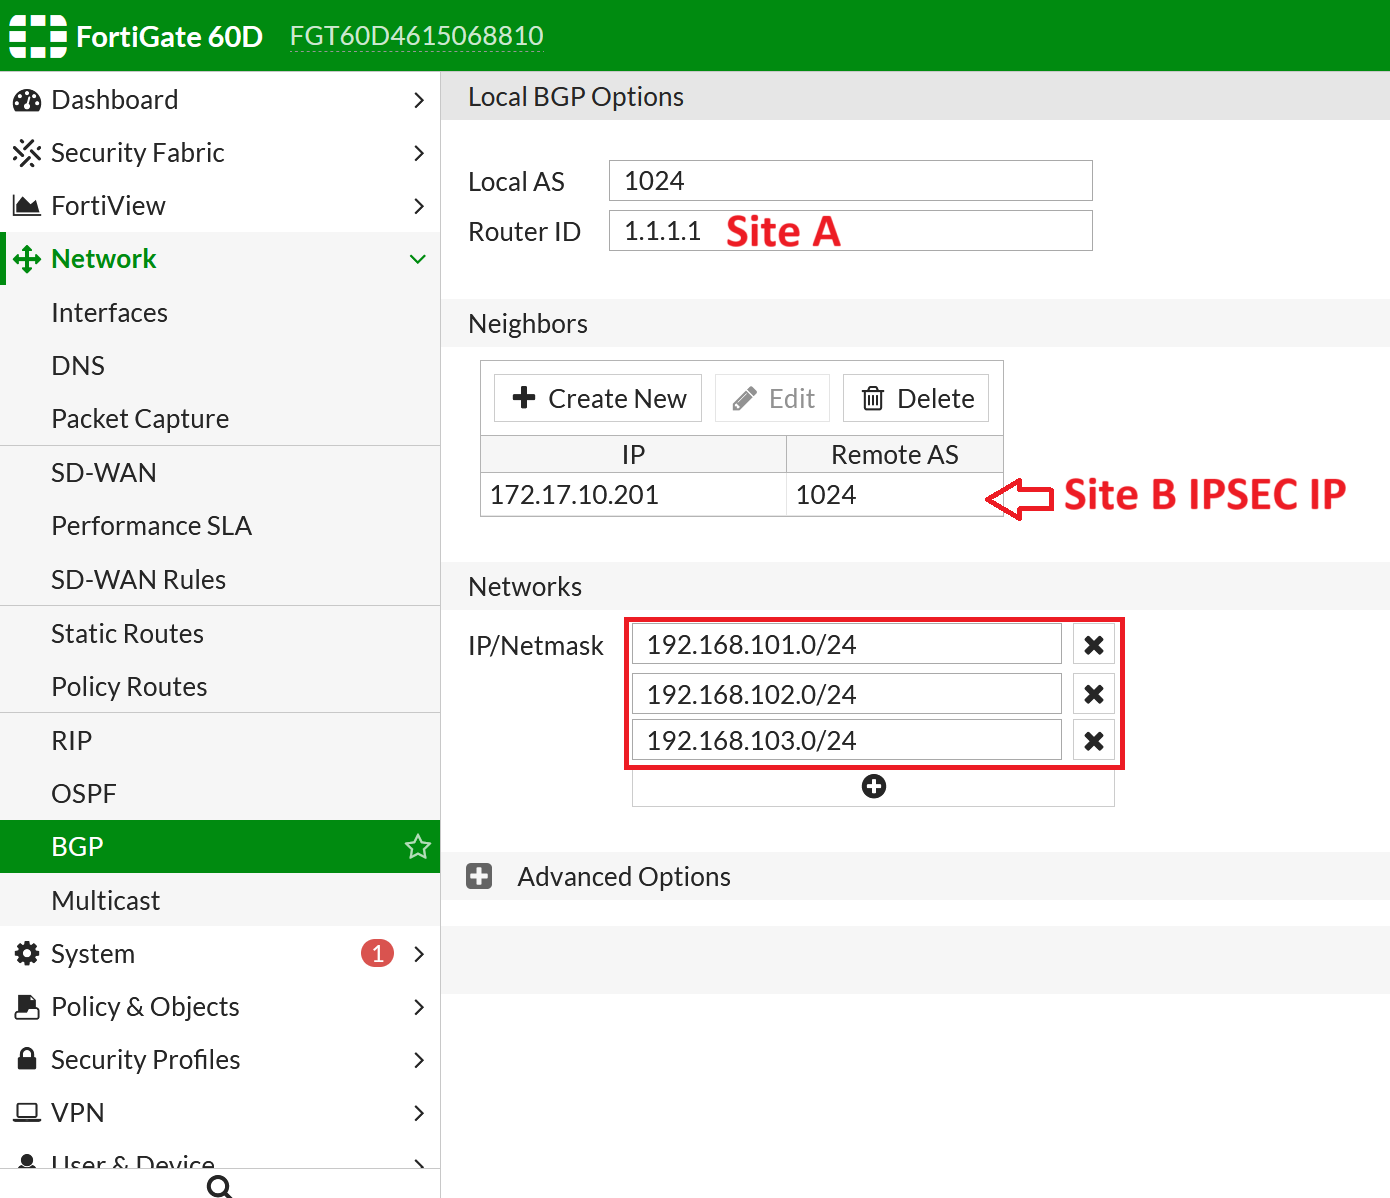
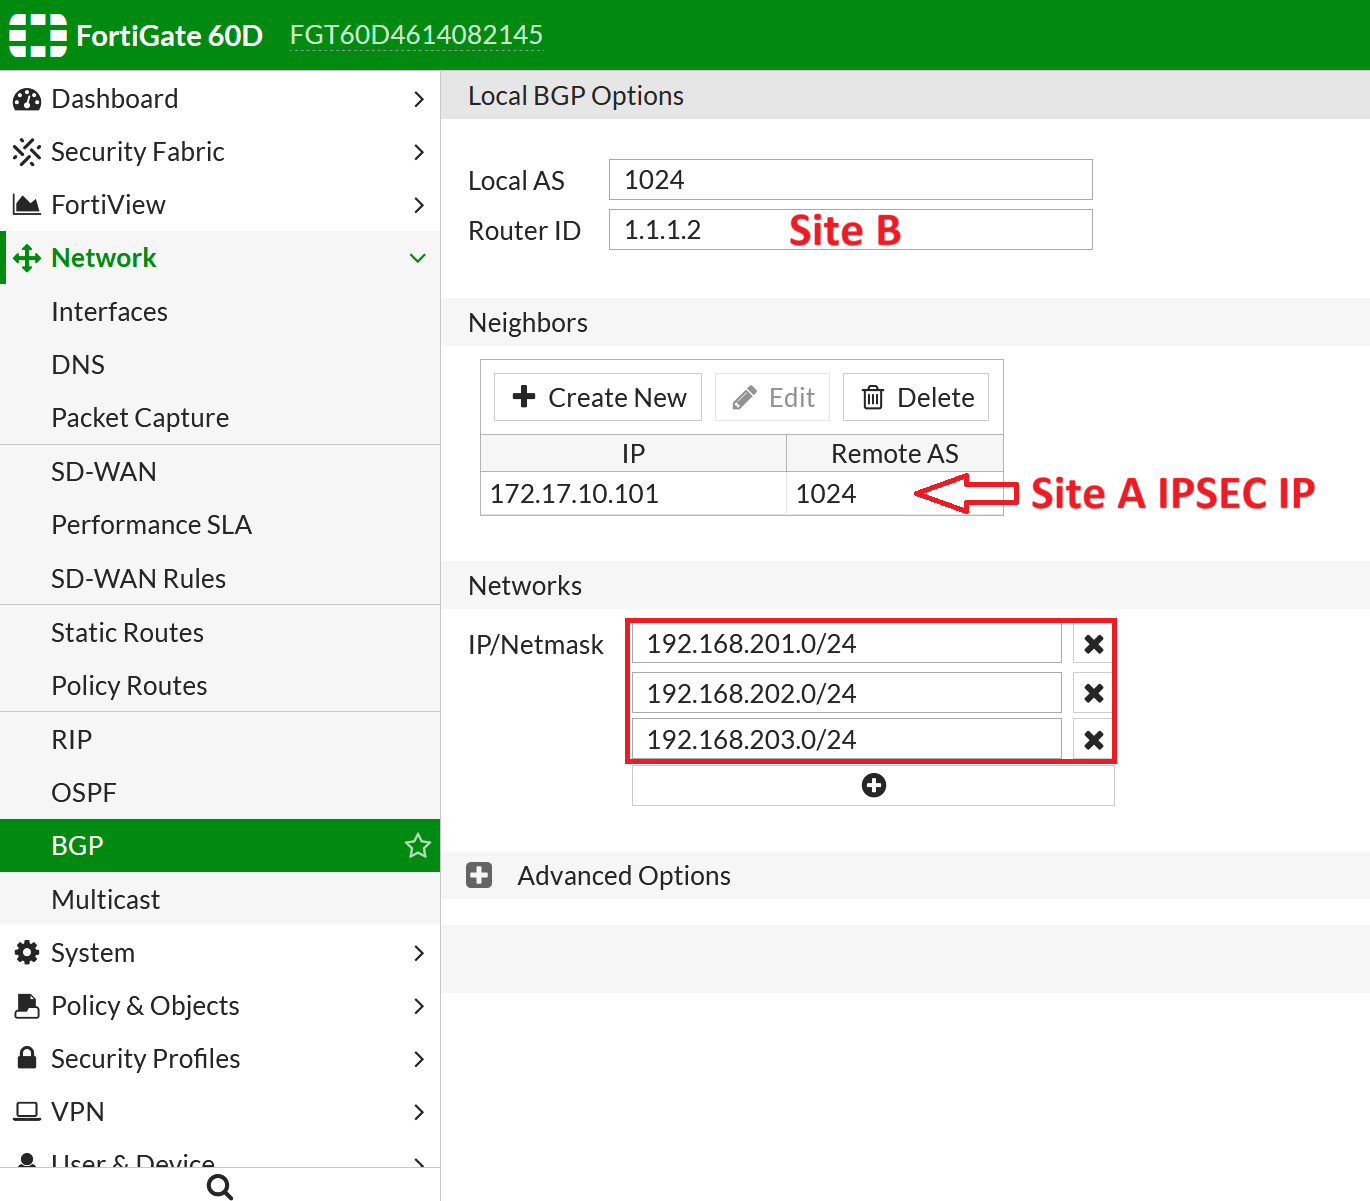
設定iBGP
Site A、Site B 設定相同的AS,Router ID設定不同的ID,Neighbors設定對方的IPSEC IP,最後鍵入自己的LAN Subnets
至CLI設定BGP介面來源
<< Site A >>
config router bgp
config neighbor
edit 172.17.10.201
set update-source IPSEC
end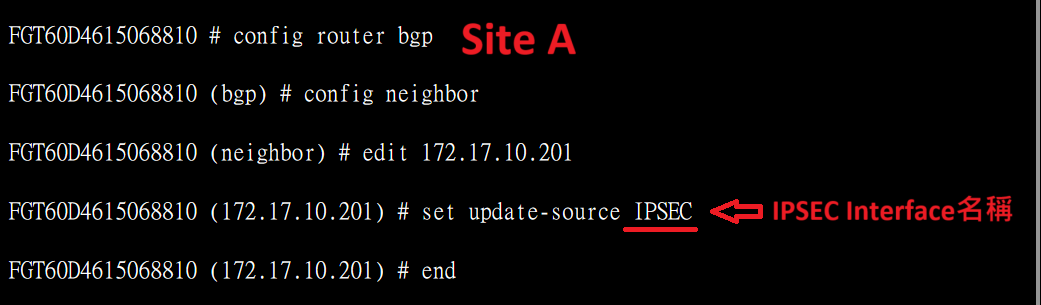
<< Site B >>
config router bgp
config neighbor
edit 172.17.10.101
set update-source IPSEC
end
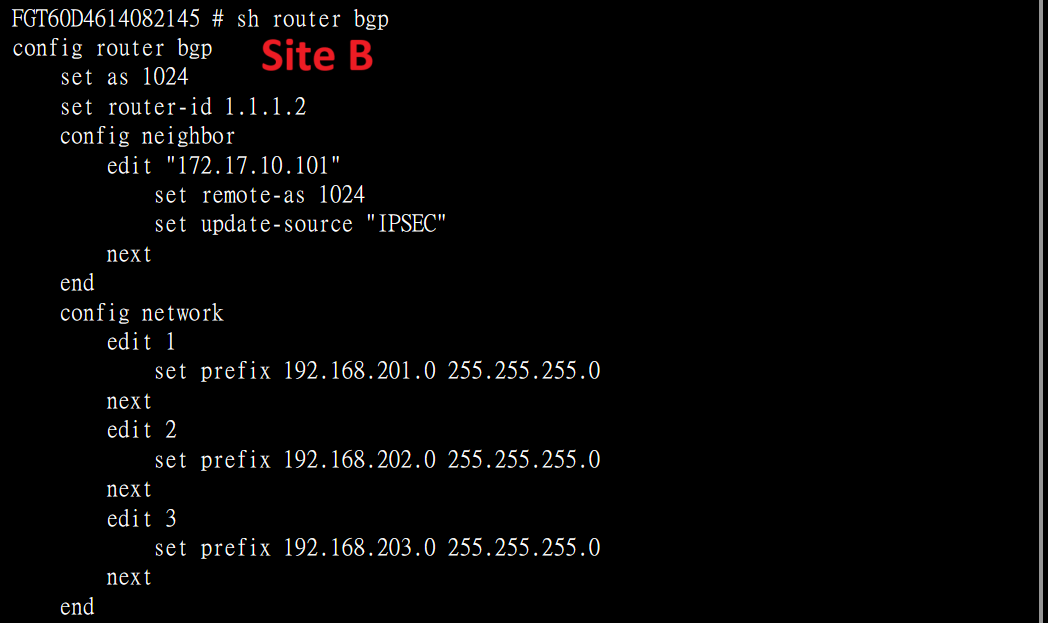
確認一下BGP設定
show router bgp
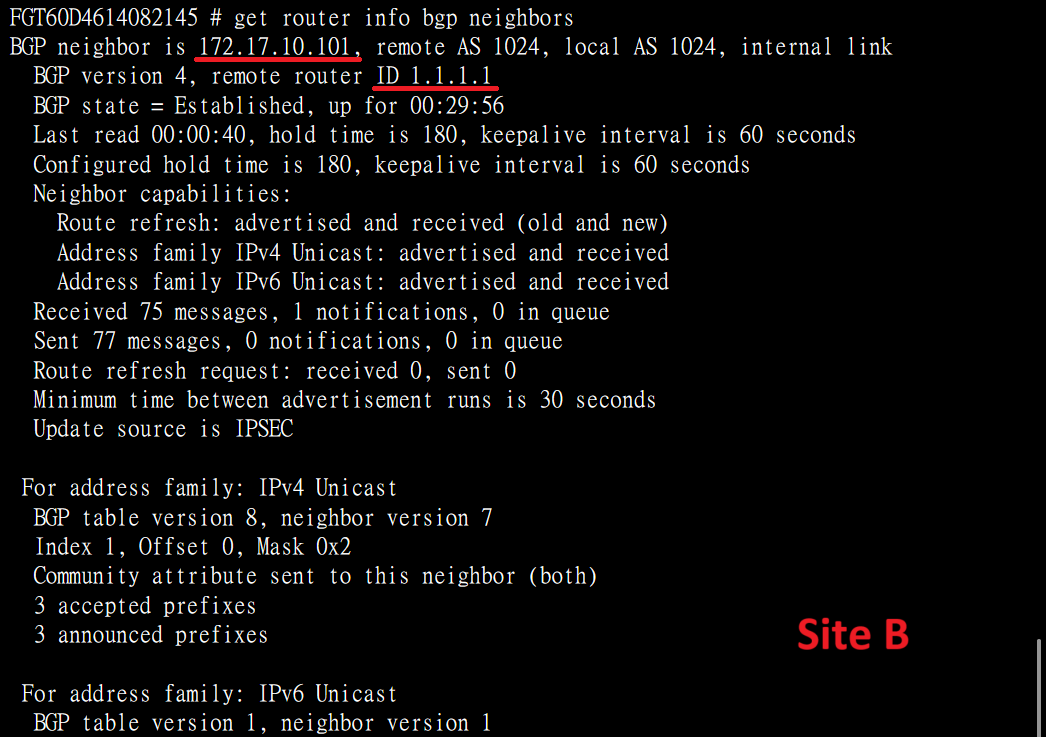
確認Neighbors
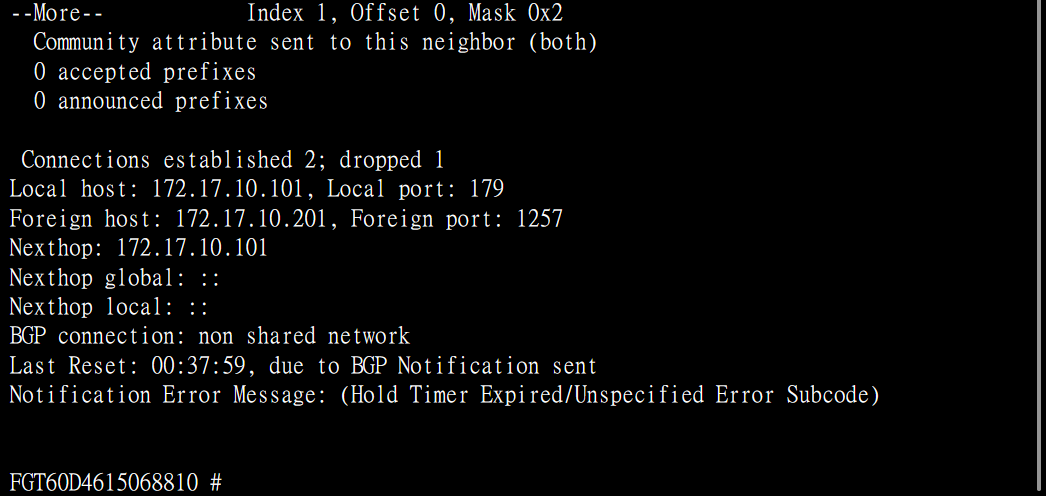
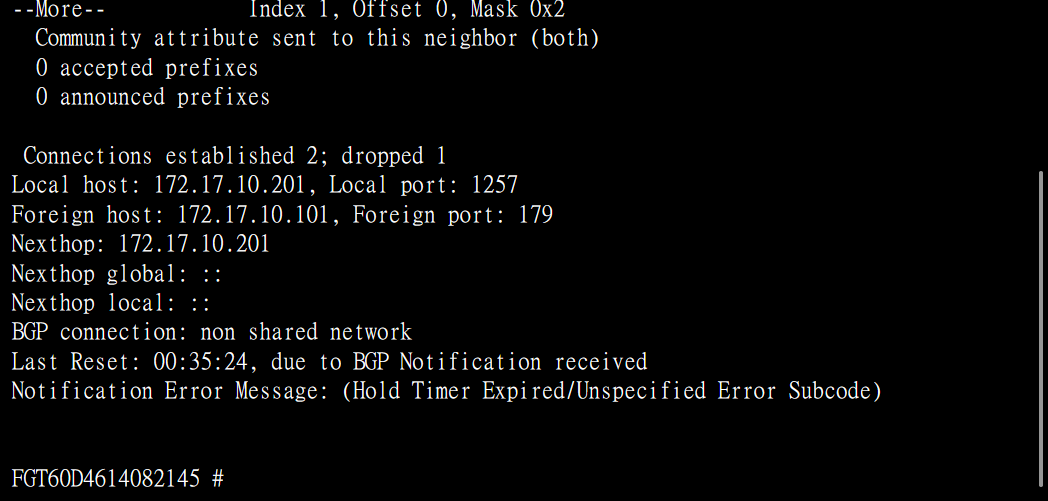
get router info bgp neighbors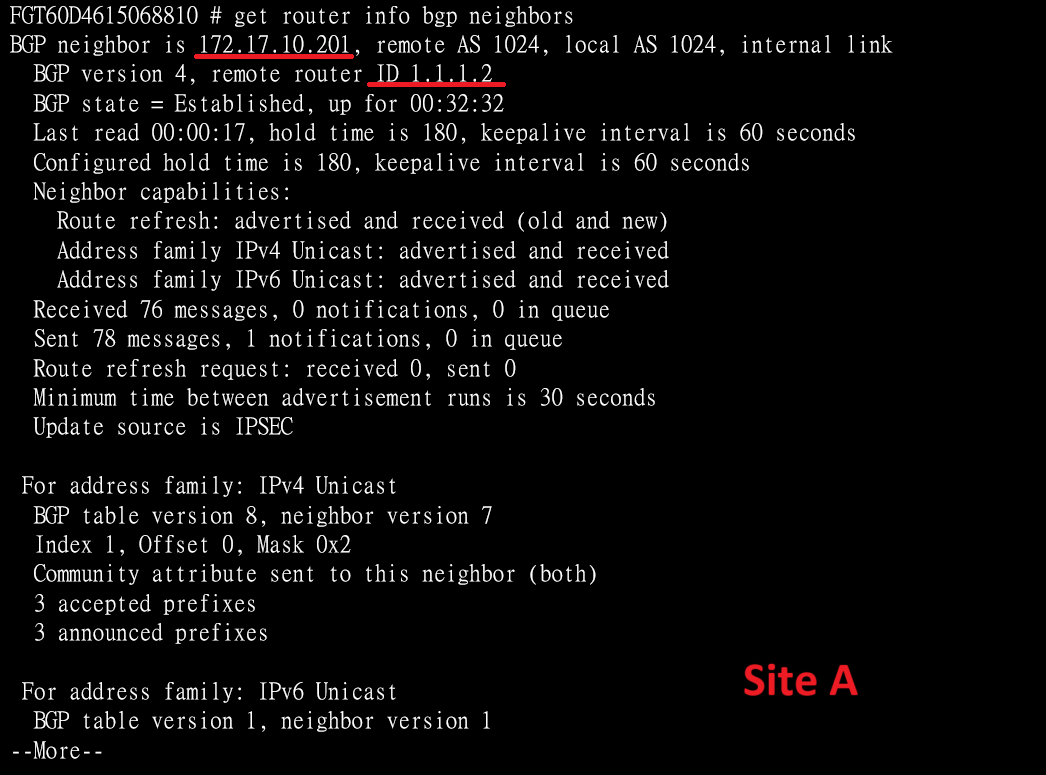
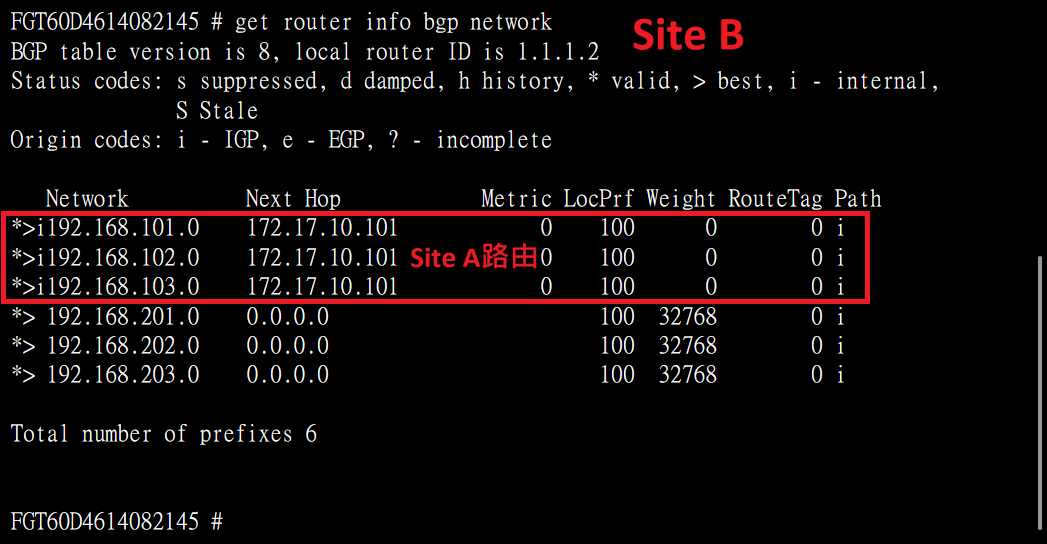
確認BGP路由
get router info bgp network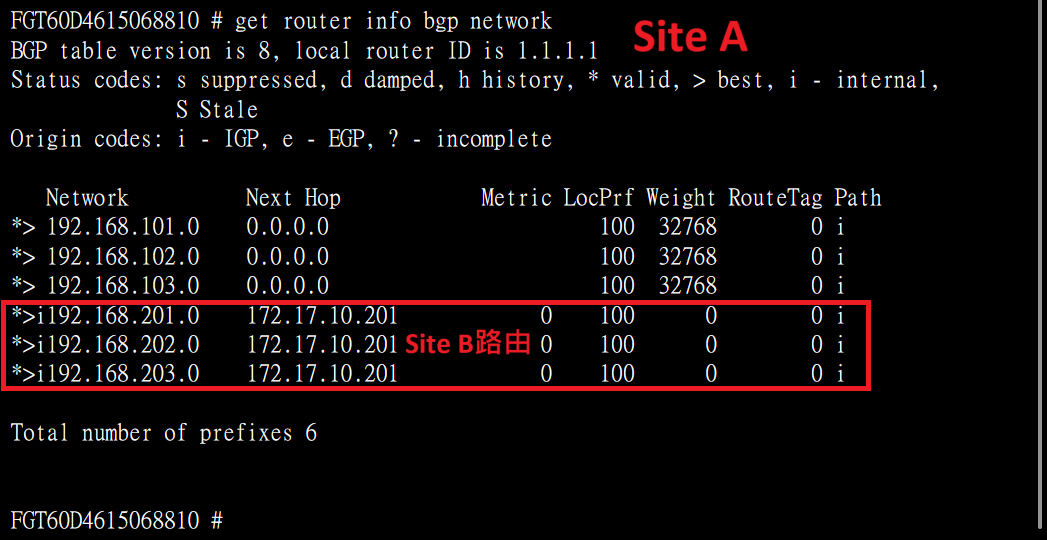
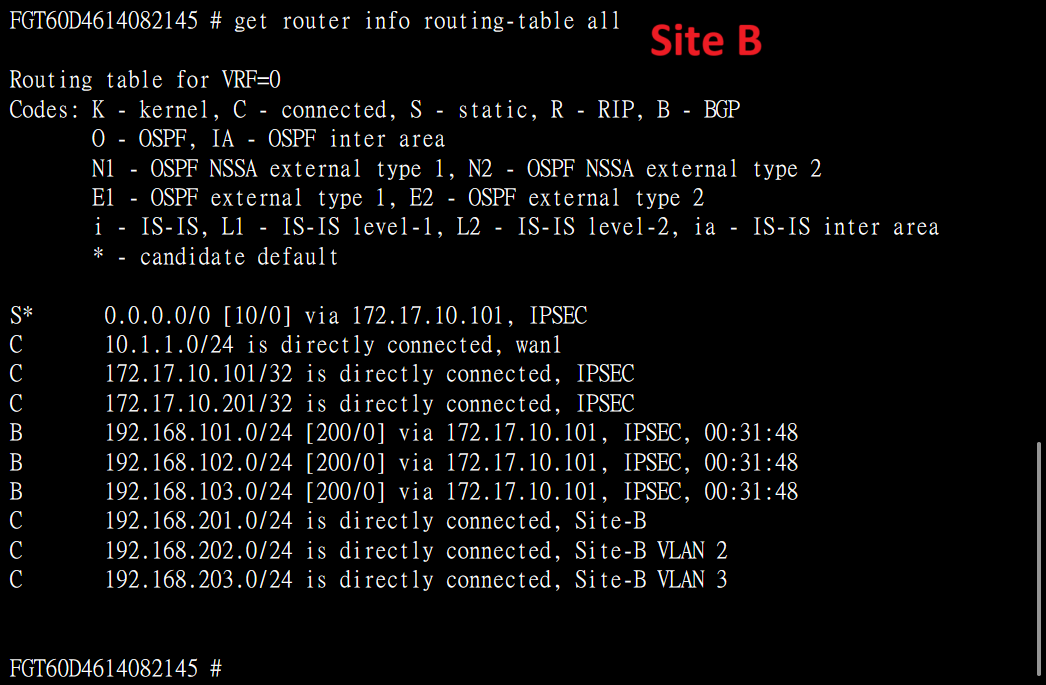
確認整體路由
get router info routing-table all
連線測試
從Site A Firewall測試ping Site B VLAN 3 Interface IP

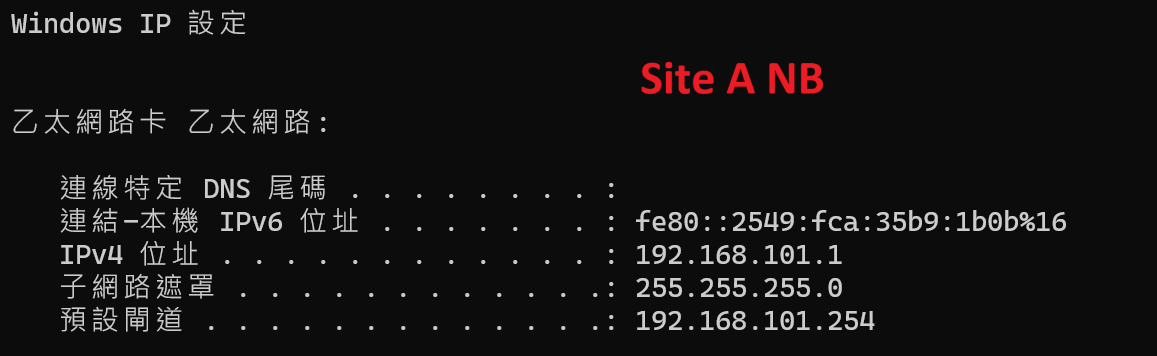
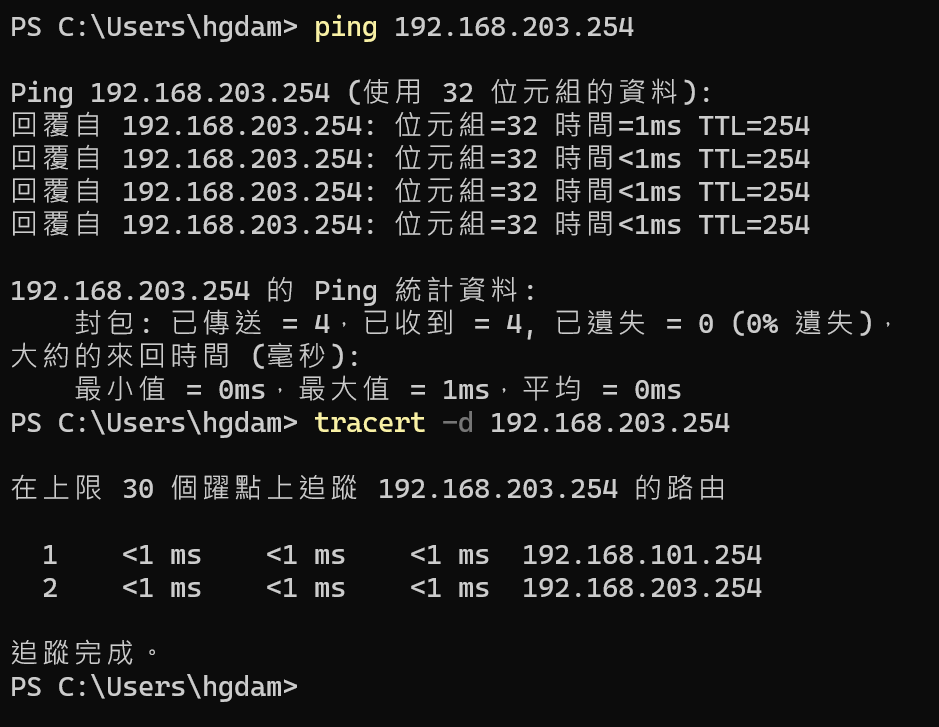
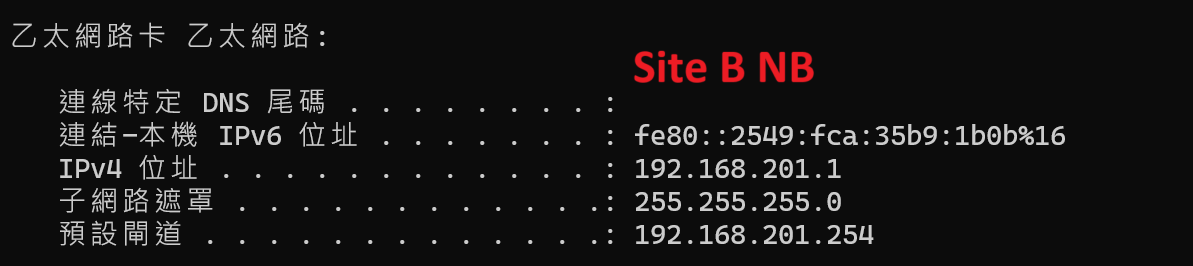
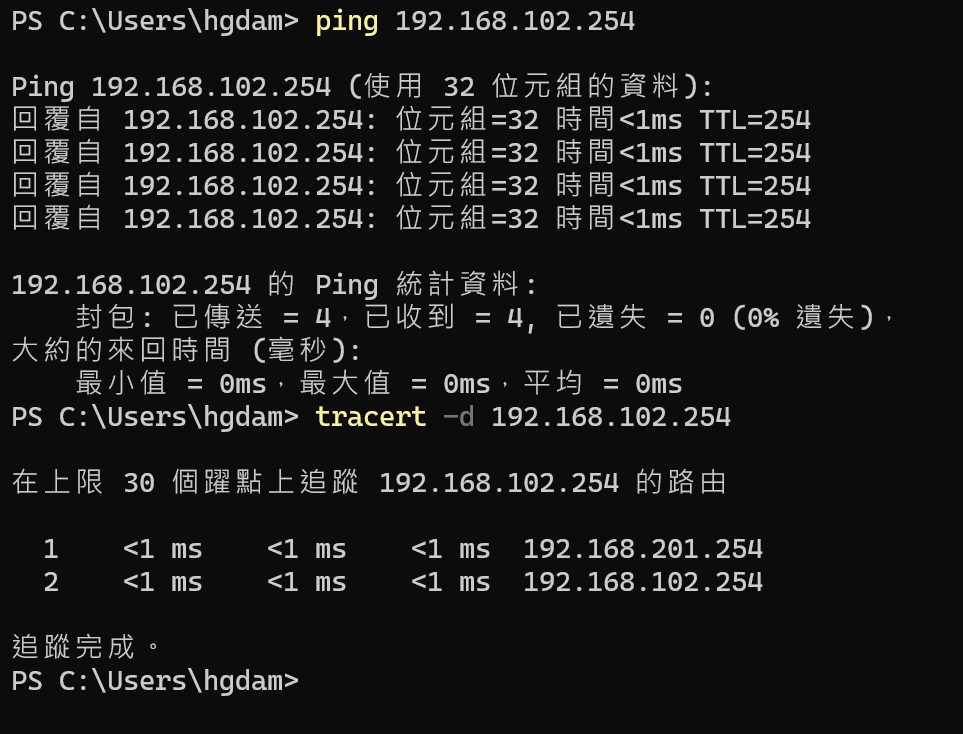
將NB接到Site A LAN,Ping Site B VLAN 3 Interface IP
將NB接到Site B LAN,Ping Site B VLAN 2 Interface IP
結語
以上實作透過Fortigate IPSEC VPN來進行iBGP動態路由,不過通常一般企業內部其實鮮少會使用BGP來進行路由交換,僅在此紀錄一下設定與測試的過程,並提供有需要的朋友參考。
No Comments